|
Recent Entries to this Blog
Annuals to Grow Again
Posted: 07 Aug 2007 Posted: 07 Aug 2007 Posted: 16 Jul 2007 Posted: 10 Jul 2007 Posted: 09 Jul 2007 All Entries |
hummingbird3172's BlogMy Crazy Creative Chaotic Garden, a work in progress!
Hypertufa Garden Art--Mouth of Truth
Category: Garden Projects | Posted: Tue Jul 10, 2007 5:17 pm First I was inspired by Bethie to make hypertufa heads, with which I have really enjoyed experimenting. Then I saw the movie Pan's Labyrinth and I got inspired from the spooky statues. One made me think of the large face from the movie "Roman Holiday", the Bocca Della Verita, Mouth of Truth. Do you remember it? Gregory Peck pretends it has bitten off his fingers? http://www.world66.com/europe/italy/lazio/rome/sights/laboccadellaveritthemouthoftruth The actual face is huge! It's over 5 ft in diameter! 
I decided to make my own smaller one using one of my favorite new (to me) medium, hypertufa. The hypertufa mixture I use is a little different, I ran out of peat so I decided to try and make it without. I use 1 part vermiculite to 1 part portland cement. I add enough water to make a clay like mixture. First you need a mold and I've found that the oil drip pans you can get at the auto stores work great (also nice for a birdbath). 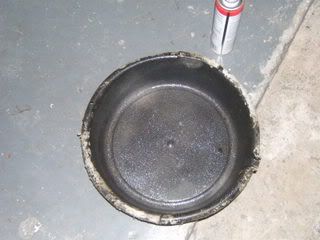
I've sprayed mine with nonstick cooking spray...like a cake pan. Next you place your hypertufa mixture...patting each layer solidly down. Until you get the thickness you want. I'd say at least 2 inches thick. Push in two eye screws into the setting hypertufa 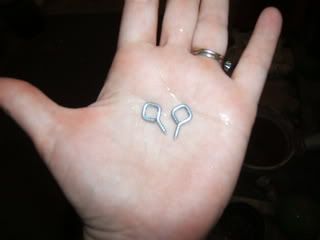
so you can create a wire hanger later. You can do whatever you want here...even make a wire hanger stuck into the hypertufa. Now you should let your hypertufa dry for at least 5 hours. It can dry more, but it might be a bit harder to carve, but will be less likely to break. You turn out your hypertufa circle and this is what you will have: 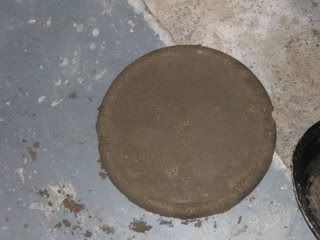
You will need to have a sketch or print out of the actual Bocca Della Verita to help guide you. Scratch out where you want his eyes, mouth and features. Use a knife and create eye holes and a squareish mouth hole. 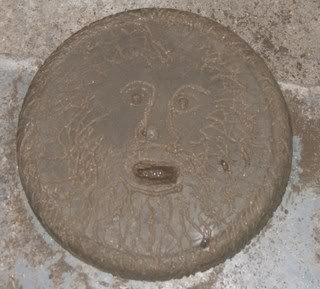
Mix up a small amount of hypertufa and start to add a forehead, cheeks, nose, and build the hair and beard up a bit. 
Allow to dry for a few hours and then go back and fine tune the features. 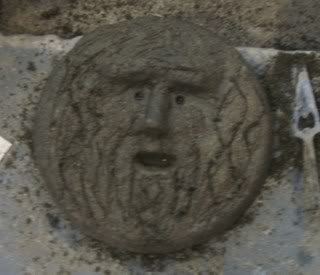
As he dries he will get lighter and lighter because the vermiculite weighs next to nothing. Run a piece of wire between the eye screws to make a hanger. Hang on a fence or wall! This one really freaks out the kids! 
You could really create any kind of face this way. It was so easy that I really wanted to share. I can't wait to hang him on my back fence! Last edited: Tue Jul 10, 2007 6:39 pm This blog entry has been viewed 11228 times
Unmolded Mushrooms, Grouted Balls, and a Metallic Green Bee
Category: Garden Projects | Posted: Wed Jun 13, 2007 5:48 pm Unfortunately my smaller mushrooms didn't do as well for the unmolding, but the larger ones look pretty good! I know what to do differently next time. 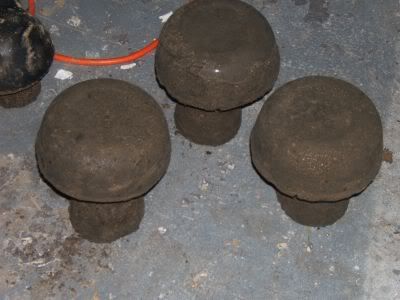
I used a Mr. Pumice to soften the edges a bit. I think they will look nice in groups with various sizes tucked in shady parts of the garden. I am very pleased with these balls...they have such sparkle. I want to make some more with earthtone polished pebbles for more of an organic look. 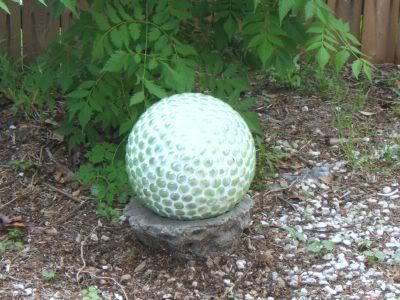
I made the stand with hypertufa...it looks very ancient. This is the ball that was made with the extra large gems...it makes me think of dragon scales. 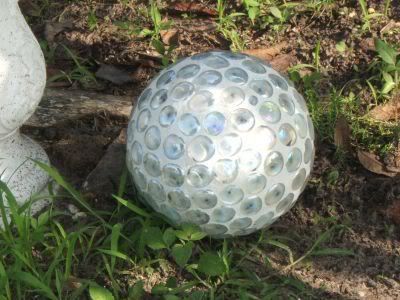
While I was out taking pictures a tufted titmouse flew right by me and landed on my bird feeder....I feel lucky to have gottn this picture! 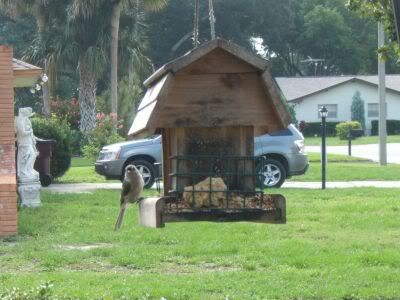
My cat, Shadow looks on longingly. He really wants to catch the birds and the lizards. 
I think this lizard is very glad that Shadow is an inside cat. 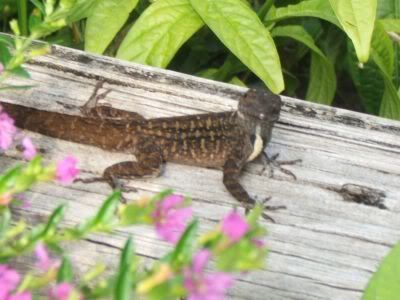
My Sundown echinacea is looking good! It is being enjoyed by this gorgeous metallic green bee: 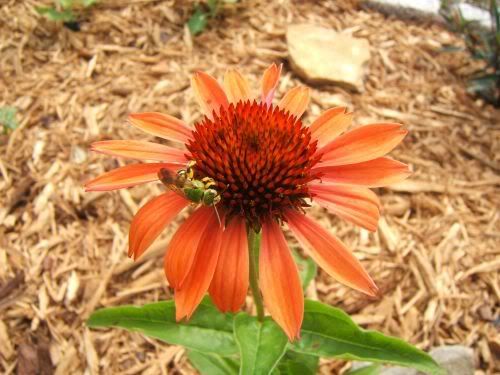
The ladybug larva are growing and scattered all over the superbells plant. Hopefully soon I can get some pictures to show how they've changed. This blog entry has been viewed 1662 times
Mushroom Making
Category: Garden Projects | Posted: Tue Jun 12, 2007 7:46 pm Mushrooms were one of the first projects I wanted to try with hypertufa. I love mushrooms! I especially love the nice stony looking hypertufa mushrooms, covered with a light coating of moss. I love those tinkling toadstools, but haven't bought any...they are just too expensive and I can't buy just one.....one isn't so expensive but I'd want at least three. I did find a set here: http://www.earthlygoods.com/garden_whimsy/witchety_toadstools.html# I love the earthy colors and they look like they'd sound great! I've even put mushrooms on some of my beads: 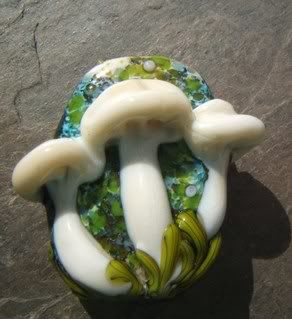
Today, I've been making my hypertufa mushrooms. I did a lot of research online because I was going for a certain look, I want kind of roly poly mushrooms. I made the stems with styrofoam or paper cups and made them a few days in advance. Then when I made the caps I pushed the stems into them. Not sure how they will come out, but I've read of others using this method. The caps were made using very rounded bowls that I got at Dollar Tree for 4/$1. The small caps are made from plastic salsa bowls. 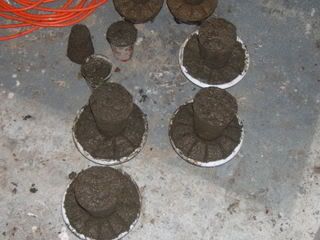
I also tried casting my first leaf...and don't you know I had to go and get myself a great big castor leaf? I know if is likely to be a big crumbly mess, but maybe it will come out....maybe. I used the buff color concrete colorant and plan to do a wash of diluted green acrylic over it (IF it comes out), and then seal it. Right now the color looks quite a bit like cat poo...a big one! 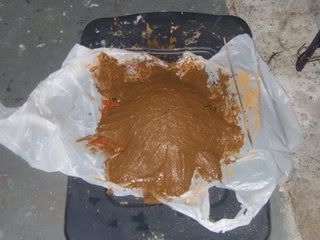
I love leaves and if I can do this well, they I plan to make some inside decorations as well as out. I've planted an Empress tree and someday it will have pretty large leaves, maybe 2 feet across. I imagine those would be nice...maybe constructed into a fountain....too many ideas, too little time! Last edited: Tue Jun 12, 2007 7:55 pm This blog entry has been viewed 9267 times
Hypertufa Firsts, Ladybug Babies, and Planting Endeavors
Category: Garden Projects | Posted: Mon Jun 11, 2007 7:20 pm Well, I tried hypertufa again and boy am I pleased! Last week I made a planter. I wanted it to be round and very stone-like. I know I kind of cheated, but after it was dry I soaked it in water with vinegar to help neutralized the alkalinity. 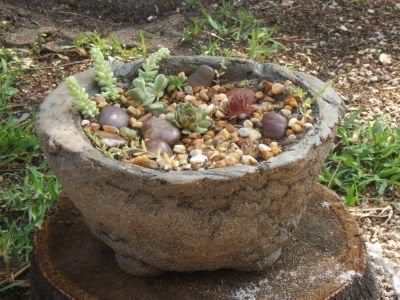
I've put some interesting succulents inside, several types of hens and chicks, burro's tail, bear paws, and some type of sedum (I think). I need to look them up. Some of these things don't usually care for our humidity so I made a special fast draining soil mix to help (I hope). My grandma, who can grow almost anything, but has hen & chick issues, loves hens and chicks, so if I can figure a way to keep them happy then I want to make her one of these for Christmas. I also plan to work on my mushrooms today and finally grout my balls. I have been thinking about casting leaves too...the other day I saw some castor plants growing in an empty lot so I think I want to start with one of those leaves. My cardinal vine is starting to take off in my "Hanging Hummingbird Garden". 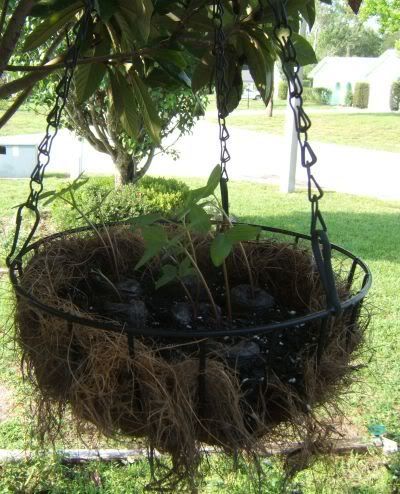
I keep rotating the pot to keep the vines growing straight. I can't wait to see some color....and hummingbirds...I hope! The ladybug eggs are hatching! 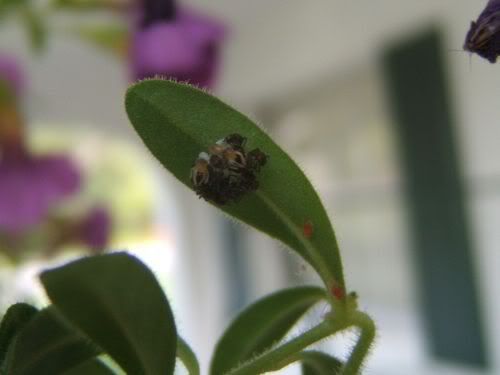
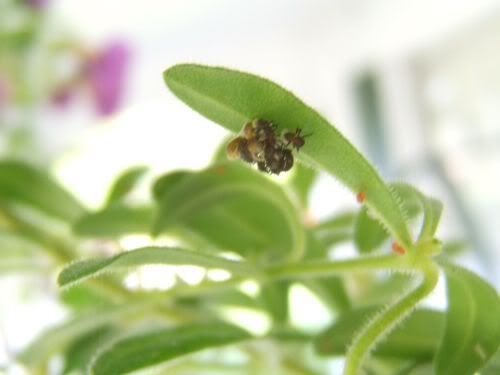
This picture shows the little larva as they hatch. They aren't so cute right now, but some day they will be beautiful red ladybugs. My garden bed is done, well sort of, it needs to fill in. I got so sick of weeding that I laid weed block fabric and mulch...it is an improvement. I am not fond of mulch...I don't like the way it looks, but these weeds are too vigorous to keep up with! 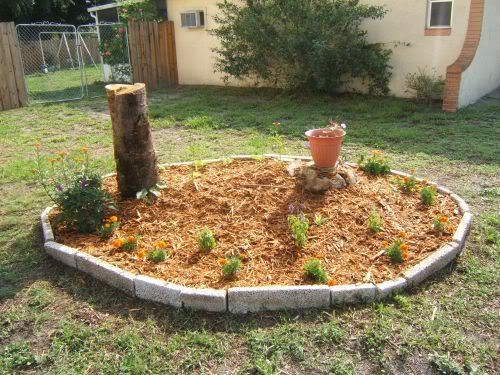
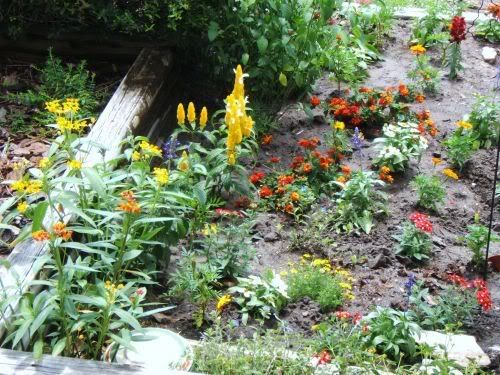
So this is what's growing: Planted by the tall stump, Grandpa Ott MG's, to the left Porter Weed, Butterfly Weed, and Mystic spires salvia. Across the front-orange marigolds and Decor Zinnias (apricot and chartruse). Behind the marigolds and still tiny, Bravado Echinacea, and Anise Hyssop, then sundown echinacea and behind that, a bicolor butterfly bush, and at the very back peach passion sunflowers. All the way to the right: mexican petunia (purple showers), crossandra (orange marmalade), and more salvia. I know it sounds kind of a mess, but should look better when the plants get bigger. The perennials are still pretty small so the annuals will fill in until they reach their proper size. 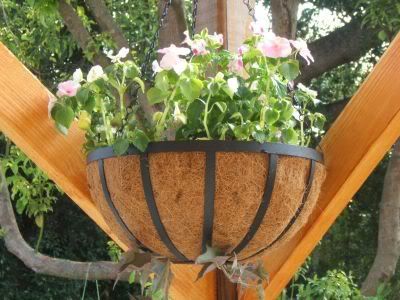
I've got two hanging baskets done: they contain baby pink and white impatiens and torenia with some tricolor sweet potato vine to fill in. I am not sure I like the way dh hung them, but at least I can reach them and admire the plants at eye level. I am wishing that I'd added kind of a punch of surprise color because the pink and white is a little bland...I may go back and add some bright purple or blue. Have a great day! Last edited: Mon Jun 11, 2007 8:27 pm This blog entry has been viewed 5364 times
Latest Projects
Category: Garden Projects | Posted: Mon Jun 04, 2007 7:17 pm Well, last week we built a pergola for our back garden...so it is kind of like a shady cover for part of our pool deck. This was the first carpentry project we've ever tried so I am extremely pleased with the result. 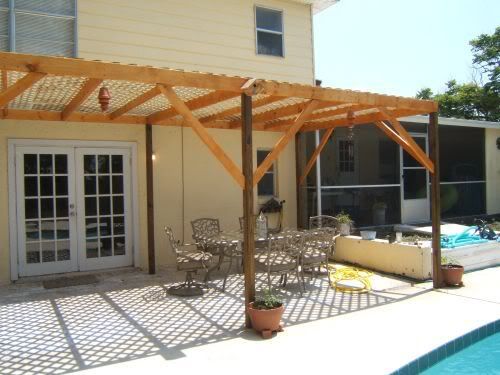
I've planted pink trumpet vine in those big terra cotta planters and can't wait until the pergola is enveloped in the feathery leaves and pretty flowers. I have a windchime addiction....but I will only buy them on sale or for a really low price. I got a set at Target for $2.49 (they originally sold for $10), actually I bought 2 sets, one for the front and one for the back. I found a pretty little bell chime at Michael's for $2.99. I wanted to complement the terracotta planters in back so I decided to make my own chimes out of flower pots.... 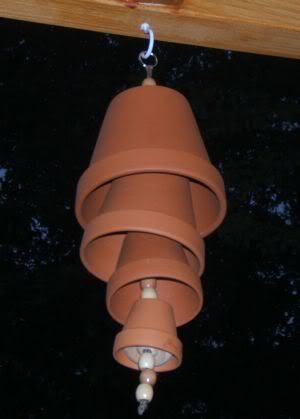
I used wooden car wheels and wooden beads to separate the pots slightly so the softly rattle together. I think I will make more, but decorate them....they might make nice Christmas gifts...the sound is quite soothing. I am still working on my bowling ball...I DID find that the silcone works the best for me. I work on a small section at a time then use the weight of the ball to hold them down until dry. I am having to track down more of the gems. I am using the extra large iridescent clear....I think they will have a beautiful dragon scale appearance when done. I got some light green for doing my dh's ball...hopefully I bought enough...Michaels had them for $1 a bag. While at Michaels I found these lovely pot hangers for my fence...going with the terra cotta 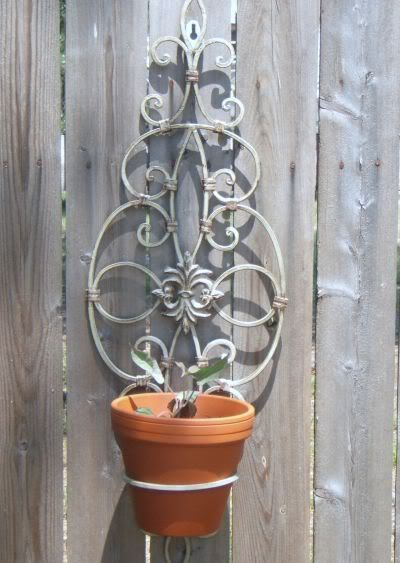
I've planted them with ornamental sweet potato....that is the easist stuff I've ever tried to root. Every two days I have new plants. That may or may not bode well for the future. My last little project I've been working on is to make a hanging hummingbird garden....sounds more fancy than what it is...I saw one for sale somewhere for about $20, but I already had a hanging basket--empty and waiting to be planted. I've put 5 little peat pots with cardinal climber seedlings....this is what it is supposed to look like (in a little over a month): http://www.highcountrygardens.com/catalog/product/C0019/ I hope mine looks as nice as this one! I hope the hummingbirds visit. Every week I clean my feeders and refill them...still no hummers! This blog entry has been viewed 665 times
New Beginnings, Caterpillars and Such
Category: Garden Projects | Posted: Wed May 23, 2007 5:31 pm 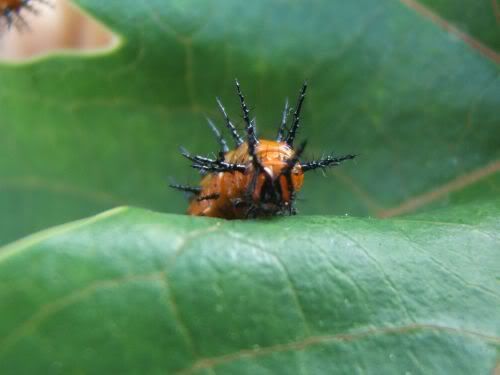
This is the little fella that I am raising inside so we can watch his growth. He loves to eat Passionflower vine leaves! For some reason I never see the caterpillars outside make it to a large size so I wanted to give this guy personal protection. I do this with the monarchs and queen butterflies too. 
Here is the FIRST bud on my echinacea. I am anxiously awaiting the appearance of this flower! There are 2 other buds coming too....so excited! 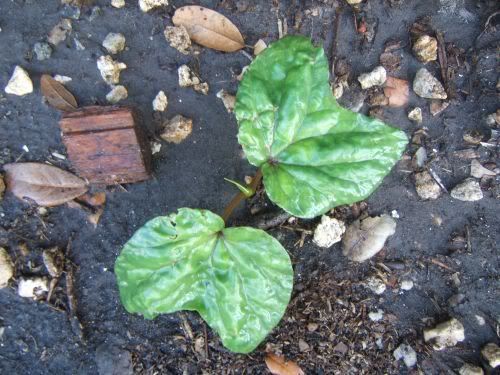
I've just planted these Giant Moonflower seedlings along my back fence. I've never grown these before but from the pictures I've seen, I can't wait to have them all over my fence. They are impressively large seedlings too! I've got plans for a few other vines to cover this fence. Cobaea (cup and saucer vine) and also Coral Vine. It is a big fence so there should be room for them to twine in harmony. I've got my newest garden bed all cleared. It is most definitely an ugly site right now: 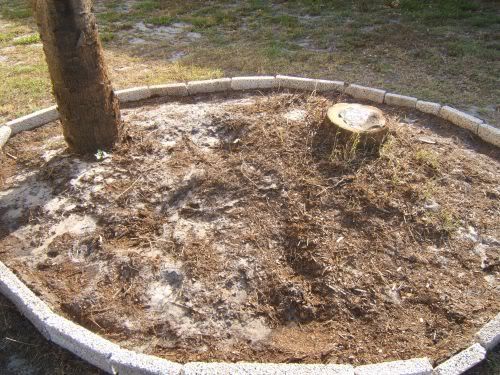
We are going to even the stumps a bit....both will hold planters...and after seeing Eileen's picture of the tree stump person I think I will need to make it a face and let the planter be a hat...maybe full of jewel box nasturtiums. This is going to be my dramatic violet and orange garden. A bicolor butterfly bush is going to go right at the back--it has shades of raspberry and orange...it was the main inspiration for the color choice. This blog entry has been viewed 880 times
Creative Chaos in the Garden
Category: Garden Projects | Posted: Wed May 23, 2007 4:39 am I've been working on my Garden for a few months now and it has been great watching the tiny seedlings grow into something bigger. I started with an area in the front flower bed and started working to create a butterfly garden. I've planted 2 shrimp plants (red and a gold), mystic spires sage, butterfly weed, zinnias, cosmos, marigolds, evolvulus, convolvulus, snapdragons, parsley, dahlias, dwarf sunflowes, morning glories, lavender, and moved 2 echinaceas from my herb bed. I am so thrilled that one of the echinaceas is getting ready to bloom! I've had it for almost 1 year. The other one was kind of crowded by the bigger one but I've separated them and now it is beginning to wake up and grow. 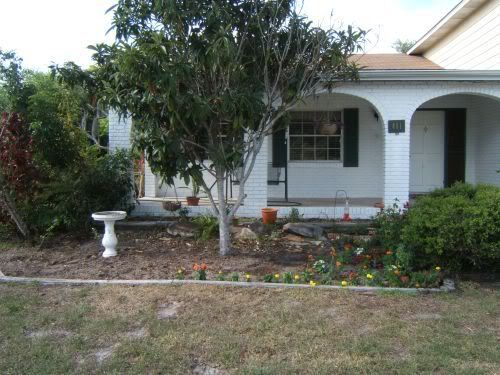
Now, the other half of the bed will be roses! I got five of the J & P Cherries n' Cream roses....already they are leafing out nicely. I put some alyssum seed around them, but I think I am also going to put in creeping thyme plants....I have some planted around some rocks and I like what it is doing. 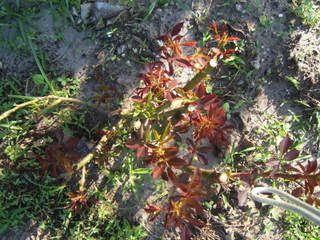
I just put a butterfly bush, Empire Blue behind, near the rear of the bed. It is also very small but I can't wait to see what it does! Last edited: Wed May 23, 2007 5:34 pm This blog entry has been viewed 806 times
You're reading one of many blogs on GardenStew.com.
Register for free and start your own blog today. |
Entries by Category
All Categories
Archives
All Entries |
