|
Recent Entries to this Blog
Windchimes-Love or Hate
Posted: 31 Mar 2011 Posted: 31 Mar 2011 Posted: 21 Feb 2010 Posted: 28 Nov 2009 Posted: 10 Feb 2009 All Entries |
bethie's Blog
Windchimes-Love or Hate
Category: bethie's world | Posted: Thu Mar 31, 2011 12:32 pm I know the jury is still out on windchimes. I have a large rural yard so I can indulge and we love to make them. None of mine can be heard from inside the house with the windows open. If you happen to have a deer jawbone laying around this is a fun one. It's made from flattened spoons (just hammer the bowl)and has a tinkley sound. 
( photo / image / picture from bethie's Garden ) This one is made from junk and is spoons and turquoise beads. We are jewelrey makers so we find it easier to use jewelery wire and crimp beads instead of fishing line. 
( photo / image / picture from bethie's Garden ) 
( photo / image / picture from bethie's Garden ) This delicate beauty (my fave) is made from a vintage dish. Takes a while to drill. 
( photo / image / picture from bethie's Garden ) We went out of our comfort zone and went bold and primary for this one. The different shapes of glass have different sounds. A lot of drilling here with a diamond bit. 
( photo / image / picture from bethie's Garden ) Hubby got this bell at a yard sale and it already had holes in it. We added butterfly beads, made a brass clapper and cut long wiggly glass pieces. Fun. 
( photo / image / picture from bethie's Garden ) This large chime is back in the little shed by the garden The north wind activates it. We are able to collect driftwood by the might Mississippi. This blog entry has been viewed 1842 times
Glass Fun with Birds
Category: bethie's world | Posted: Thu Mar 31, 2011 11:50 am I said to hubby, let's make some stained glass birds. He said OK. He Always says that. We made one and of course that led to quite a few others.There are wrens, chickadees, goldfinch, cardinal, bluejay and barn swallows.We twisted up some copper wire for feet. Then we decided to make a flat feeder to display them on.We used old cypress for this. Then of course it needed some leaves-we are gardeners after all. And of course the sun should shine. 
( photo / image / picture from bethie's Garden ) 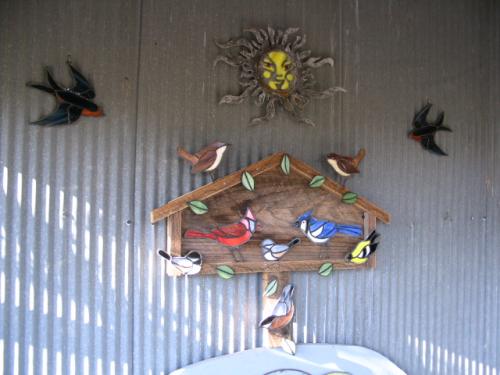
( photo / image / picture from bethie's Garden ) This blog entry has been viewed 1658 times
Mr. Sunshine (mosaic)
Category: bethie's world | Posted: Sun Feb 21, 2010 2:33 pm I made this giant sunface from hypertufa this summer. It is a whopping 46inches by 24inches. It was made on a board by drawing the pattern in marker right onto the board. 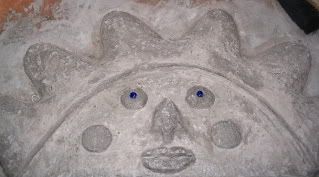
I cut hardware cloth to mirror the pattern. Half the hypertufa is put on the board, then all the wire laid down and covered with more hypertufa. Much patting and shaping. You have plenty of worktime on this. The features are put on last. My top was getting too wet from all the patting so I threw an old sheet on it and soaked up the water. There are some wires inserted between a few of the rays for tethering it if needed. This piece cured for several months and then hubby lugged it in and I start glassing it. 
Hubby did his usual Great Job on the grout. 
This piece is made as a leaner so I could put it against this stump. Strangely I've named him "Horace" though hubby persists in calling him "Homer." 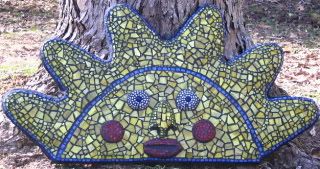
This blog entry has been viewed 1119 times
Fence Project
Category: bethie's world | Posted: Sat Nov 28, 2009 1:10 pm We had a big maple tree cut last summer since it was half dead. It was just to the right of this photo and the sun just streams through here now. We wanted to break up the space a little but still see the fencerow since we are birdwatchers. To the far left is a bed headboard set painted black to lead you to the front garden. 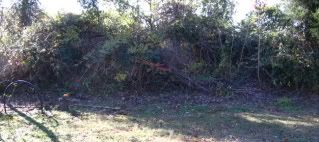
We decide on bamboo since over the years we have cut and stored quite a bit of it. It is Very Easy to work with. The only thing we buy is some treated posts. We don't even have to crete in the posts since this is light duty. We use little nails on the cross pieces and wire the bamboo right to them. 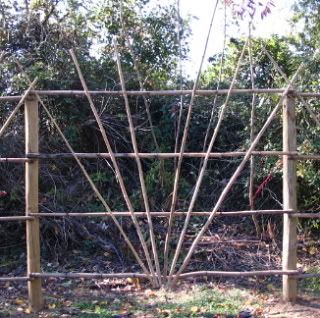
Every project makes a mess. 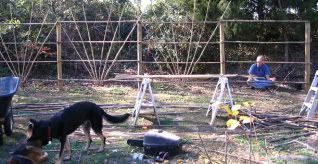
We had just been hiking and had seen some very beautiful sycamore leaves so I decide to make some copper ones for this project. Of course they will look better over time as the shine leaves them. 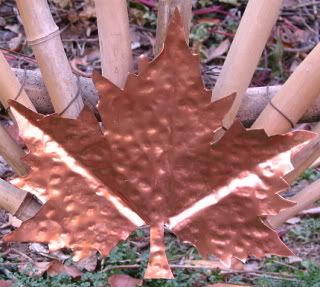
We made this bluebird house this summer. It has a hole in the front but just for fun it looks like a house on three sides. 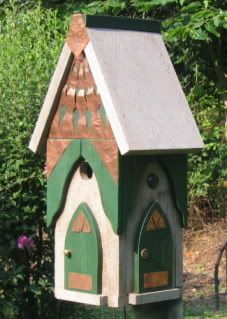
I decide the headbord entranceway has to be colorized to go with the fence so I spongepaint it. 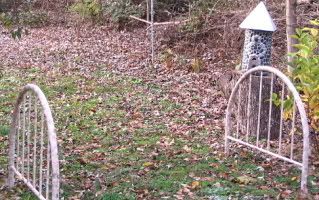
We decide to make a nice new birdfeeder for this area while we are at it. I make a few more leaves and we add a piece of Mississippi driftwood to the mix. 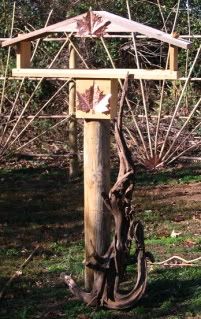
Done. I am planting a few things directly in front of the posts. Now I just have to cleanup the mess unless I think of something else. Hmmmm... 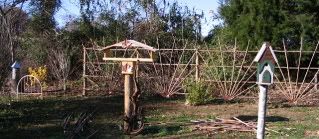 [/img] [/img]
This blog entry has been viewed 939 times
Gnome Door
Category: bethie's world | Posted: Tue Feb 10, 2009 1:37 pm During the holidays we Finally got around to making a gnome door. I showed hubby some pictures I had on the computer and out we went with a tape measure.The door can be made any size depending on your tree. We decided on this spot in the yard because of the nice old ivy vines running up the tree plus my goose pen is right behind this so I am here every day to enjoy it. We measure for the size we want then I cut a rectangle out of newspaper that size. I folded it in half and cut a gentle curve with scissors. I did the same for the window. We're going to make this completely out of junk and not buy a thing. The body of the door is some aged oak barnwood that we salvaged. The door is cut with a jigsaw. It's cut out in one piece and then re-cut into several. It's put back together on the back with some thin wood. The doorframe is cypress that I've sanded and sponge painted. The hinges are old kitchen cabinet door handles pounded flat, cut off and sprayed black. The brass door handle is the top off and old canister. Mirror is glued to the back of the window. It doesn't have to be cut to size and could be a mirror out of an old compact. Hubby gets carried away by it all and even grinds off the screw heads to make them square. What a guy. We'll definitely be making another of these in a different size and shape. Fun. 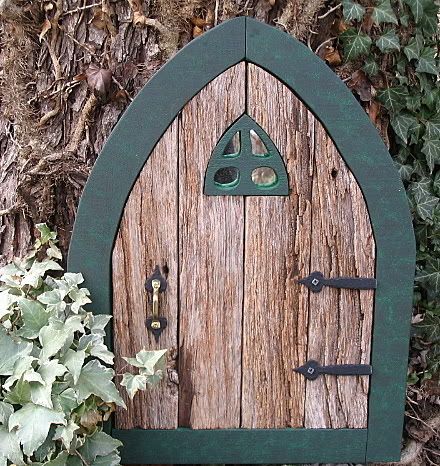
This blog entry has been viewed 2916 times
My Pighead
Category: bethie's world | Posted: Mon Feb 09, 2009 1:24 pm Sometimes you just Want something. I woke up one day and longed for a Pighead. You know the feeling. I go right to taxidermy on e-bay and start bidding on a taxidermy pig form. He has teeth and tongue but no ears or eyes. Still I love him and soon he arrives in a box on my doorstop. Hubby is surprised and pleased to make his aquaintance. 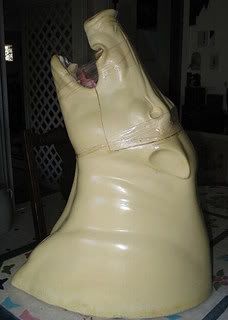
I decide to glass him all in shades of blue off one big sheet of glass. I cut the glass and then sort it into shades. We get eyes and ears and attach them. Now the pig can watch his own creation. He has kind eyes. 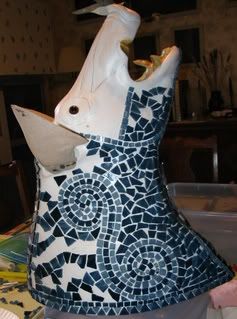
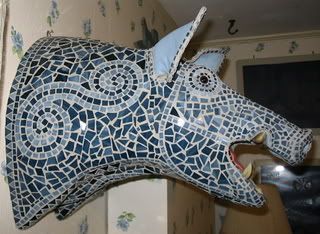
Hubby loves spirals so I make sure to include a few. 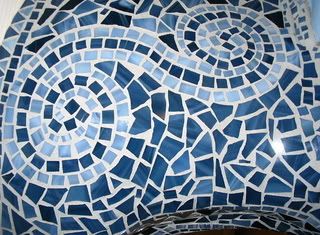
I want to make him like a carousel pig. Fun. It takes a good while to get him glassed. He will take a lot of taping off to keep the grout out of his mouth. We go with gray grout and hubby does his thing. When the grout cures the cleaning and scraping is done. 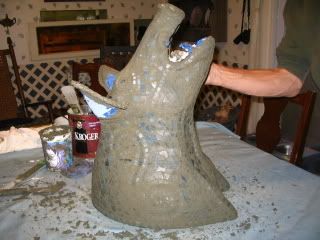
He has a spot on the dining room wall all picked out for him so up he goes. 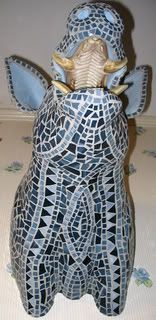
He's such a Happy Pig. 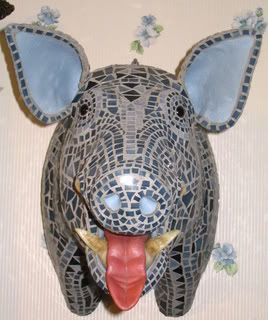
This blog entry has been viewed 740 times
Mosaic Eggs
Category: bethie's world | Posted: Mon Feb 09, 2009 1:18 pm I saw some painted eggs online that were very pretty but I knew paint could never make it in the Southern sun. I want eggs in a cute nest so I look around for something to glass in a robin's egg blue. Egg Gourds. They are hard as a rock and ready to go. These are easily grown and will cure right on the vine and have many crafty uses. Grow some. Here are the egg gourds shown with a white size medium egg. 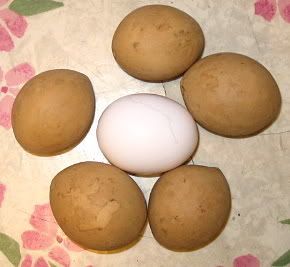
The glass is small so I put it on with tweezers. 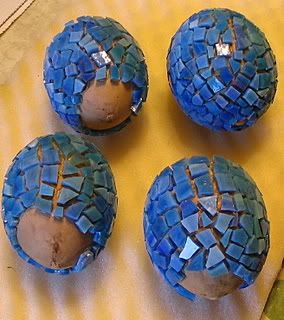
Hubby works his grouty magic. Black grout is a Big Mess. 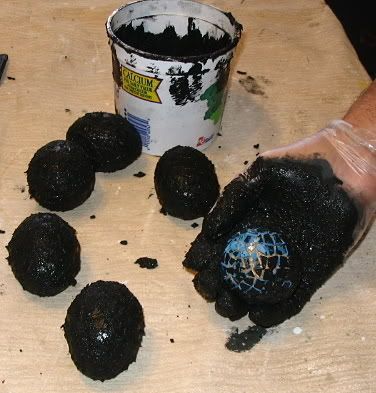
I search around for some wild grapevines that still have some "give" in them. Hubby twists me up a grapevine wreath and I take the leftovers and weave a crude bottom into it. I want plenty of drainage on them. All done. 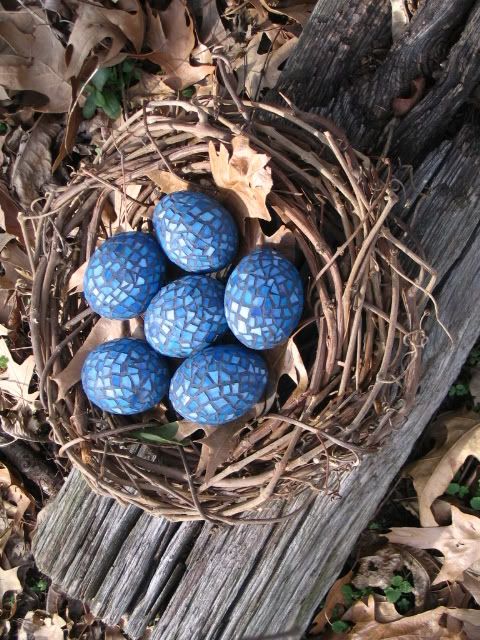
This blog entry has been viewed 3022 times
Summer Garden Retrospective
Category: bethie's world | Posted: Fri Jan 09, 2009 2:37 pm Well the gardening gods looked upon us with kindness this year. It was droughty here but several times when rain was critically needed we got it. This is the right side of my back steps. 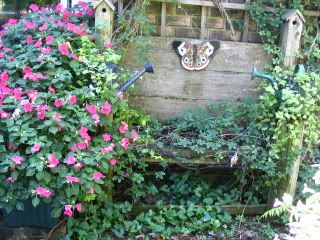
This is the left side of the back steps. 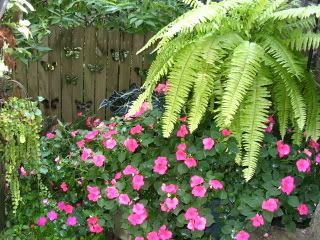
Clemmies do great here in the south. This is Jackmani. 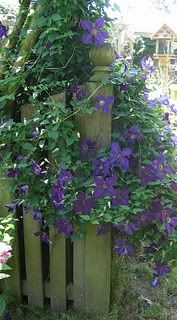
Down the path to the shop. 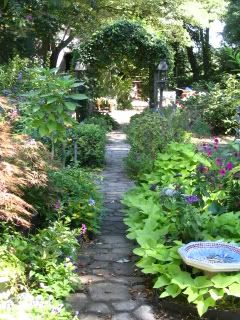
Back at the veg. garden on an August afternoon. We lost several contorted willows from drought so we made arbors out of them. 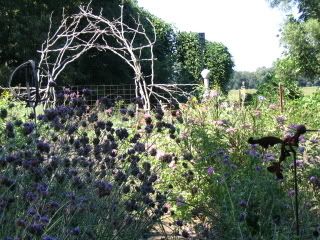
Plant it and they will come and they did. 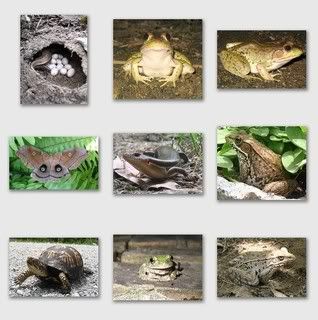
The beautiful came also. 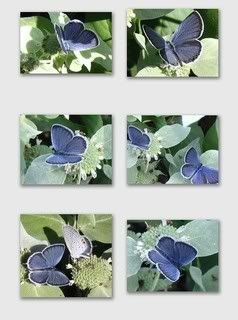
Plant cupheas for hummingbirds and for their many flowers. 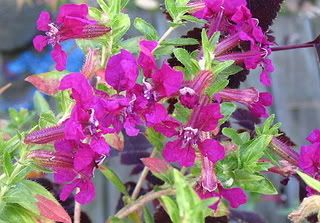
I love the colors on these. 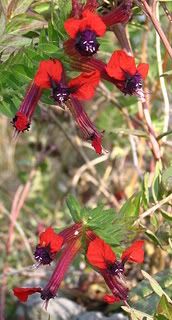
There should always be Buddleia. 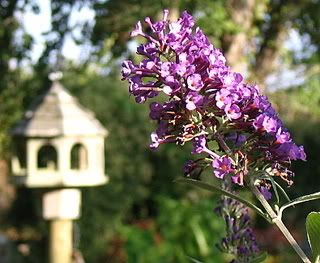
We enjoyed every piece of garden junk we have. 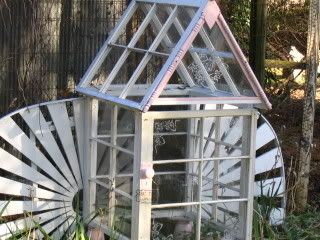
I grew a lot of foliage plants this year. Coleus varieties just keep getting better. 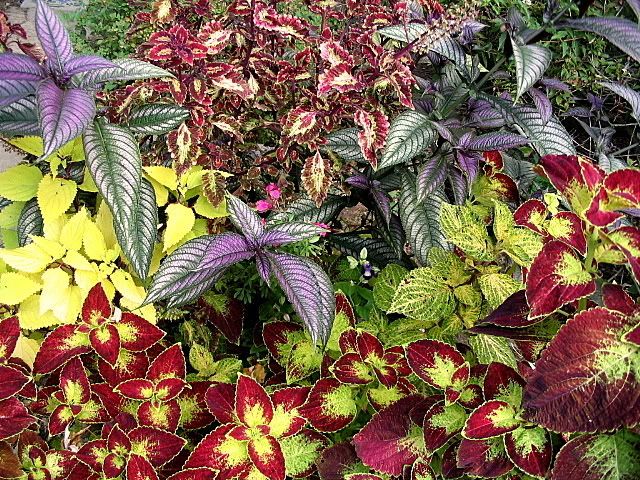
One of my 5 big hypertufa troughs. 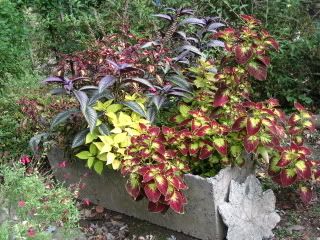
Looking forward to this year's garden. Insert smile here. This blog entry has been viewed 751 times
Garden Sinks (mosaic)
Category: bethie's world | Posted: Fri Dec 19, 2008 8:51 pm This summer I told hubby I wanted to mosaic and old sink to put in my landscape. He reminded me there was an old sink in the shop when we bought the house and it was up in the rafters. He got a ladder amidst the "be careful" and "don't hurt yourself" and brought down a lovely cast iron sink. We looked around the shop and came up with a heavy metal stool that he took the back off and we inverted to be the sink stand. I had my heart set on a spot near my patio that is heavily landscaped and was happily amazed that this would be a perfect fit. Hubby leveled and put the stand in place so I could plant around it while the sink was pending. I decided to keep it fairly simple since there is a lot going on in my yard. I just scribble some directional lines on the sink and cut some glass and start. This multicolored glass is all off one sheet that was left over from a church window hubby made, in other words FREE! 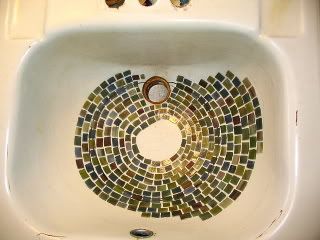
I decide to use old spouts I get at the junkyard. I like a rustic look. Hubby does all the grouting.We go with gray grout for this one. 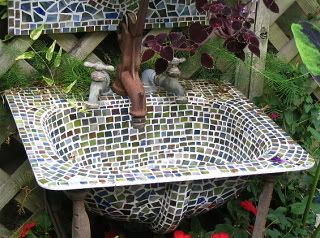
I decide it would be nice to have a matching mirror over the sink. Hubby cuts the rectangle out of concrete backer board. I make the middle real mirror so it can reflect some of the plants around and a hypertufa vase that is sitting across from it. 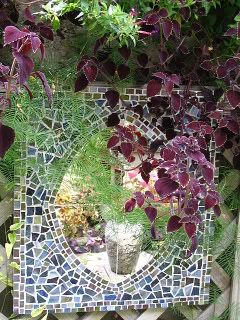
In goes the finished sink like it's been there forever. It's right up against my stormhouse which has lattice in front of it. The plants are spilling down from a big hypertufa trough. 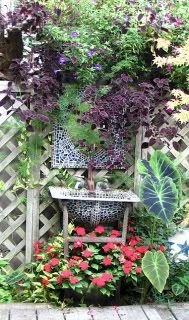
Now hubby comes home with a little sink he bought at the junkyard for $1. 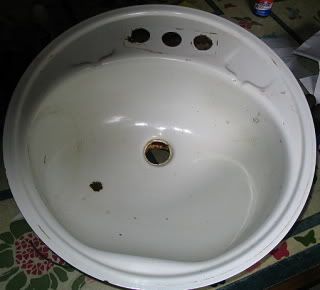
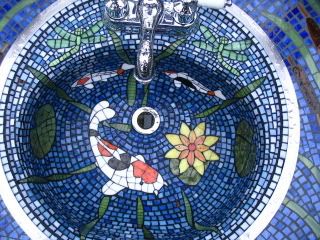
We decide to make this a Big Project which we will eventually sell. We agree on the idea that the sink will be a koi pond and the countertop will be the pond verge. Hubby says he will do the cut glass and I will do the mosaic. He cuts out the countertop from backerboard and brings it in. I trace it and start drawing the patterns. I copy the patterns and give them to him. He glues them on the glass, cuts and grinds them and brings them back to me. I recut them as I glue them. Since the sink is very curved I will take one piece and sometimes recut it in as many as 10 pieces and then glue it back together on the sink.This takes Forever.The cut glass design elements are glued on first and then the water is added. 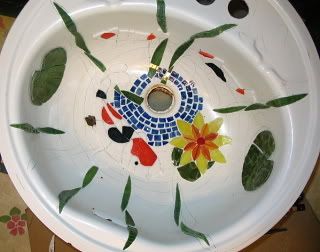
I start at the drainhole of the sink with a dark blue glass and get lighter as I go to the top. Now the sink is glassed and ready for hubby to grout. We are going with black grout. 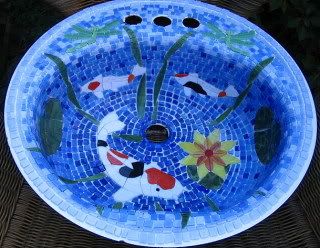
We build the frame out of cypress. We find cypress 2x4"s at the junkyard for $1 each. Hooray! The shelf on the bottom will be hardware cloth(RATWIRE!) so water won't rot it. 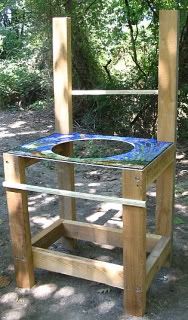
We decide to make a little backsplash so hubby cuts it out and drills the screw holes and gives it to me to glass. We decide on shelf brackets for the top and make a simple pattern for that. I decide we need a little piece to hang from the shelf. We decide on cattails. I draw this and cut it out of copper. Hubby says he will finish it and he does. 
We give the snails "irridized slime trails" just for Fun. 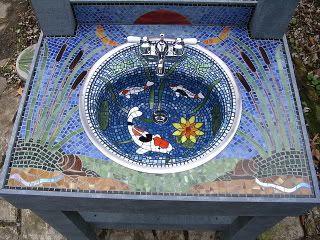
We want a color on the wood so we use one of the colored latex stains. This product is Wonderful. The look of paint but not the maintenance. I'm not quite happy with the plain gray so I tint some darker and daub it on with a plastic bag. 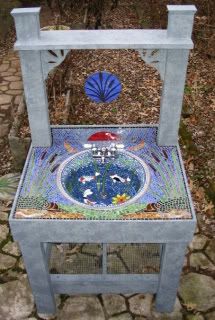
We decide to use a new fixture on this one and Finally we are done. 
This blog entry has been viewed 13709 times
Stained Glass Orchids
Category: bethie's world | Posted: Tue Jun 03, 2008 11:40 am In December Droopy posted some beautiful orchid pics. I just had to have them in glass. I made a pattern from the photo and got hubby on board for this. I orignally wanted pink but this yellow glass kept calling my name. 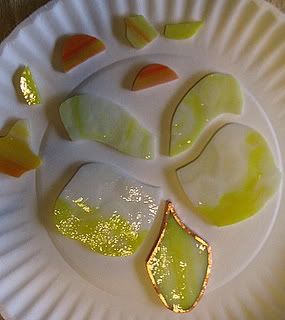
I needed something heavy to hold these glass pieces so I made a hypertufa vase in a cheap glass vase. The glass is then busted and holes are drilled in the top. Then I glassed it in blue and hubby grouted it. I made the leaves from sheet copper and soldered them to wires. 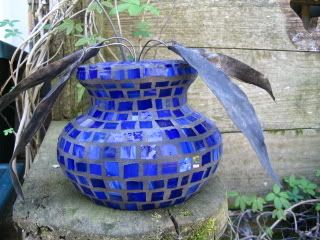
Not too bad. 
We are super busy this spring so I am keeping up with the forum as best I can. I'm mostly just reading the posts and looking at all the beautiful pics. I'm hot and heavy working on a mosaic sink for My yard. This blog entry has been viewed 1908 times
You're reading one of many blogs on GardenStew.com.
Register for free and start your own blog today. |
Archives
All Entries |
