|
Recent Entries to this Blog
Blueberry patch is planted!
Posted: 07 Apr 2010 Posted: 02 Apr 2010 Posted: 20 Mar 2010 Posted: 20 Jun 2009 Posted: 17 May 2009 All Entries |
daisybeans's Blog
Blueberry patch is planted!
Category: Blueberry blog | Posted: Wed Apr 07, 2010 12:53 am The blueberries arrived on Saturday afternoon! I was excited to see the box on the front steps, but surprised at how small and lightweight it was... I had really been wondering what these plants would be like since all the plants I'd seen in the nurseries were at least 2 or 3x the price of those I ordered from the grower. So I expected them to be small, but I was alittle taken aback. They are younger than I thought they would be so ... maybe no fruit this year. But they look happy and healthy and I like them. 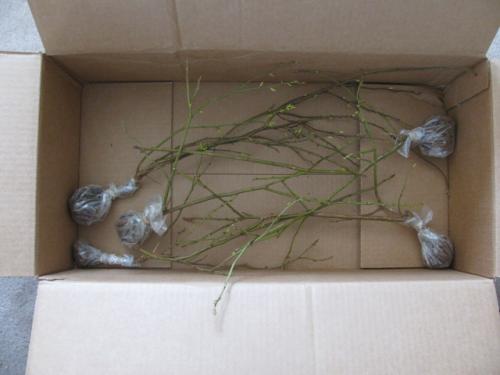
The tiny blueberry plants ( photo / image / picture from daisybeans's Garden ) Now, I've only bought one other plant through the mail and it was a more mature rhodie in a pot... This was so different! It kind of scared me to see them looking so vulnerable and fragile!!! I had alredy prepared the bed for them with lots of peat so I got right to planting them. Following the instructions that I had been given by our blueberry guru here on GS (that would be Sjoerd), first I dug a hole about a foot deep and two feet wide with loose soil in the bottom. I added peat to the bottom and mixed it up and watered it in. To the soil I removed from the hole, I added about the same amount of peat, maybe a little more so it was really peaty. Here I would have added some bone meal, except I didn't have any... (oops). 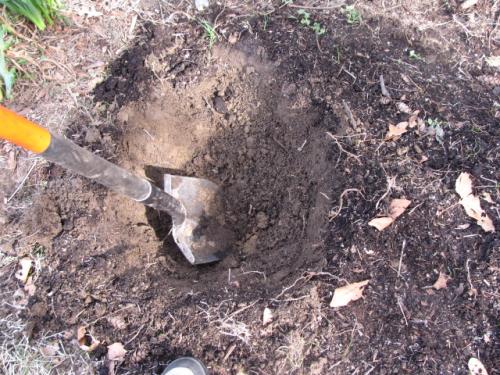
pretty good hole! ( photo / image / picture from daisybeans's Garden ) 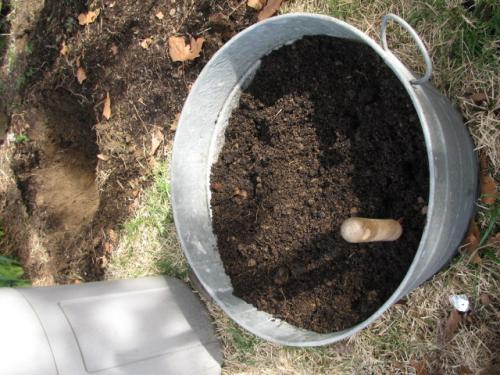
ground soil and peat mix ( photo / image / picture from daisybeans's Garden ) Each plant arrived with its little root ball rinsed of soil and packed with some of that jelly-like stuff that holds a lot of water, then wrapped in a plastic bag and held closed with a rubber band. 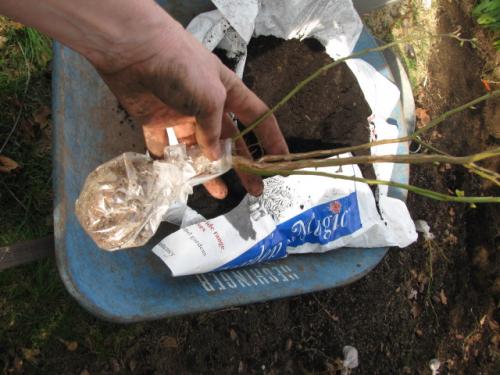
in the bag ( photo / image / picture from daisybeans's Garden ) 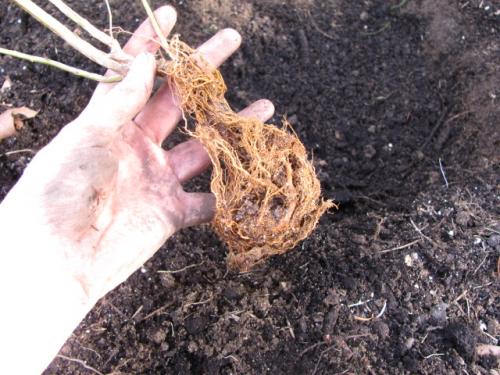
the root ball with the jelly-like stuff ( photo / image / picture from daisybeans's Garden ) I gave the roots a little drink and gently spread them out. I was thinking they looked OK... but I was also thinking "What do I know????" 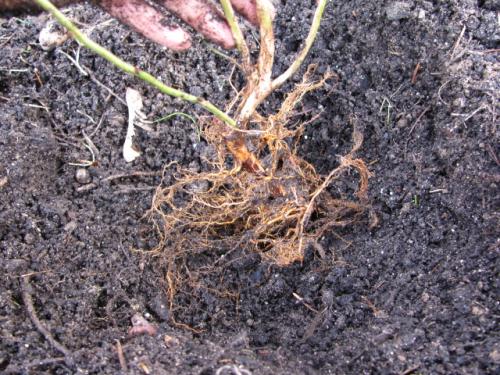
root ball ready to plant ( photo / image / picture from daisybeans's Garden ) I had to take a deep breath.... they'll be fine I said to myself. No worry, the neighbors are used to me talking to myself and the plants.... Then, I filled the hole most of the way with the soil/peat mix. I made a mound of soil in the middle and placed the plant on top, spreading out the roots and checking to make sure the base of the plant where the roots meet the stems was level with the top of the hole. I snugged in so that it won't sink too much and then packed around the roots with moist soil mix. Then filled in the rest of the hole with that mix. Did I mention that talked to them at several points? At least I can say we've become "friends" and hopefully I did OK planting them! 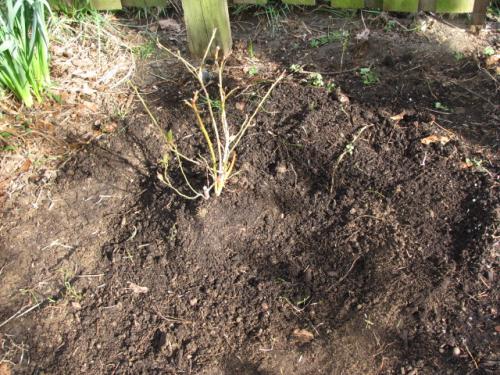
all snugged into its new home ( photo / image / picture from daisybeans's Garden ) The next day, I pressed down the soil around the plants and filled in the low spots with more soil/peat mix. At this point, I had some bone meal so I top dressed the soil with about 1/2 of a trowel of bone meal around each plant and about the same amount of berry fertilizer about 6-8 inches out from the plant. I worked that into the soil, gave them a drink, and then I put about 2-3 inches of peat moss around each plant. I moved the soil away from the base so that they are still level with the top of the soil. Then, I finished the whole thing with a few inches of shredded pine bark mulch. And here is the finished blueberry patch. There are six plants in there, believe it or not. Five were from the grower and one I bought at a nursery. That one is a little bigger than the others. (Don't mind my falling down fence. It's being replaced shortly.) 
the finished blueberry patch ( photo / image / picture from daisybeans's Garden ) Next I have to figure out the watering issue. We had a little rain this a.m. so not a problem yet... Think I will collect rain like I did last year and use that along with dehumidifier water when needed... Let's see how it all goes. Thanks for all the support GS friends, espcially Sjoerd and Jewell for the tips! And especially thanks to Sjoerd for patiently describing the soil prep and planting process to me (more than) a few times (and STILL I forgot the bone meal... duh.) Last edited: Wed Apr 07, 2010 12:54 am This blog entry has been viewed 2444 times
the blues shipped from the grower today
Category: Blueberry blog | Posted: Fri Apr 02, 2010 1:59 am I have been (im)patiently waiting for my blueberry plants to arrive from the grower in New Jersey.... It has been about 2 weeks since I ordered them. When I ordered, the grower said they would ship plants to Maryland asap since it was time to get them in the ground! The two weeks went by so slowly and every day I would look hopefully to the porch as I walked up the path.... Yesterday I emailed the grower and he replied right back to say they were shipping the last of the Maryland plants by the end of the week. Then today he emailed again to say that the plants had JUST SHIPPED today from the post office in New Jersey. Yippee! If I am a lucky gardener, they will arrive on Saturday, or Monday at the latest. I happen to be off on Monday so I am keeping all of my fingers crossed that I will be able to get them planted then. This blog entry has been viewed 1760 times
Blueberry Blog
Category: Blueberry blog | Posted: Sat Mar 20, 2010 2:40 pm My "something new" for this year is blueberries.... so I'm going to keep track of the experiment. For the past couple of weeks my focus has been on how to prep the soil so that my blues will have the ph of 4-5 that will make them the happiest. Sjoerd reco'd the Azalea/Rhodi soil mix and after calling and visiting some 6 large local nurseries and talking to nursery people at 2 garden shows, I have come to the conclusion that it's just not seen as necessary around here... Who knows why, but it is odd. But, regardless, because of that, I've learned about how to adjust the ph in other ways so I think in the long run, it will be just fine. I also spent some time learning about the best plants for this area. The most consistent advice I got was to know where the plants were started (good advice for any plant purchase) and buy plants that will be hardy enough to withstand our winter. In other words, don't buy plants started in the South. Bunkie reco'd a farm in NJ called Dimeo Blueberry Farms and they look like a good operation so I ordered 5 plants from them. More about that when the plants arrive, which should be within a week or two. But back to the soil. Yesterday I took my new ph tester and became very familiar with the soil and amendments... very fascinating (the ph of dirt is fascinating? Really? I believe I may be getting nerdier and nerdier the older I get... and my friends and family would concur... my cousins looked at me with one eye closed when I told them about it last night. But I just KNOW my GS friends will get it!). Generally speaking my soil is at ph 6, a tiny bit higher outside of the drip line of the pine tree. But peat and compost are lovely for ph, at 4-5 and 5 respectively. I learned that it's not so easy to change the ph of a large area. You have to add a lot of amendment. I added about 150 lbs of peat and about 4 cups of soil acidifier (sulfur). Still the overall ph didn't change much. But I think it will still be OK. When the plants arrive, I'll dig the holes deep and 2x as wide and fill the bottoms with peat/soil mix, then fill in with more peat/soil mix. I also have a very nice organic fertilizer for acid loving plants. I am still thinking about whether to add more soil acidifier as I read in one source not to add sulfur around the plants... I expanded my space to accommodate all 5 plants that I ordered plus one more that I bought from a nursery around here. Here are the before and after... Doesn't look like much at this moment but I am imagining how it will look. 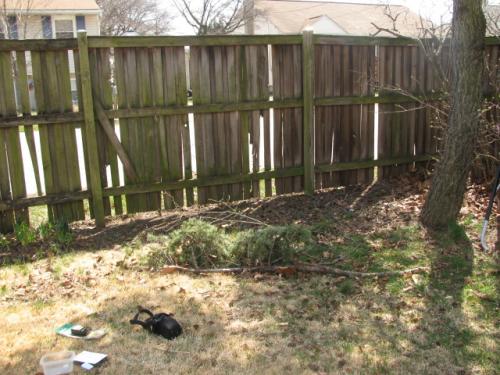
"Before" -- wow, what a mess. ( photo / image / picture from daisybeans's Garden ) 
Another before shot. ( photo / image / picture from daisybeans's Garden ) Looks a mess doesn't it??? 
150 lbs of peat ( photo / image / picture from daisybeans's Garden ) 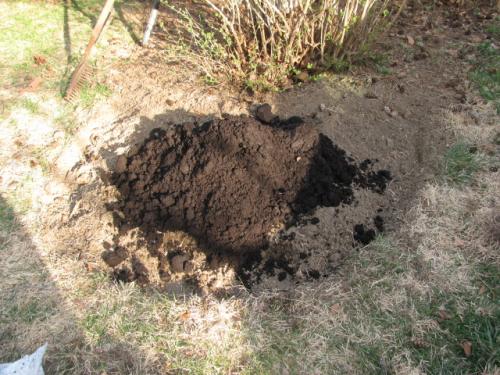
1 50 lb bag of peat here ( photo / image / picture from daisybeans's Garden ) Interestingly, adding this much peat (50 lbs) to this small area didn't change the ph of the area very much at all. That is how I know that really prepping the holes at planting will be very important for the blues. Also additional amendments each year... 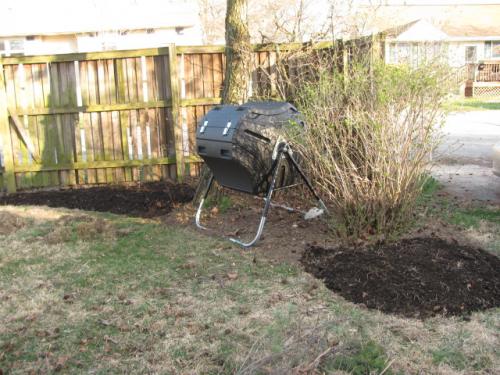
two spots for blues ( photo / image / picture from daisybeans's Garden ) The "after" pic still doesn't look like much. My poor fence is really in bad shape. I am trying to decide what to replace it with -- I'd like something that provides privacy in some areas but increases air flow and sunlight in others... hmmm, I think I will post a forum topic and see what ideas the Garden Stewers have (now why didn't I think of that before???!!) But it is a nice spot with nice sun from late a.m. on, and I hope the blues are happy there. There is plenty of space for the plants to be 2 feet or more apart from one another so I'm thinking about what I might grow in between... Last edited: Fri Apr 02, 2010 1:50 am This blog entry has been viewed 1836 times
You're reading one of many blogs on GardenStew.com.
Register for free and start your own blog today. |
|
