|
Recent Entries to this Blog
How to graft cactus seedlings - one result
Posted: 29 Oct 2010 Posted: 29 Oct 2010 Posted: 24 Oct 2009 Posted: 04 Sep 2009 Posted: 11 Oct 2009 All Entries |
Christer Johansson's Blog
How to graft cactus seedlings - one result
Category: How to... | Posted: Fri Oct 29, 2010 4:12 pm This is a follow up on an old topic. 2009-05-31 I made a graft, and the scion was a seedling of Mammillaria coahuilense. The stock I almost always use was Selenicereus grandiflorus. Five days after the graft it looked like this... 2009-06-04 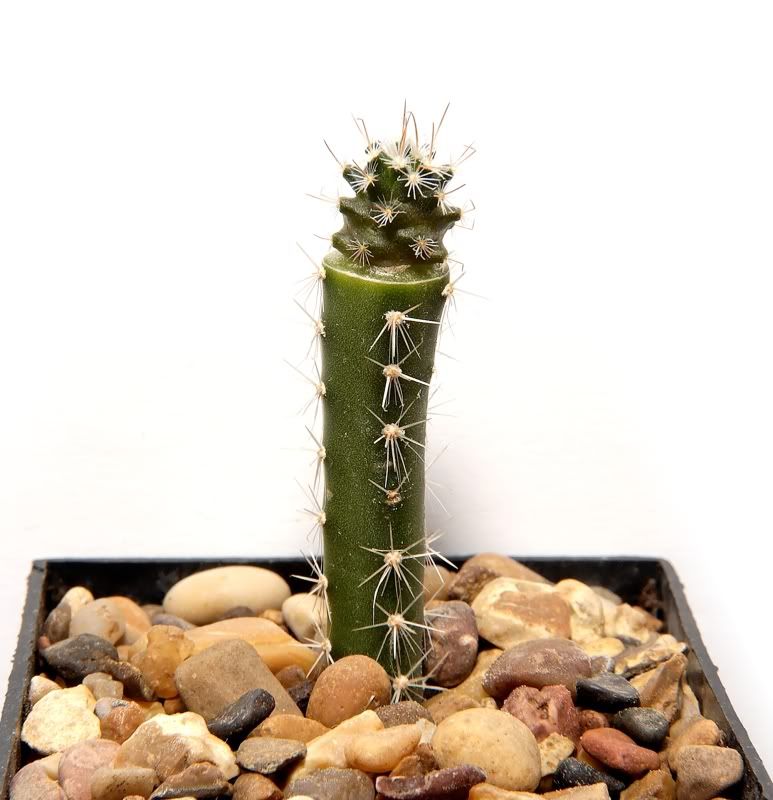
It start to grow very well, and 3 month later it looked like this... 2009-09-20 
Now it has been over a year and I de-grafed the plant, let it rooting, then plant it in a pot. This is how it looked 2010-10-23... 
To compare with a plant grown on it's own root... 
And yes, there are some buds there as well... 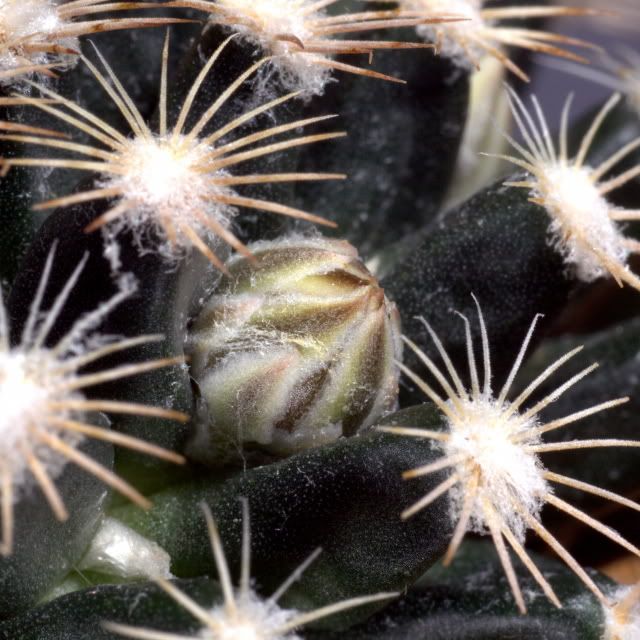
I have to remind you, this is a very slow growing species... About the species Finally... 
Last edited: Mon Nov 15, 2010 7:49 am This blog entry has been viewed 823 times
Comments (0) | Leave a Comment | Permalink
How to graft cactus seedlings - Eriosyce
Category: How to... | Posted: Sat Oct 24, 2009 3:15 pm This is a followup on "How to graft cactus seedlings" and show the result on another species and genus. I started of with seeds that I planted 2009-04-16. Eriosyce odieri FK 804 
About 3 month later they looked like this. 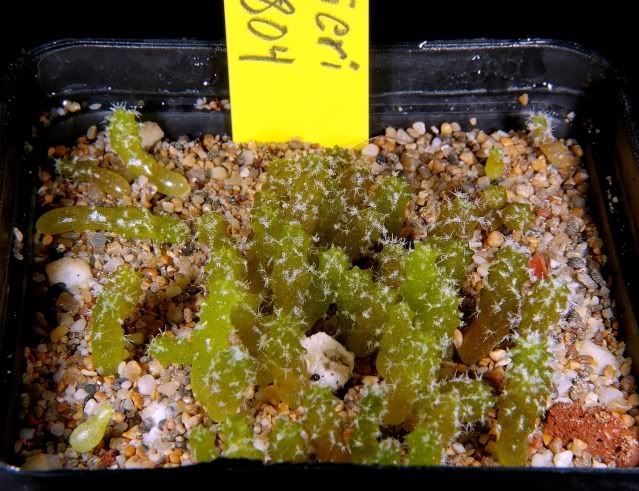
I picked out 3 seedlings and let the rest keep on growing in the pot. I grafted them and one of them looked like this when it was newly made. 
-------------- 3 more month has now passed by and the seedlings still in the pot looks like this. 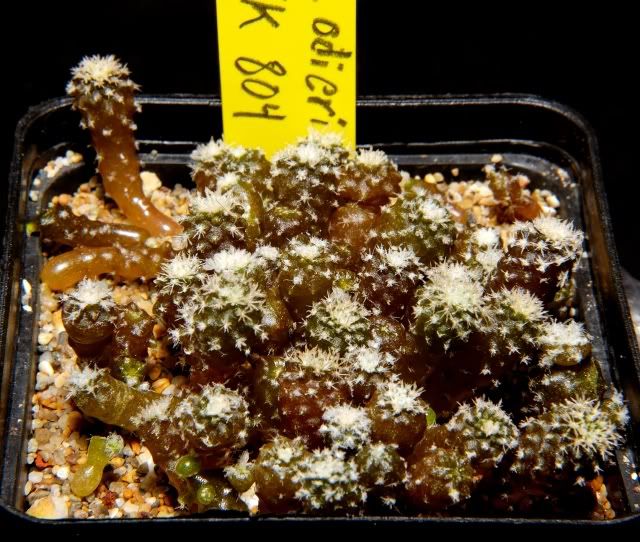
But the grafted one is a little bigger. 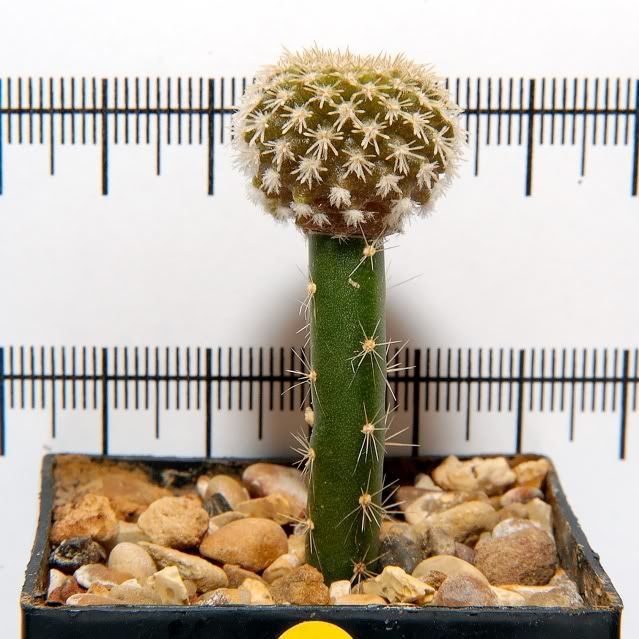
All three of them looks like this with a black background. 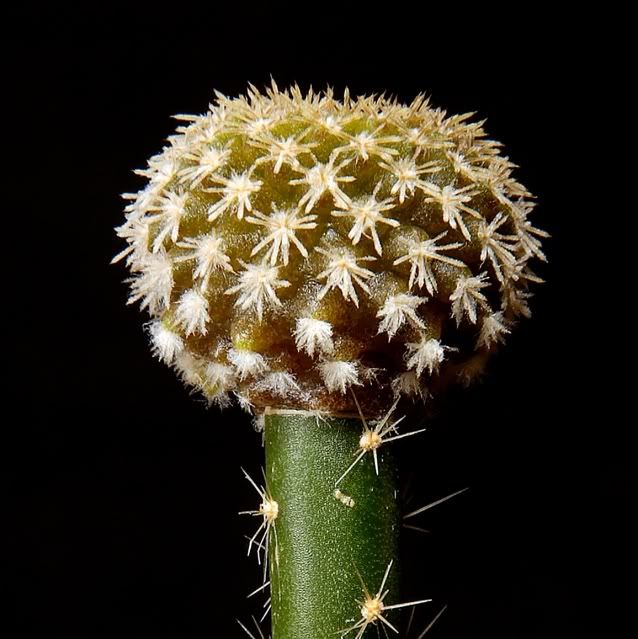
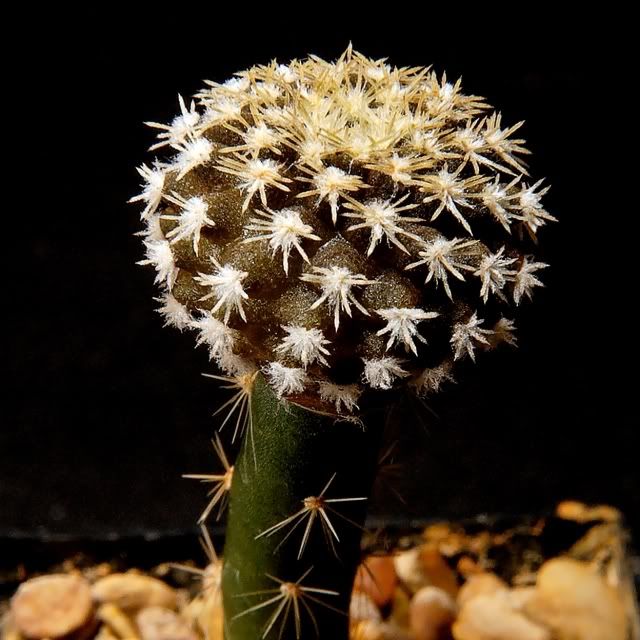
And one made some pups as well. 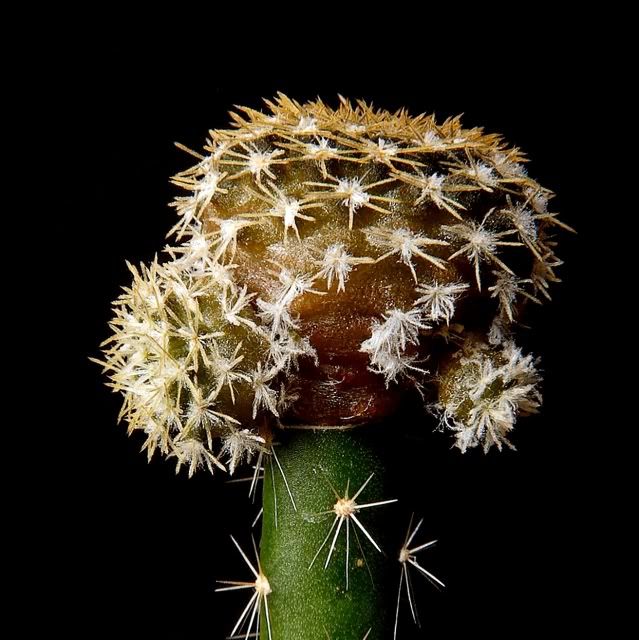
It worked well with all three of them this time... This blog entry has been viewed 1063 times
How to graft cactus seedlings - update 1
Category: How to... | Posted: Sun Oct 11, 2009 2:03 pm This is an update on How to graft cactus seedlings, and it's about grafting a seedling of Copiapoa dealbata on a Selenicereus grandiflorus stock. It's been three month since I made the graft and the seedlings I am using looked like this when I picket one out. 
They have spent three month on a windowsill and some of them have got burns from the sun, but they have been growing some as well. This is how they looks like today. 
Their real spines start to show now. Just when I finished grafting it looked like this. 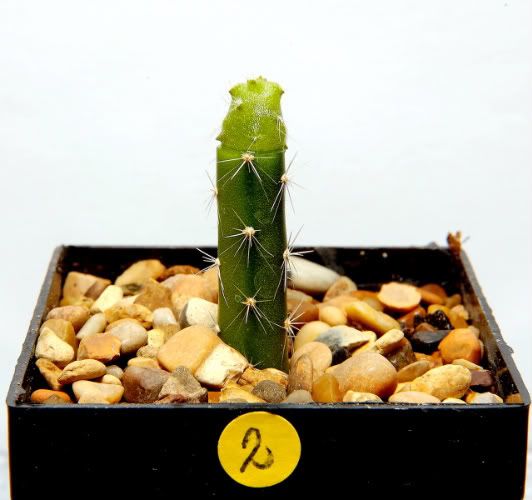
I am using a 5cm (2") pot. The graft spent two weeks in a closed environment with a humidity around 80%, then I moved the stock to the windowsill. No direct sunlight the first week in the window, then eastern sun only. The graft start to grow at the fourth week, so actually it has only been growing for about two month now. And this is how it looks like today. (the measurement is in millimeter and centimeter) 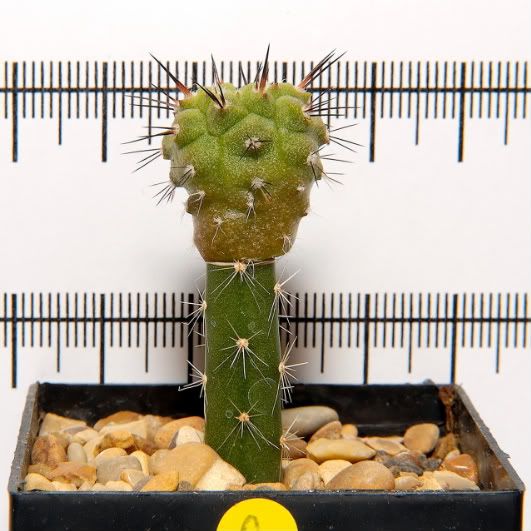
I made three graft with this species, but one didn't make it. It was eaten by the stock? The other that made it was not perfect because it did not make contact on all the surface. It start to tilt a little, but now it looks OK. 
It has more spines, but I don't know why? To be continued... Last edited: Sun Oct 11, 2009 6:22 pm This blog entry has been viewed 2484 times
How to graft cactus seedlings
Category: How to... | Posted: Fri Sep 04, 2009 9:27 pm There are many different ways to graft a cactus seedling, but I will show how I have done it. First of all you have to choose what grafting stock you want to use. There are many that are suitable for this, and to mention some: Opuntia humifusa, Myrtillocactus geometrizans, Pereskiopsis, Trichocereus, Hylocereus and Selenicereus. All of them works but give some different result on different species. Some of them are suitable for permanent grafting and are very hardy, but can give an unnatural growing shape; bloated. Others will not live very long, but push the graft in a natural way. I choose Selenicereus grandiflorus for two reasons. First it is proven to make a normal growing form on the species I want to graft. Second, I have a big plant that I can get cuttings from. Step one First you have to decide what species you want to grow and get some seeds. I am growing a lot of Chilean cacti at the moment; Copiapoa and Eriosyce. Earlier this year I ordered a lot of different seeds from a dealer here in Sweden; SuccSeed. The one I choose for this example is Copiapoa dealbata FK56. The seed was originally collected by Fred (Friedrich) Kattermann, a German author, botanist and collector, now living in USA. And the seeds were collected from plants located 10 km South of Carrizal Bajo, Huasco, Chile, at the altitude of 40 meters above sea level. 
This is an extremely slow growing cactus. Many collectors want it and big plant is very expensive. Many keep it for the beauty of its form. Step two You have to sow the seeds and take a cutting for the stock. It's easier if you make sure the stock is rooted and growing before you graft. The right time to make a graft is the time when the stock is growing; spring and summer. The seeds was sown 2009-04-18, and they where only 3 month old when I picked out some seedling to graft.
Step three Time to graft! Make sure you have water the stock the previous day so it's not thirsty. You need a clean sharp knife. I use a paperknife and make it sterile in boiling water. Then you need a sterile place where you can cut the seedling. A clean cut of the stock. 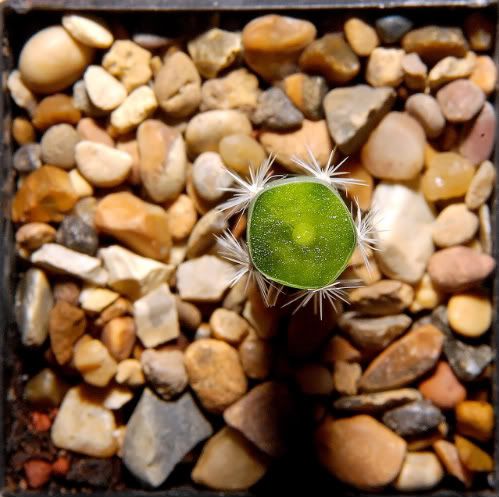
The little ring in the middle of the stock is the vascular part and it has to make contact with the same little ring on the scion (graft). It's hard to tell where it is on a small seedling, but it is in the center of the plant. 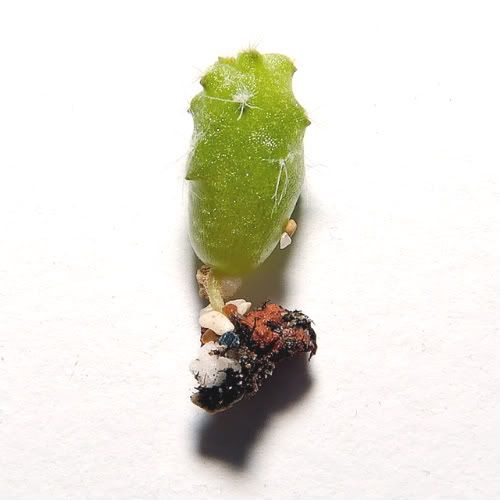
Make sure you press gently on top of the graft to remove all air bubbles and make an all over contact. If the seedling is small it will glue it self to the stock. Finish! Now you have to make sure it will not dry out, and I put mine under a transparent jar turned up side down. To make sure that the humidity not drop to low or rise to high I put a digital meter inside. For me it works fine with humidity between 70 and 80%. I store the jar in a light place. No direct sun light. Room temperature is preferred. It remains in that environment for two weeks, and then you drop the humidity day by day. Then it can take some sunlight, in partly shadow. I put mine in a window with morning light.
To be continued... (I will show the growing graft in different ages) Last edited: Wed Oct 21, 2009 12:18 pm This blog entry has been viewed 2031 times
You're reading one of many blogs on GardenStew.com.
Register for free and start your own blog today. |
|
