|
Recent Entries to this Blog
How to graft cactus seedlings - one result
Posted: 29 Oct 2010 Posted: 29 Oct 2010 Posted: 24 Oct 2009 Posted: 04 Sep 2009 Posted: 11 Oct 2009 All Entries |
Christer Johansson's Blog
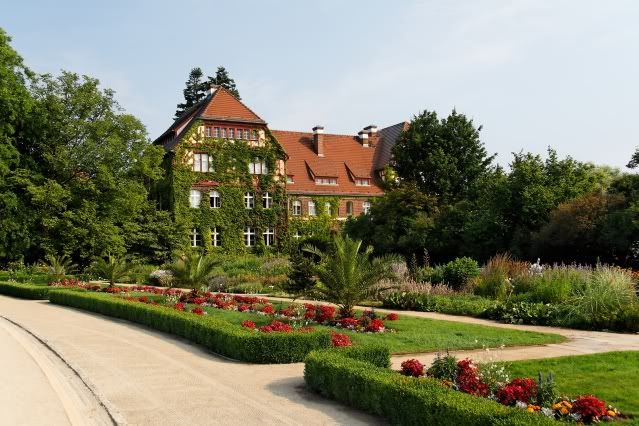
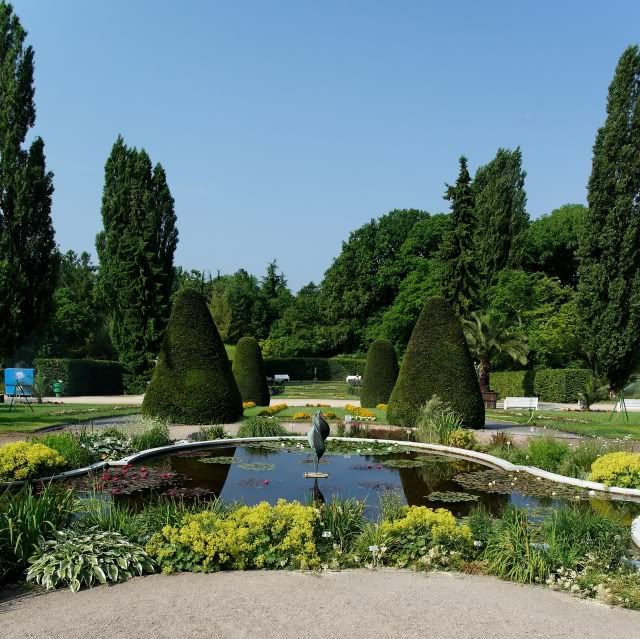
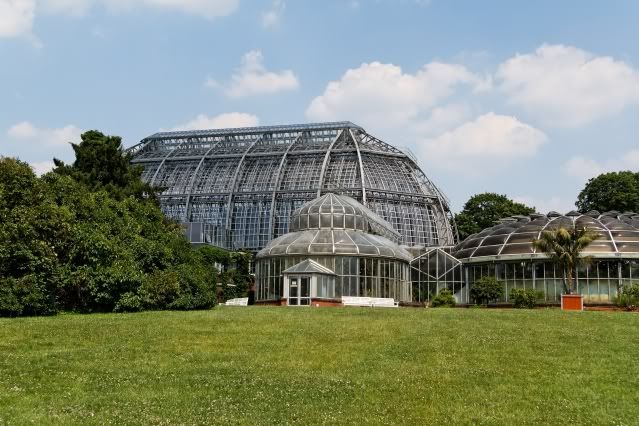
Take a tour in Berlin Botanical Garden
Category: Parks and gardens | Posted: Fri Oct 29, 2010 4:35 pm I made a trip to Berlin this summer. Some of the pictures from Berlin botanical garden... 
This blog entry has been viewed 481 times
How to graft cactus seedlings - one result
Category: How to... | Posted: Fri Oct 29, 2010 4:12 pm This is a follow up on an old topic. 2009-05-31 I made a graft, and the scion was a seedling of Mammillaria coahuilense. The stock I almost always use was Selenicereus grandiflorus. Five days after the graft it looked like this... 2009-06-04 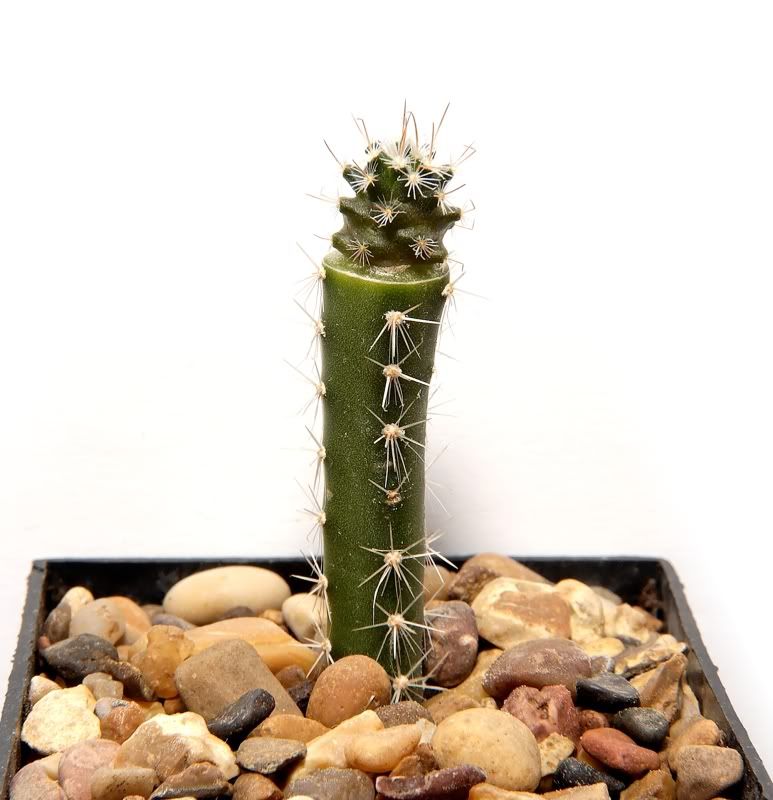
It start to grow very well, and 3 month later it looked like this... 2009-09-20 
Now it has been over a year and I de-grafed the plant, let it rooting, then plant it in a pot. This is how it looked 2010-10-23... 
To compare with a plant grown on it's own root... 
And yes, there are some buds there as well... 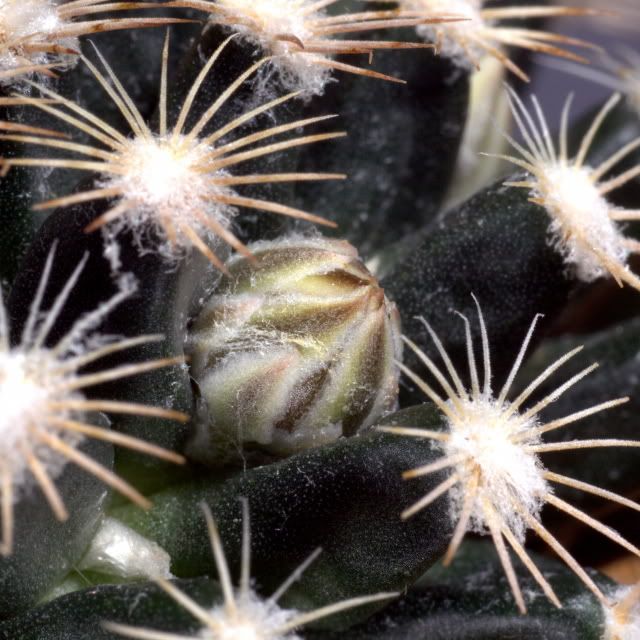
I have to remind you, this is a very slow growing species... About the species Finally... 
Last edited: Mon Nov 15, 2010 7:49 am This blog entry has been viewed 825 times
Comments (0) | Leave a Comment | Permalink
How to graft cactus seedlings - Eriosyce
Category: How to... | Posted: Sat Oct 24, 2009 3:15 pm This is a followup on "How to graft cactus seedlings" and show the result on another species and genus. I started of with seeds that I planted 2009-04-16. Eriosyce odieri FK 804 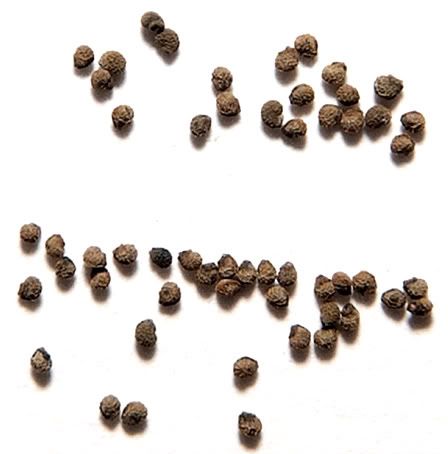
About 3 month later they looked like this. 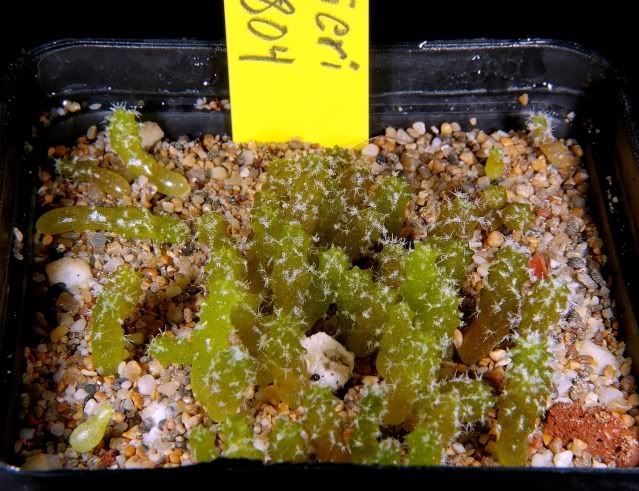
I picked out 3 seedlings and let the rest keep on growing in the pot. I grafted them and one of them looked like this when it was newly made. 
-------------- 3 more month has now passed by and the seedlings still in the pot looks like this. 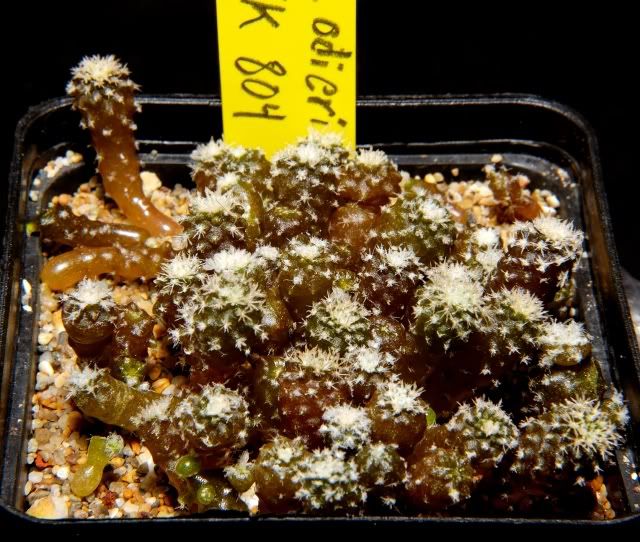
But the grafted one is a little bigger. 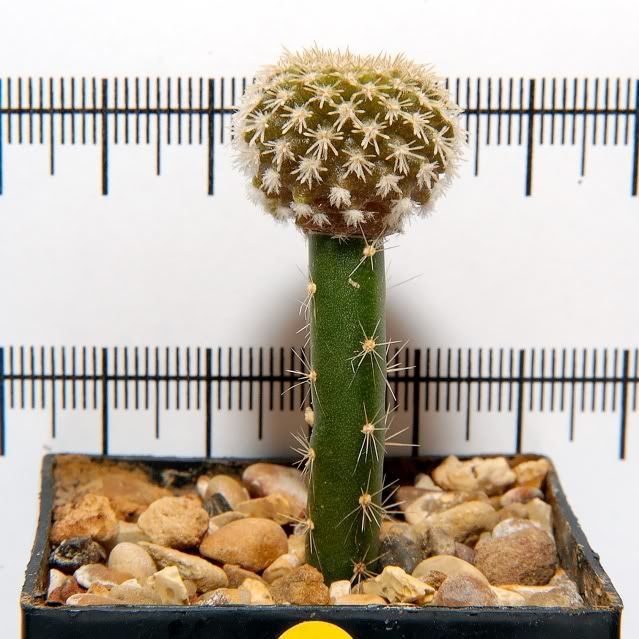
All three of them looks like this with a black background. 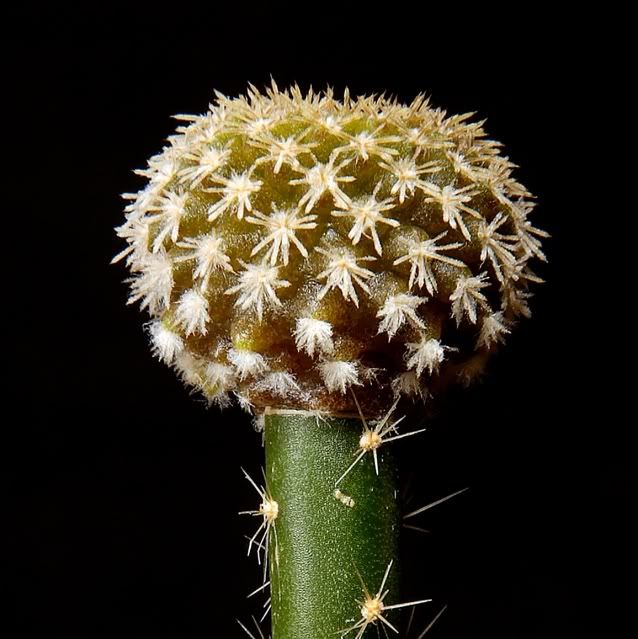
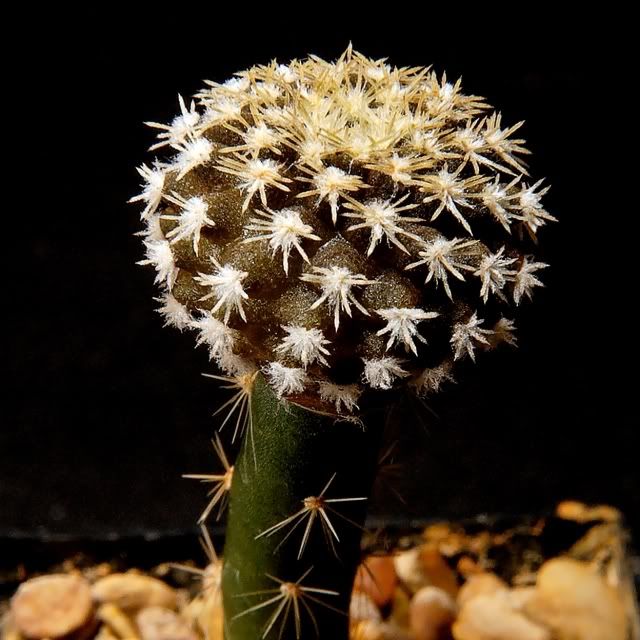
And one made some pups as well. 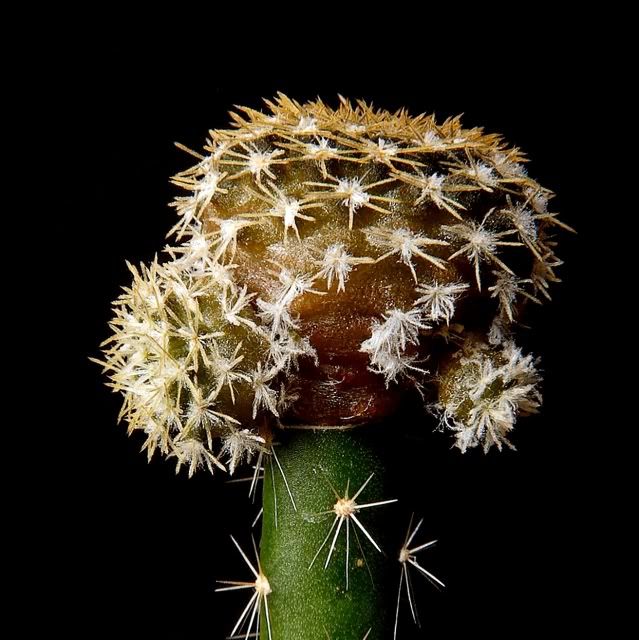
It worked well with all three of them this time... This blog entry has been viewed 1066 times
How to graft cactus seedlings - update 1
Category: How to... | Posted: Sun Oct 11, 2009 2:03 pm This is an update on How to graft cactus seedlings, and it's about grafting a seedling of Copiapoa dealbata on a Selenicereus grandiflorus stock. It's been three month since I made the graft and the seedlings I am using looked like this when I picket one out. 
They have spent three month on a windowsill and some of them have got burns from the sun, but they have been growing some as well. This is how they looks like today. 
Their real spines start to show now. Just when I finished grafting it looked like this. 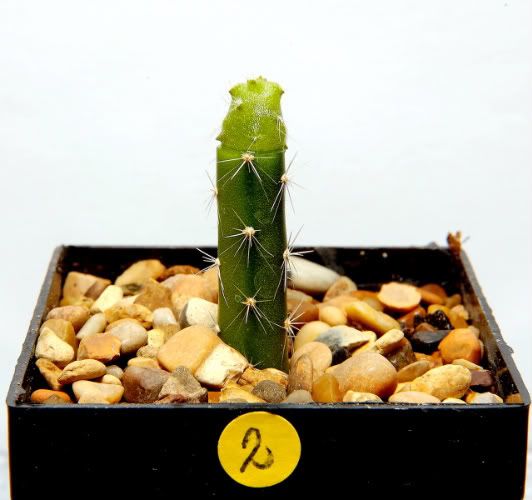
I am using a 5cm (2") pot. The graft spent two weeks in a closed environment with a humidity around 80%, then I moved the stock to the windowsill. No direct sunlight the first week in the window, then eastern sun only. The graft start to grow at the fourth week, so actually it has only been growing for about two month now. And this is how it looks like today. (the measurement is in millimeter and centimeter) 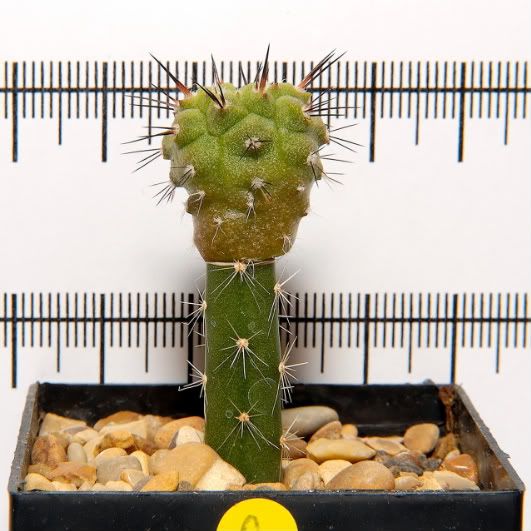
I made three graft with this species, but one didn't make it. It was eaten by the stock? The other that made it was not perfect because it did not make contact on all the surface. It start to tilt a little, but now it looks OK. 
It has more spines, but I don't know why? To be continued... Last edited: Sun Oct 11, 2009 6:22 pm This blog entry has been viewed 2486 times
Why grow cactus seedlings in a plastic bag?
Category: Why? | Posted: Sun Sep 06, 2009 3:43 am First time I ever tried to grow cacti from seeds was a really disaster. I ordered a kit with 12 different seeds and a germinator. I put soil in the small plastic square pots, the seeds and water. Then I waited. After a while the seeds start to germinate and I was so happy. Then after a while I noticed that some of the small seedlings just fell over and they had no roots? I spayed the pots with natural bug poison, and it crawled up a lot of larvae. It was Sciara. They destroyed nearly all of the seedlings. The second time I where more careful and sterilize all the soil in the microwave to prevent gnat eggs. Then I put a layer of sand on top. This time it worked out fine. The only trouble this time was that I have picked out species that need different environments at different stages of their lives. Some needed fresh air and not so high humidity two days after germination. I had a real trouble to give them what they wanted and failed with a lot of them. From now on I always grow my cactus seedlings in plastic bags. Well, it works with any closed environment; the plastic bags are just simple and cheap! Somehow the environment regulates it self in there, and you can grow as many different species as you like in different bags. I am growing messembs (Aizoaceae) in bags as well. Some species of cacti have been in a bag for two years soon (Blossfeldia). No problems with gnats or mold, and no more watering! (Well, maybe some...) It's just perfect for the slow growing species. Last edited: Sun Sep 06, 2009 6:40 pm This blog entry has been viewed 677 times
How to graft cactus seedlings
Category: How to... | Posted: Fri Sep 04, 2009 9:27 pm There are many different ways to graft a cactus seedling, but I will show how I have done it. First of all you have to choose what grafting stock you want to use. There are many that are suitable for this, and to mention some: Opuntia humifusa, Myrtillocactus geometrizans, Pereskiopsis, Trichocereus, Hylocereus and Selenicereus. All of them works but give some different result on different species. Some of them are suitable for permanent grafting and are very hardy, but can give an unnatural growing shape; bloated. Others will not live very long, but push the graft in a natural way. I choose Selenicereus grandiflorus for two reasons. First it is proven to make a normal growing form on the species I want to graft. Second, I have a big plant that I can get cuttings from. Step one First you have to decide what species you want to grow and get some seeds. I am growing a lot of Chilean cacti at the moment; Copiapoa and Eriosyce. Earlier this year I ordered a lot of different seeds from a dealer here in Sweden; SuccSeed. The one I choose for this example is Copiapoa dealbata FK56. The seed was originally collected by Fred (Friedrich) Kattermann, a German author, botanist and collector, now living in USA. And the seeds were collected from plants located 10 km South of Carrizal Bajo, Huasco, Chile, at the altitude of 40 meters above sea level. 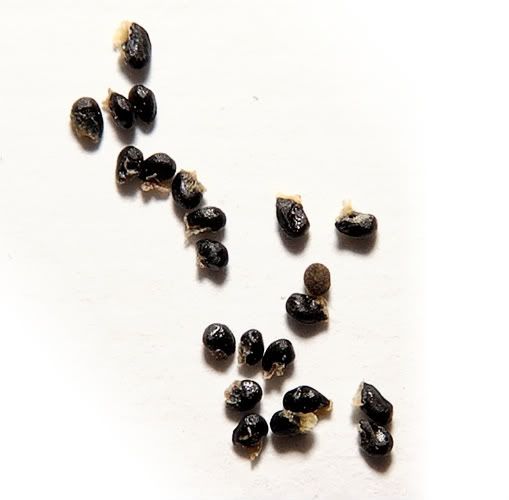
This is an extremely slow growing cactus. Many collectors want it and big plant is very expensive. Many keep it for the beauty of its form. Step two You have to sow the seeds and take a cutting for the stock. It's easier if you make sure the stock is rooted and growing before you graft. The right time to make a graft is the time when the stock is growing; spring and summer. The seeds was sown 2009-04-18, and they where only 3 month old when I picked out some seedling to graft.
Step three Time to graft! Make sure you have water the stock the previous day so it's not thirsty. You need a clean sharp knife. I use a paperknife and make it sterile in boiling water. Then you need a sterile place where you can cut the seedling. A clean cut of the stock. 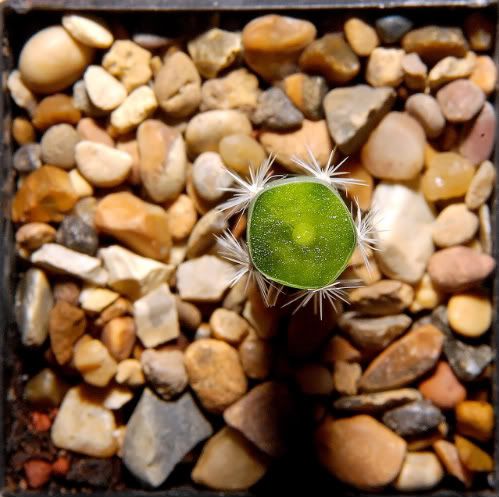
The little ring in the middle of the stock is the vascular part and it has to make contact with the same little ring on the scion (graft). It's hard to tell where it is on a small seedling, but it is in the center of the plant. 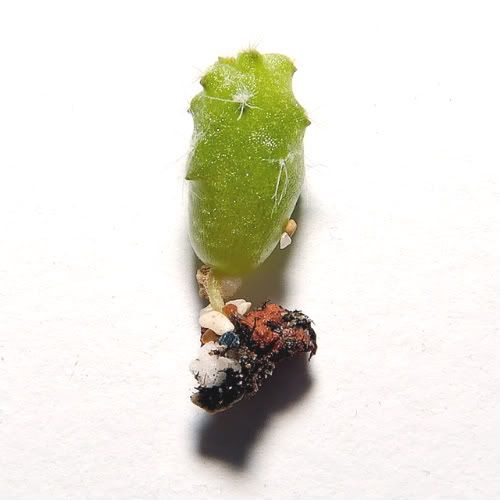
Make sure you press gently on top of the graft to remove all air bubbles and make an all over contact. If the seedling is small it will glue it self to the stock. Finish! Now you have to make sure it will not dry out, and I put mine under a transparent jar turned up side down. To make sure that the humidity not drop to low or rise to high I put a digital meter inside. For me it works fine with humidity between 70 and 80%. I store the jar in a light place. No direct sun light. Room temperature is preferred. It remains in that environment for two weeks, and then you drop the humidity day by day. Then it can take some sunlight, in partly shadow. I put mine in a window with morning light.
To be continued... (I will show the growing graft in different ages) Last edited: Wed Oct 21, 2009 12:18 pm This blog entry has been viewed 2033 times
Why graft cactus seedlings?
Category: Why? | Posted: Fri Sep 04, 2009 5:20 am Almost everybody has seen a grafted cactus somewhere in the store. The most famous one is the Gymnocalycium mihanovichii cv. 'Hibotan' or Ruby Ball, the one that looks like a red lollipop. That special hybrid has no chlorophyll so it has to be grafted or it will die. It uses the stock to process sunlight and the roots to get water and nutrition. In other cases, why graft cactus seedlings? Here are 5 different reasons: 1. The climate you live in can not give that specific genus or species the heat, sun or humidity that it need for the root to thrive. 2. You want some really slow growing species to grow and flower very fast. 3. Some species produce many pops when they are grafted and that is one way to make real clones of that plant. 4. There are species that are really difficult in the beginning after they have germinated. To prevent that all dies (as usually) you can graft. 5. You want to jump ahead five years and de-graft the plants when they are big enough. My reason is the last one. I want to jump ahead with some of my seedlings and save five years of growing time. When it's big enough I de-graft it (cut it of the stock and re-root it). For a nursery it is essential to grow big plants in short time and then sell them. For me it's just time-saving. Last edited: Sat Sep 05, 2009 6:17 pm This blog entry has been viewed 709 times
Comments (0) | Leave a Comment | Permalink
And finally the Aztekium ritteri flowers
Category: On my windowsill | Posted: Thu Sep 03, 2009 6:17 am Yesterday was a rainy day at the beginning, but somehow this little fellow seems to like it under my artificial light and open the flowers anyway. The flowers only opens for two days, and the first day just one of the buds opened. But the second day both open. 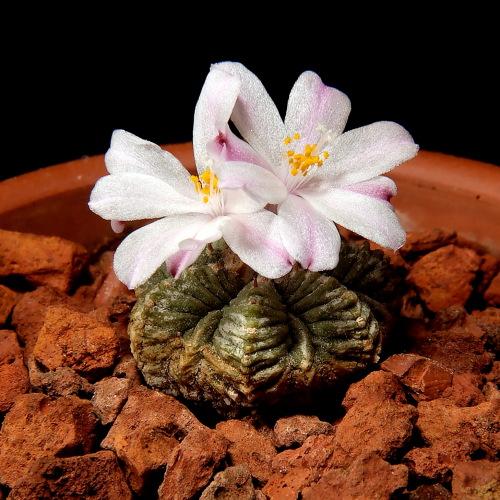
Aztekium ritteri ( photo / image / picture from Christer Johansson's Garden ) I have the plant on a shelf in my window, and it's a little crowded there now :) In this image the Aztekium ritteri flowers, and it was earlier this summer. The size of the clay pots are 5cm (2"). 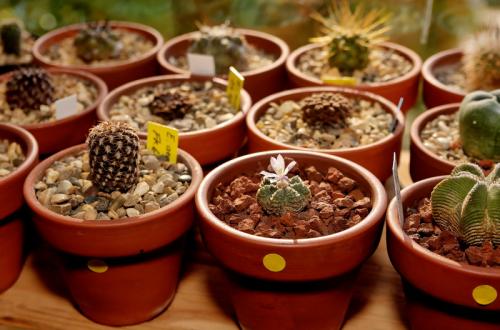
Windowsill ( photo / image / picture from Christer Johansson's Garden ) Now I have seen that my Lophophora buds up again, for the third time this season. This blog entry has been viewed 1341 times
Still waiting for the flowers
Category: On my windowsill | Posted: Sat Aug 29, 2009 12:31 pm These two plants always have buds and flowers, but they are very nice anyway :) 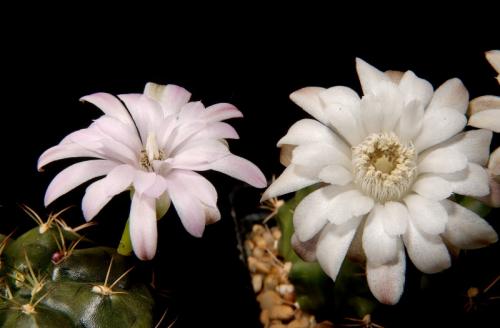
But the plant I am waiting for right now is this little fellow. Aztekium ritteri 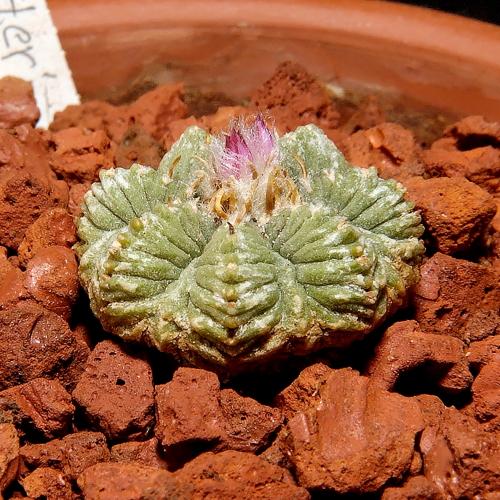
It's only 15 mm wide and grown from seed since 1994. The flowers looks like they going to be pink, but they are white. This one has flowered before, but only with one flower at the time... This blog entry has been viewed 522 times
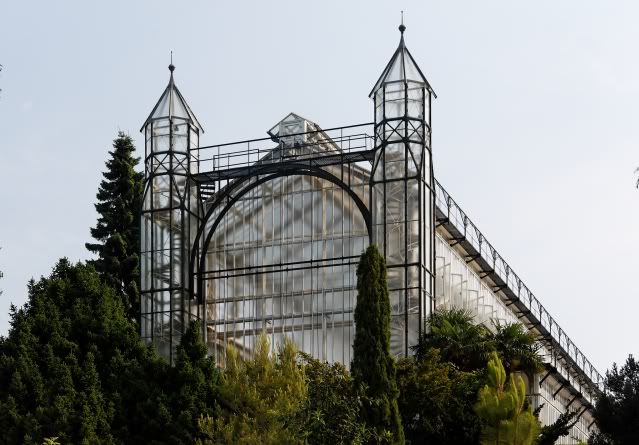
Copenhagen botanical garden
Category: Parks and gardens | Posted: Thu Aug 27, 2009 5:11 pm This trip was a short train-trip over to one of our Nordic neighbors; Denmark. Copenhagen have some really nice parks and gardens to visit, but let us start with Copenhagen botanical garden. This is a very big garden with a lot of different plants in many different growing habitat. There are no entrance fee for the park, but no walking on the lawn! The main gate with the information boot... 
Once you are inside you follow the mainstream and then you will end up here: 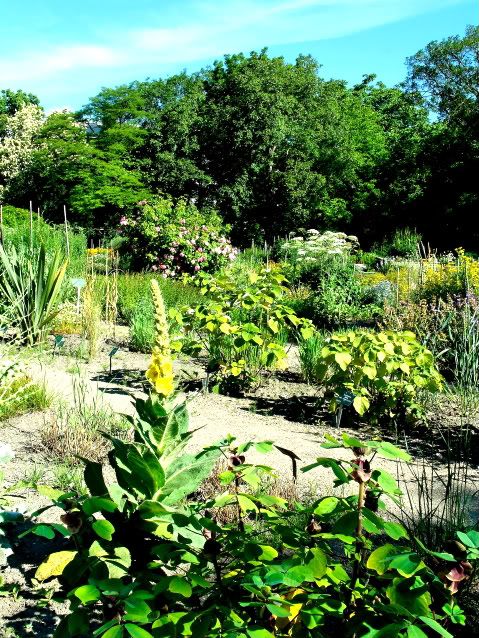
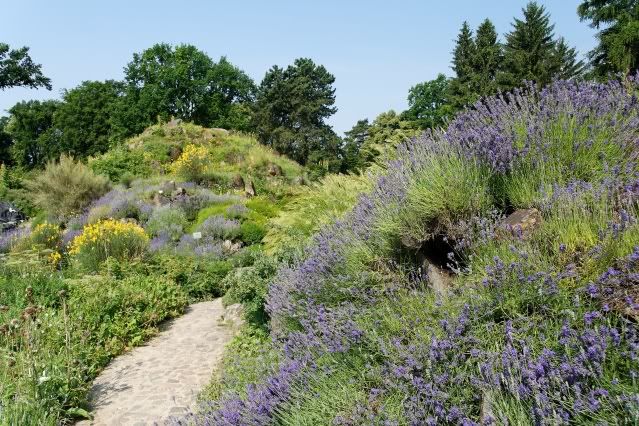
Next path will lead you to a man-made hill filled with plants :) 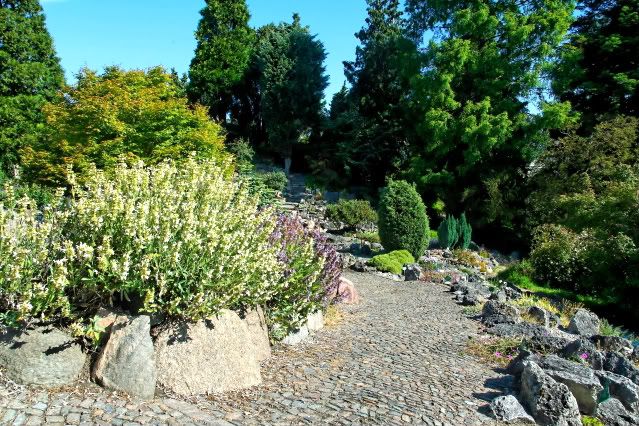
On that hill you will find a lot of plants that like to live in a stone garden. 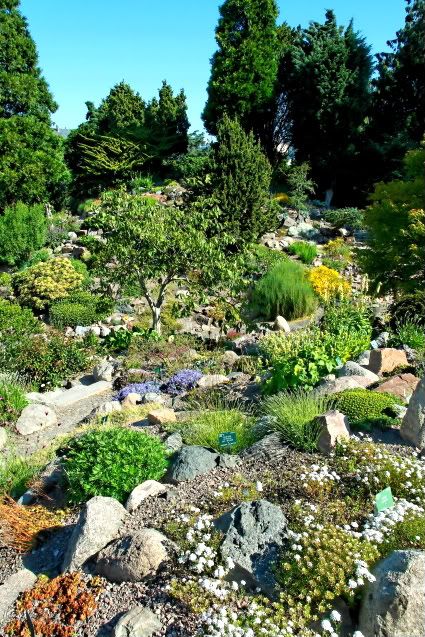
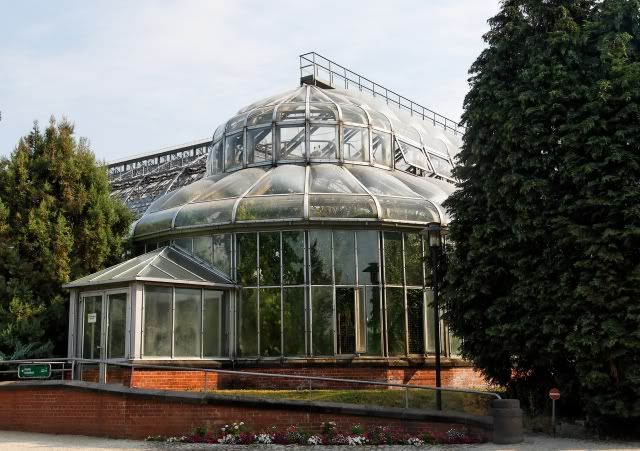
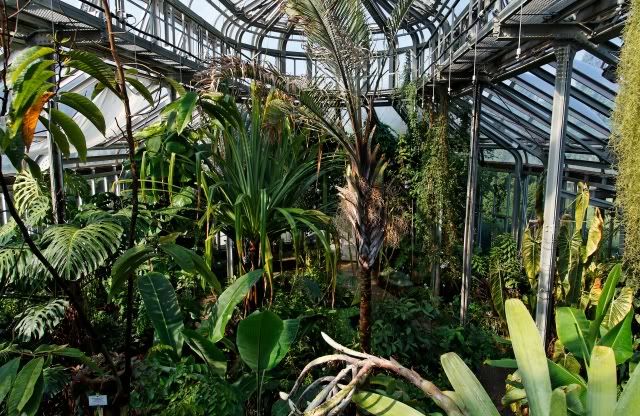
Over the hill and you will se their magnificence glasshouse!! 
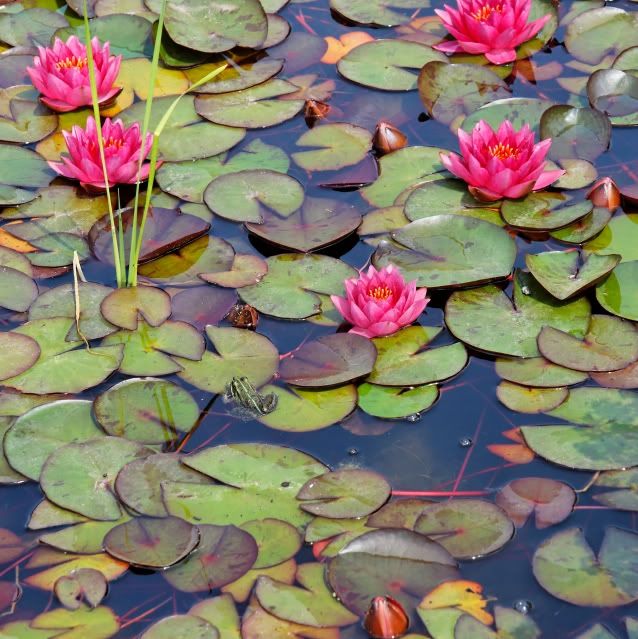
Yes, I know. I am still impressed of it. The water lily pond i front of it is a beauty! Lets go a little closer... 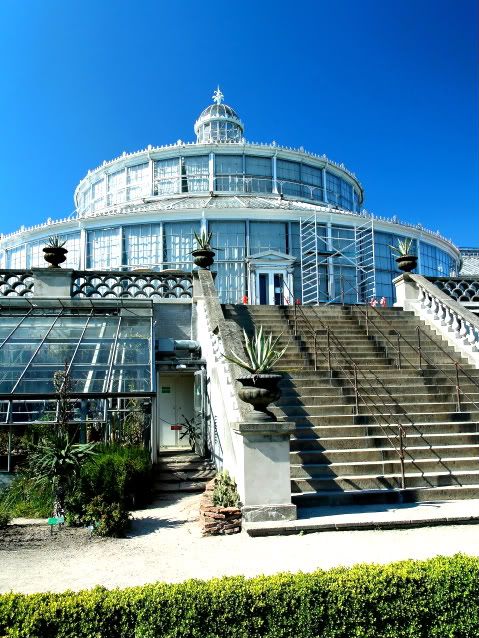
Oh well, there where some repair on the glasshouse, but it's nice that they use white scaffold. Maybe we shall take a look on the other side? 
Now then, lets go inside....ops, it's not open :( The only downer in this park is the opening hour of the glass house! ----------------------------------------------------- "The Palm House Open 10.00-15.00 (every day). Closed on Mondays during the winter season (01.10 - 30.04) Open on Monday in week 42 (public school holiday). Cacti and succulents: 13.00-14.00 (Wednesday, Saturday, Sunday and holidays) Orchids, begonias and bromelias: 14.00-15.00 (Wednesday, Saturday, Sunday and holidays) Alpine plants: 11.00-14.00 (Wednesday). In the winter season closed to the public. The new greenhouse with endangered species: 13.00-15.00 (Wednesday, Saturday, Sunday and holidays)" ------------------------------------------------------- Well, you have to make a schedule! However, lets go inside! 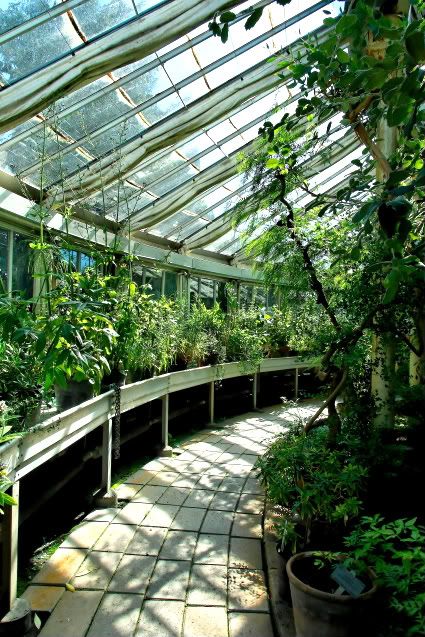
There where not so much in flower inside... 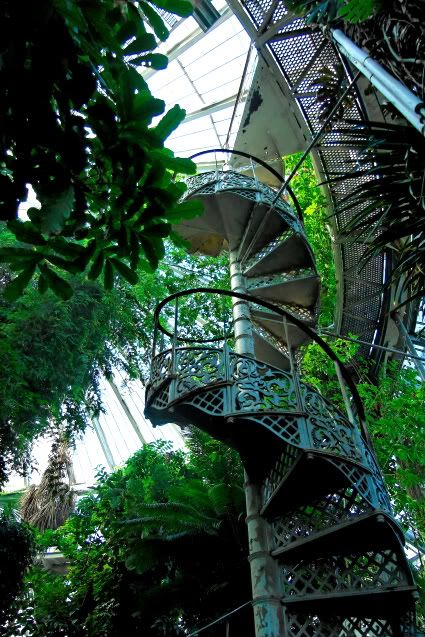
Piiiiuh, it was really hot inside!! A stroll over to another corner of the park. 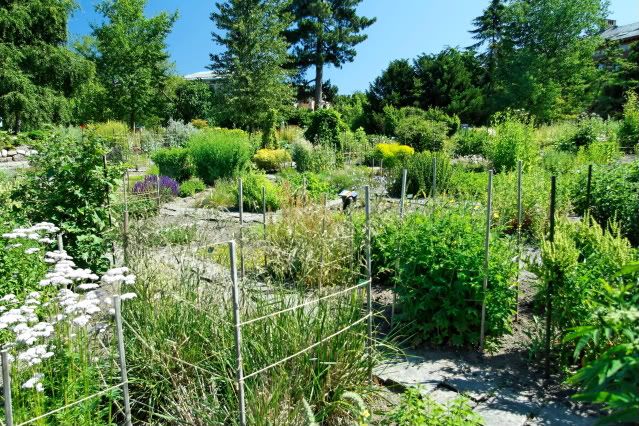
And before they let you in again in another part of the glass house, we stroll around the pond. 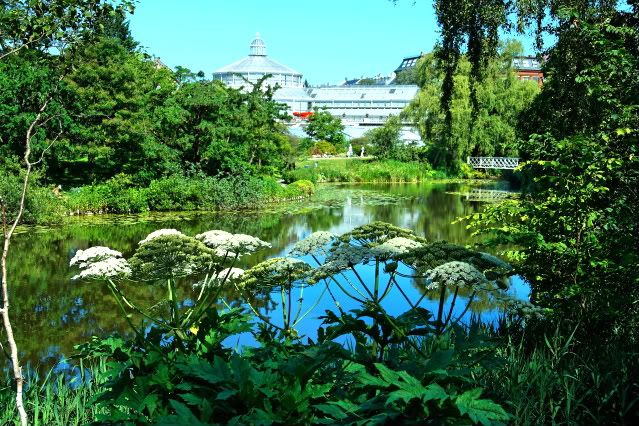
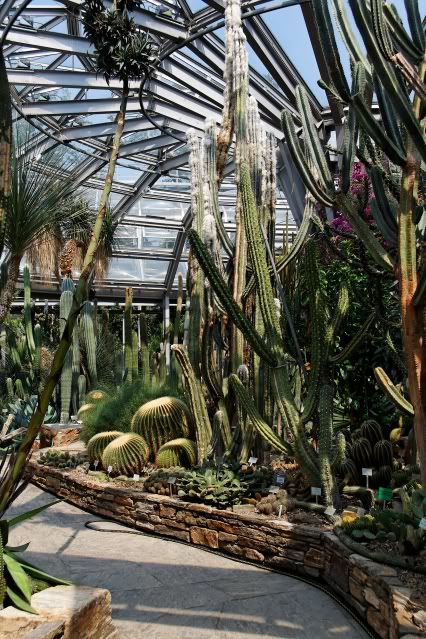
And finally they open the house that I really want to enter! 
Well, that's a stroll in Copenhagen botanical garden :) This blog entry has been viewed 863 times
You're reading one of many blogs on GardenStew.com.
Register for free and start your own blog today. |
|
