|
Recent Entries to this Blog
My new life is shapping up nicely
Posted: 23 Dec 2006 Posted: 29 Oct 2006 Posted: 09 Oct 2006 Posted: 27 Sep 2006 Posted: 25 Sep 2006 All Entries |
Pinkiered's BlogRoses, Roses and more Roses PLEASE!
Winterizing your roses
Category: Roses | Posted: Mon Sep 25, 2006 4:49 pm Its that time of the year. I walked outside this morning and saw my breath...where did summer go? Well, its time to get the roses ready for winter. To do that is simple if you live here in the South. We dont have to bury our roses to keep them safe. All you have to do, is prune them back and mulch well. See my pruning and transplanting blog to see how to prune them back. If you are jsut pruning, just skip the transplant part. You want all the leaves and branches gone. Any branch that are growing off a main branch (which grows off the crown). Any stems or branches that are damaged, rubbing each other or growing against another. I have a rule of thumb when pruning for winter....I heard it somewhere...not sure where but I used it last winter and my rose looked beautiful early spring. I leave three branches coming off the crown if possible. A thick older stem, a thinner stem and a new smaller stem. If its not growing off the crown, prune it off. See pruning and transplanting blog on the measurements to prune back. When mulching for winter, clean out the older mulch and replace it with fresh mulch. I make sure its a inch thick when they are in the ground but when its in a pot, I mulch it 2 inches thick and place the pot on a piece of heavy duty plastic and raise the edges of the plastic with large stones to keep the edges off the ground. This does two things...it keeps a majority of the dew off the plastic so when it freezes, the frost stays away from the pot and it keeps the ground under the pot from freezing which in turns keeps the roots of the rose from getting damaged from frozen ground. My mom goes one step farther by actually placing a thick layer of mulch on top of the plastic and sets the pot on top. It works well for those who lives near water or gets alot of rain in the winter as North Florida does. This is also the time to stop feeding your roses and to cut back on the watering. Being here in the Deep South, we dont get many long freezes. Usually, as soon as the sun comes up, the ice melts away. So, if my rose is in the ground, I dont have to water as much in the winter. Ill water maybe once every 2 to 3 weeks, depending on the temps(the lower the temps, the longer I wait to water)...unless it rains during those weeks. Dont over water and dont drown it. Just about a inch of water will do. Now if its in a pot, I will shallow water it once a weeks. Meaning about a half a inch once a week. You dont want to water it until it comes out the bottom. Count to 5 and stop watering. Now, if you live in the North or the "frozen" south(where you get snow or it does freeze reg), as I call it, You will have to find a site to help you prepare your roses for winter if they are in the ground. If they arent ,Just place them inside near a window to get its daily dose of sun. I know nothing about overwintering roses where it snows or freezes on a reg basis. Sorry. This blog entry has been viewed 6417 times
How to transplant and prune roses (graphic heavy)
Category: Roses | Posted: Mon Jul 24, 2006 10:07 pm Ive titled it that way because when you transplant your rose, youll have to prune it back like you would when youre getting your rose ready for its winter nap. The pruning is the same on both sides. So just look through and take what you need. Ask any questions you have and Ill be more than happy to help you. Note Some of you might disagree to how I do mine. Let me say here, to save future nasty post, this is how I do did. Ive done it this way MANY times and I havent lost a rose this way. Ive lost them in other ways, but Ive never lost a rose due to a transplant. I am a lazy gardner and will find the easiest way to do something. So, if it works for me, it will work for you IF you follow the steps as they are. ~~editted~~ I know I said I would do a step by step of bushes, trees, shrubs and climbers but with the move this weekend and it wont stop raining, I just dont see how Ill be able to get the pics. Below is for the bush. If you follow those step by step, but keep the prune back inches in mind for each, youll be able to prune and transplant any kind of rose! The only thing different is the amount you prune back. YOU CAN DO IT...I KNOW YOU CAN! ~~edit done~~ Im starting with the bush. What you need to know BEFORE you get started No matter what kind of rose you are moving, there are basics to follow regardless. 1.You cant not just dig up the whole bush and replant it without taking the steps to insure its survival. 2.The root mass MUST be larger than the stem mass. You want more at the bottom than the top. If you have more stem mass than root mass, the rose doesnt have the roots to insure that it gets enough food and water, in turn ,energy, to recover from the shock of a transplant. This is VERY important to remember. 3.Regardless if you are transplanting from the ground to a pot, from the ground to the ground OR transplanting from a pot to the ground, you should follow these steps to insure a healty happy rose. There is one rose I didnt prune back when I moved it from the store pot to the ground and that is my shrub. She dropped all her leaves and in the 2 months Ive had her, she has yet to recover BECAUSE I didnt take the time to prune her back. Concider it a lesson learned. ;) 4.Never never NEVER, leave your rose roots exposed to the elements!!! When you start a transplant, follow through! Dont stop in the middle of a transplant, leaving the roots exposed! Your rose is having enough stress being transplanted, dont add undue stress to it. 5.When pruning back your roses, trying to figure out how far to prune it back can be confusing. Heres a simple way to do it... Intervals of 9 -For ALL rose bushes, prune it back to 9 inches of the crown (the knot where all the stems are coming from at the base of the rose bush). -For a small climber(up to 5ft), 9 inches from crown -Large climbers and ramblers (anything over 5 ft)18 inches from the crown. - small shrub, 9 inches from crown -large shrub, 18 inches from crown so on and so forth...you get the idea. Below you will find a easy to use guide on transplanting a rose bush. There are pics and detailed instuctions so you should have no problems transplanting. Now I am transplanting from the ground into pots because Im moving but like I said before, take what you need to do whatever kind of transplant you are doing. I have 13 roses in the ground to move and dont want to just leave them to the next person. What you need for a transplant Sharp pruners gloves shovel root hormone mulch wood glue gravel (if your potting) pots (if your potting) extra pots (for gravel, debris and soil) Tip about pots If you are making a move and you will be planting your roses into the ground or in my case, keeping them potted and you dont have alot of money to spend at the moment on good pots, dont fret! There is an answer to your problem! Grab your phone book and write down the names and addresses of local nurseries. DONT CALL! Drive to each of them and ask them if they have any disposible pots. These are the black plastic pots that thier plants are shipped to them in. For roses you will want up to a 5 gallon. The price is right esp if you are moving and dont have the money to spend on the more expensive pots. For a used disposible pot (5 gallon)ran me $.96 per pot. For a new one, it ran me $1.19 per pot. I even got a 50 gallon tub (too big to be called a pot! HAH!) used, for $5.50! Now my roses will fine in these for a few months. This isnt a pot to keep them in forever. Because they are black you will need to water your roses once to twice a day depending on the heat in your area. This is something to think about for other gardening projects. I had to 4 different nurseries before I found someone who had them. Summer to late summer is the best times. Their plants have either grown out of those pots, died or been transplanted into a decortive pot. example of the pots I bought 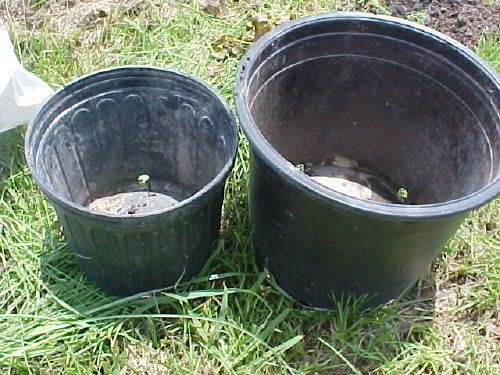
I am using my New Years as the transplant suject here. Let me note here that this is NOT the ideal time to transplant because it during the summer blooming cycle for roses. I have waited until the last min to do this so I can enjoy my roses just a little longer. The idea time to transplant and/or prune a rose would be after the summer blooming cycle is over. In my area is about Sept. Check your area zoning to find out when you should prune. That would be the ideal time to transplant too. Now lets begin the transplant!!! And try not to cry when you see my beautiful rose blooms! I teared up! OK My New Years as it looked before I started. 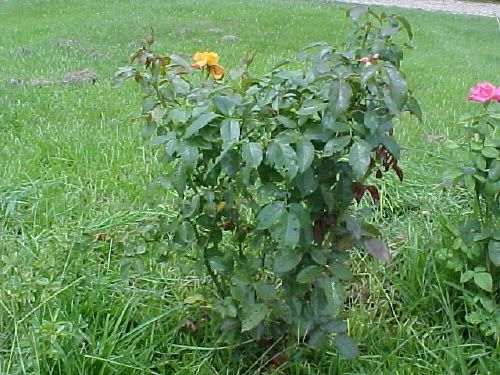
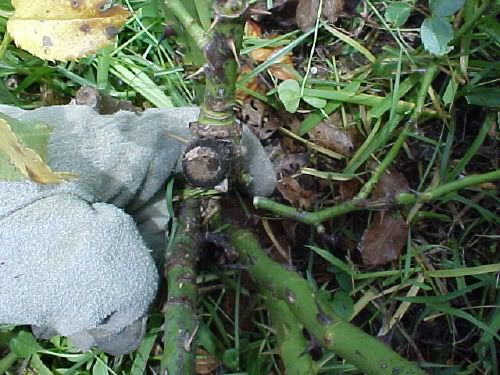
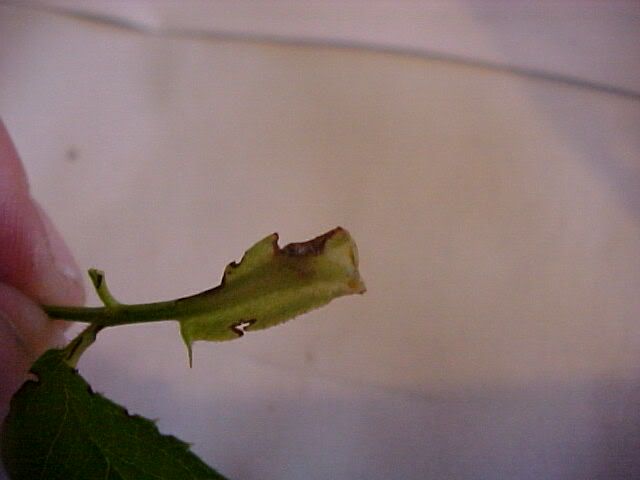
pretty, huh? Step 1 Before you start cutting away, find the inches above that it should pruned back to. In my case, as its a bush, 9 inches. Now, when you go to prune, you want to ALWAYS do it right above a leaf. Heres why. If you look closely at where the leaf and the stem come together, youll most likely see a bud. This bud will leaf or branch out after you transplant. Cutting it back to there will insure that the energy is directed to those areas and grow. See below pic If you look were my finger is, youll see where you should cut. 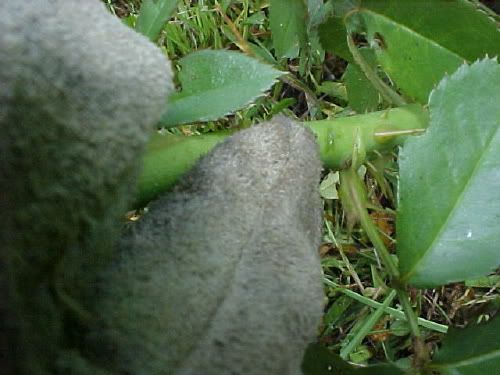
When you cut, you want to do it an angle, not straight across. This is the perfect angle. 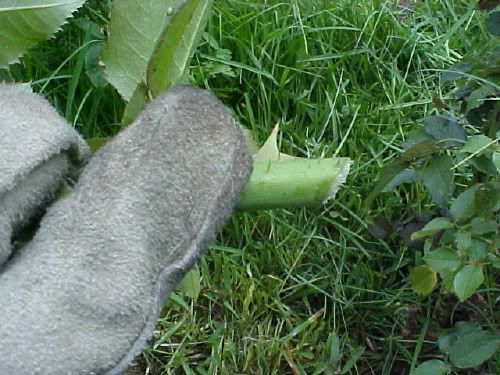
Now dont worry if your cuts arent clean. You can go back after the transplant and clean up the cuts. Step 1- pruning away the larger stems (dont worry about the smaller stems and branches just now.) 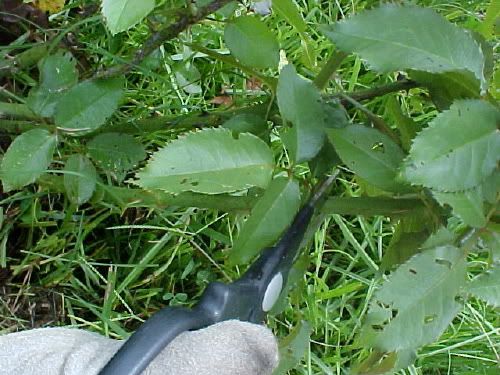
Be sure to have a pot or container handy to put your debris in. 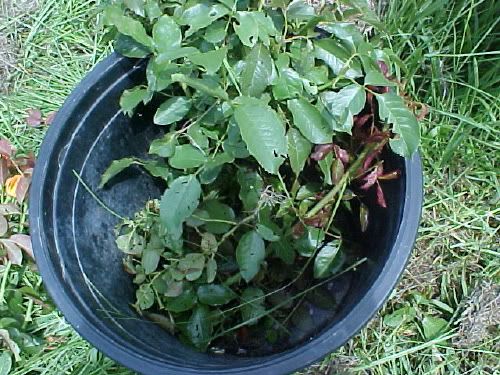
After cutting the larger stems off, this is how it should look 
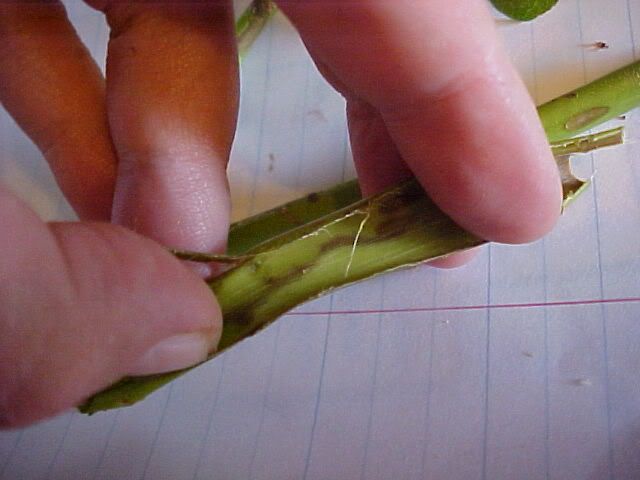
Now we will cut the smaller branches off. When you cut these, do so as close to the main stem as possible. Note here... you dont want branches coming off the main stems after a completed pruning. It goes back to the energy needed to recover. And yes I have branches on this one but Ill clean it up once its potted. 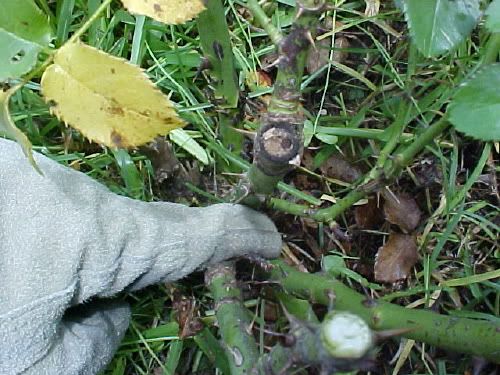
Now time for the leaves to come off. You dont need your pruners for this. Grip the leaf stem close to where it comes off the stem. (during this step, youll start seeing the buds I was talking about before) 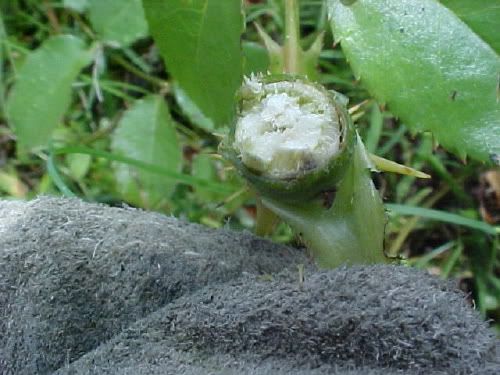
Now very gently pulled the leaf stem down and it will start coming off at the "seams". Repeat until all the leaves are off. Take care not to just jerl the leaf branches off as you might rip the main stem. 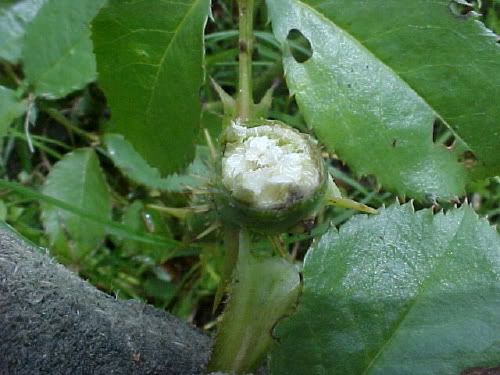
and its off 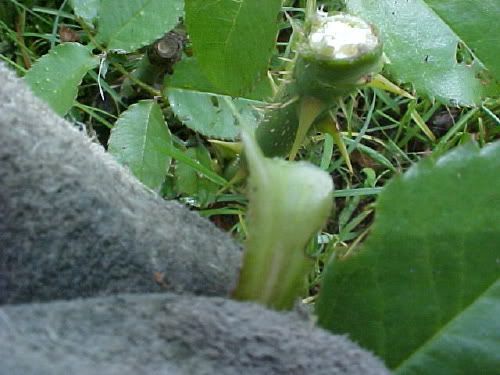
Now if some of the leaf stem is left behind, no worries mate! It will die and fall of on its own. Once all the pruning is done, this is how it should look. You want to prune any stems that cross over another or is rubbing against another. You want only straight ,thick stems left. 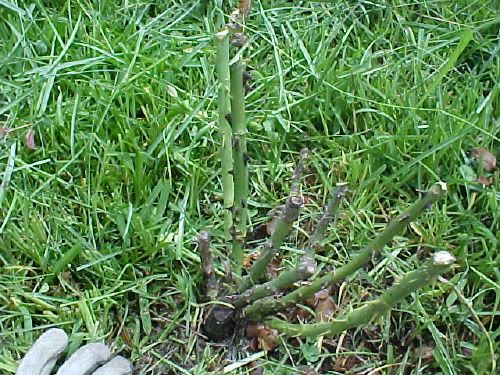
Now its time to dig! A rule of thumb when digging your rose up. Dig as far as the farthest stem sticks out. And dig that far all the way around. I start with the stem sticking out the farthest and level the shovel there 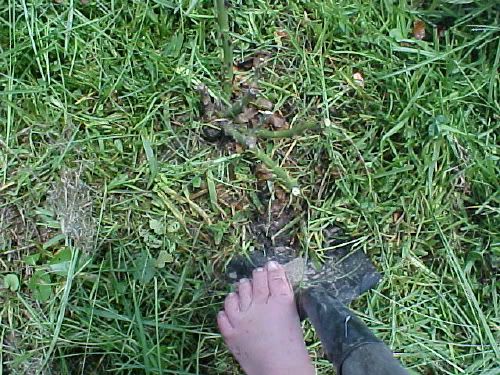
And yes, I garden barefooted...another reason for ..
Now when you start digging, dont just shovel dirt out. Pull the blade of the shovel in the ground as far it will go and gently pull the handle down. Youll see the rose move...you are going to lever it out of the ground. The point is to NOT cut or break the roots. Note the angle of the shovel where its in the ground. I placed it in the ground with the hadle straight up in the air. Once in the ground, gently angle it down until its almost even with the ground. 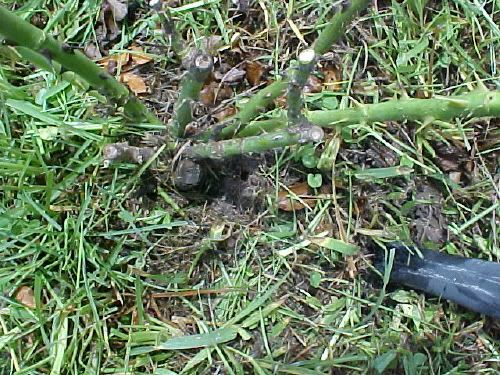
When you complete the circle around the rose, You will find you have complete circle of loose soil. Take your shovel and slid it under as far as it will go And gently push the handle down. 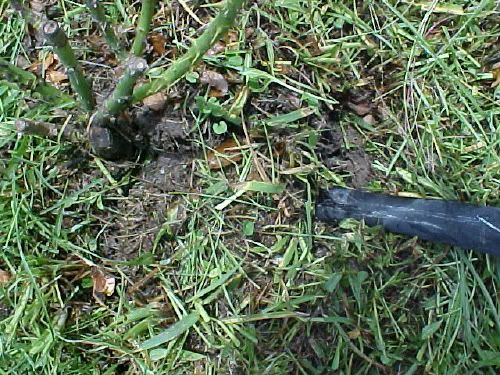
Once you have it under, youll see the whole area you just cut into will lift up. Now to get it out the ground. Grabbing the rose UNDER the crown...my finger is on the crown 
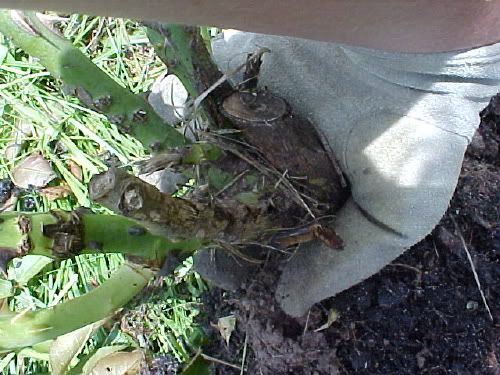
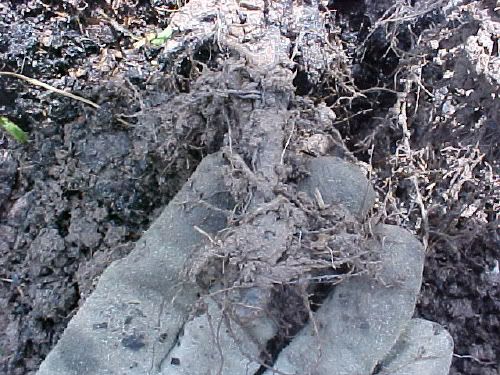
Grab it firmly (you dont want to drop it), and at the sametime pushing the handle of the shovel down, lifting the rose out of the ground 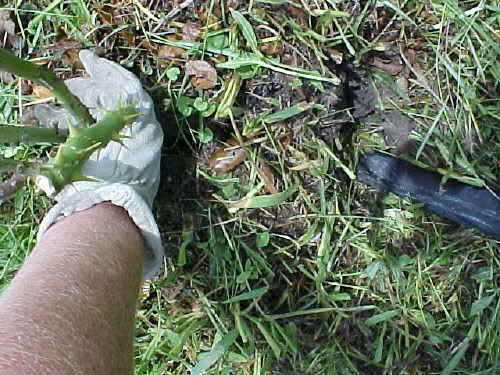
WAAA LAA! And I didnt cut or break a root! 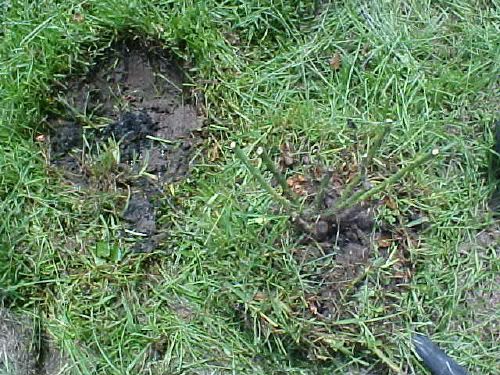
Ok now to get the grass off the rose The easiest way I have found is to grab a handful of grass and pull it straight to the left or right away from the crown. This will pull the shallow roots of grass away from the deeper roots of roses. 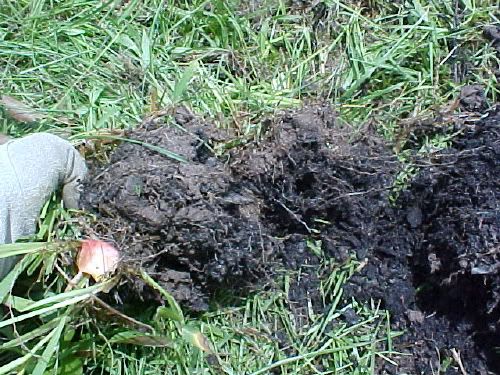
Now we must find the longest THICK root. That will determine the size pot or hole you will need. Try not to cut these larger roots. They dont bent will and will most likely break if you try. 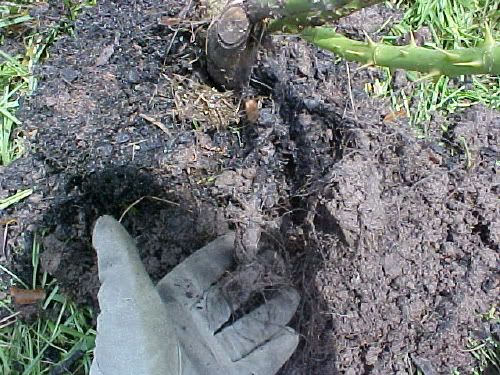
Now its time to find the pot that fits! This one is too small. You dont want to shove the roots into the pot..that means its too small. It needs room to grow. 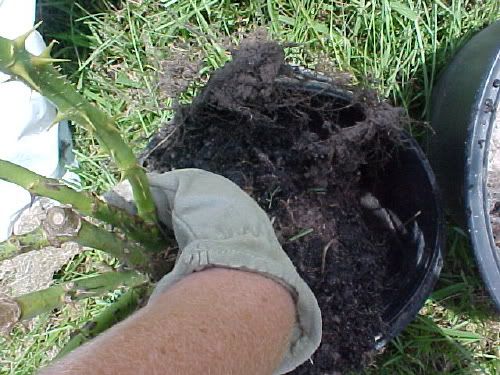
Now this one is just right! Notice the space between the edge of the pot and the longest roots. They have room to move and grow. 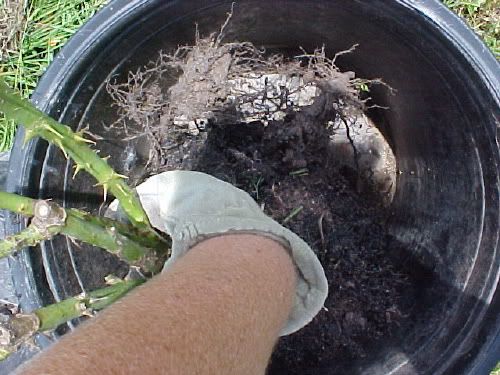
Now set the rose to the side just for a min. You can do the following BEFORE you start digging but I do this as I go along. You want to put gravel into the bottom of the pot. If you put soil straight into the pot without gravel, you run a risk that the soil will clog up the holes and excess water cant run out, in turn rotting your roots. Concider gravel in the bottom as preventive meatures. You can buy bags of gravel at any home improvement store. Ive seen them at Lowes and Home Depot. I have a ready source at hand!! The lane in front of my house! 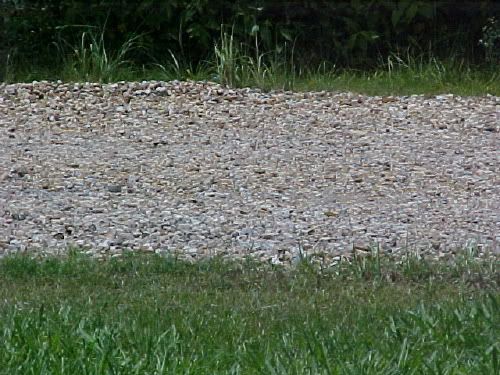
Now you want enough gravel in the bottom to cover the holes.. 
Now once you have the gravel in place, you want to add soil over it. Fill it about 1/3 full. You want to able to set your rose at the right level in the pot. Depending on where you live (once again, look into your zoning), depends on where the crown of the rose goes. I live in a warm area so I leave my crowns above the ground about an inch. If it freezes in your area, you want to protect the crowns, so bury the crown no more than an inch underground. The stems grow out of the crown and if you bury it too deep, youll smother the stems. Perfect height. Youll notice that the crown is almost even with the top of the pot. 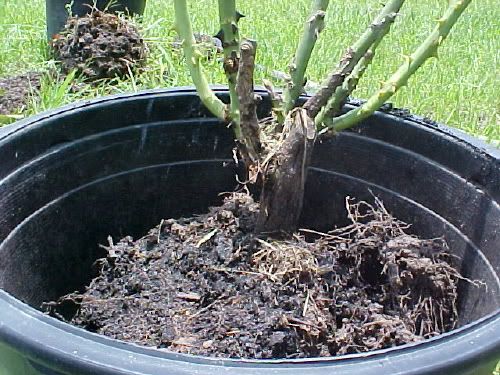
Now its time to fill 'er up! I use another pot for this so as not to just dump soil onto the rose. You want about 2 inches of space between the soil and the top of the pot. 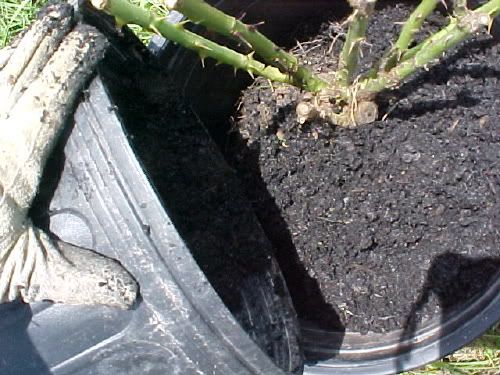
And this is how your bush should look once she is transplanted, either in the ground or pot. 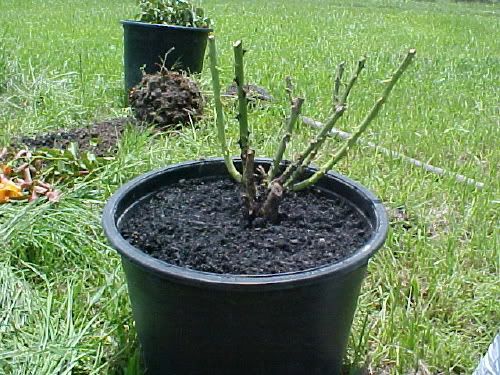
Now if your crown is a little high, theres no reason to yank it out of the pot and start over. The next step, either potting or ground, is very important to the survival of your newly transplanted rose....... mulch! This will keep the moisture it needs in the soil and in turn the roots. I use dried grass clippings. Whenever I am potting a rose...or any plant for that matter, I will fill up the pot the rest of the way with mulch. Once its showing signs of recovering from the transplant, I will remove about an inch of the mulch. When you mulch, you want to leave about a half inch to an inch space between the main stem of the rose (the one UNDER the crown) and the edge of the mulch. She needs room to breathe! 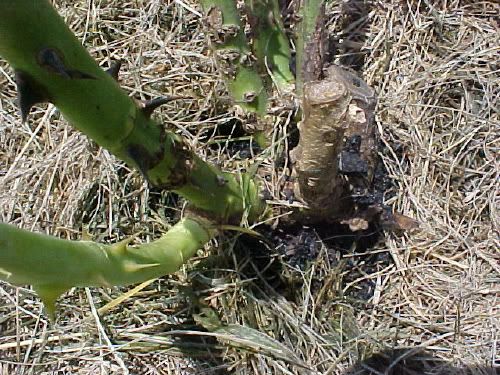
Now is the time to tidy up your transplanted rose. Clean up your cuts. Add wood glue to the tips of the cut stems to prevent borers. Add a root hormone to help the roots recover from the shock of a transplant. I use this on all my trasplanted plants and flowers.Use whatever brand you want. 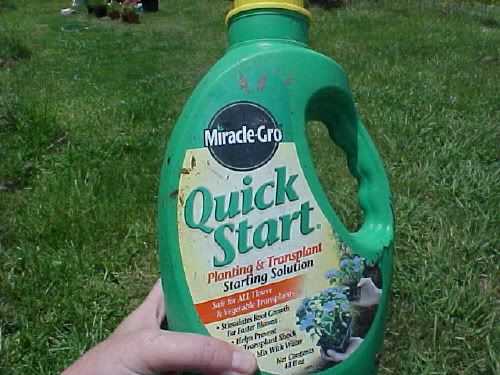
Note about mulching your roses. If you are using organic mulch such as grass cutting, you need to change it out every so often. I change the grass out at the end of every season. And an extra thick layer for winter. Ok thats it!! easy, huh?! If you have any questions, just ask. You wont know the answer unless you speak up! Until next time! Last edited: Fri Jul 28, 2006 2:56 am This blog entry has been viewed 171921 times
Transplanting roses blog to come
Category: Roses | Posted: Mon Jul 24, 2006 4:24 pm For everyone out there that come to peek at my rose blog, I will be starting a How to transplant your roses blog. Its becuase, I am moving and have to transplant 13 roses.....you cant see it but whenever I say that, I roll my eyes. LOL Oh the work to come! I will be including step by step pics and details so to make it easier for you to follow and transplant your roses with care. Until then, May your roses thrill you with every bloom! This blog entry has been viewed 1513 times
My climbing Golden Glow is in bloom!
Category: Roses | Posted: Thu Jul 20, 2006 4:13 pm I decided to post them in my blog instead of in the board. These blooms are so much prettier than the spring cycle blooms. I guess they needed that rest. But it was well worth the wait. These buds have an orange mixed in with the yellow that wasnt there last cycle. Very pretty. 

Dont mind the bug munch marks! I forgot to spray again this Monday. And the little buggers did a number on the Bluegirl and Chrysler Imperial.I thought I had the worlds smallest Chrysler bloom until I saw the beetles. My Perfume Delight is budding well so Ill have pics of it soon! This blog entry has been viewed 923 times
Lesson learned
Category: Roses | Posted: Tue Jul 04, 2006 2:04 pm Two weeks and one day ago, I sprayed my roses and cannas for the Leaf Beetle that was causing so much grief. I have the date circled and everything. It rained yesterday so I couldnt spray and today is the 4th of July so last night I thought, ok Ill just spray on the 5th when I get home.They should be ok for a day. WRONG! I went out this morning and the beetles are back in force!!! One day after I was suppose to spray! They just dont play! They ate all the blooms on my Don Juan, Chysler Imperial and Eurpenana. They really seem to like the red roses. They ate two off my Golden Masterpeice tree and one off my Hot Cocoa. Since my Knockout is covered in blooms, I didnt count the ones eatten but it was quite a few. If that wasnt enough! They had started munching on my orange and hot pink cannas!! I sprayed today. Golden MasterPiece 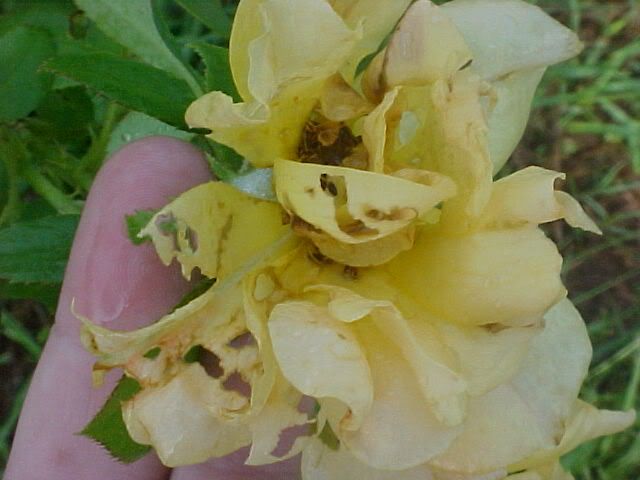
This blog entry has been viewed 846 times
Wazit??
Category: Roses | Posted: Thu Jun 22, 2006 8:22 pm This is my Wazit blog. If I dont know what it is, Ill place it in this blog until I figure it out. This pic is of what looks to be tiny yellow eggs inside the leaf walls. I noticed it because of the dicolortion of the underside of the leaf. It was purple and the closer I looked I noticed a very slight swelling in the area. I touched it and it popped open to reveal the tiny little yellow eggs. This is what it looked like from on top of the leaf. 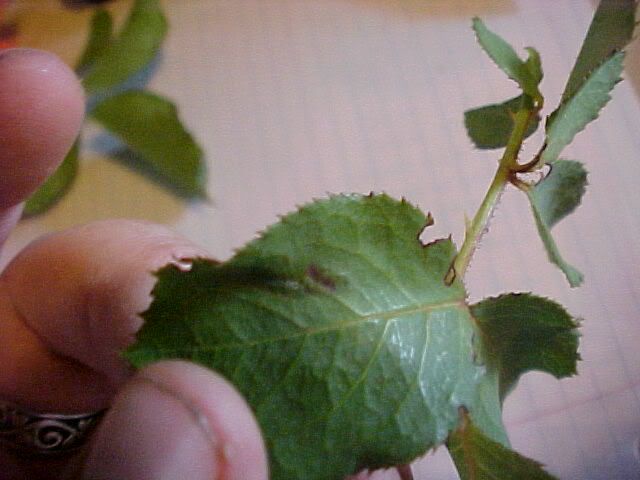
Underneath 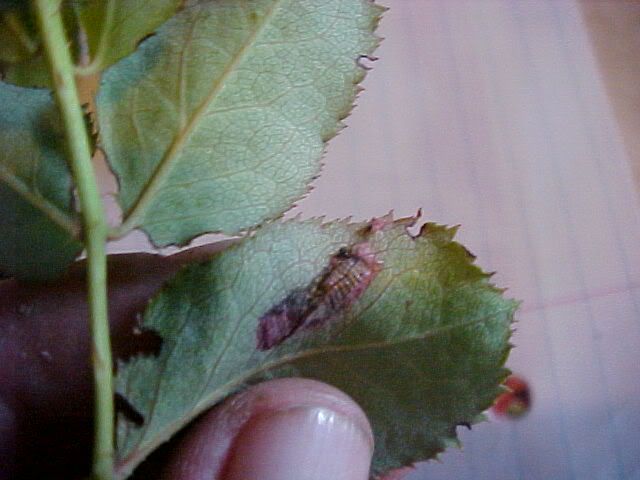
The eggs between the walls of the upper and lower walls of the leaf. 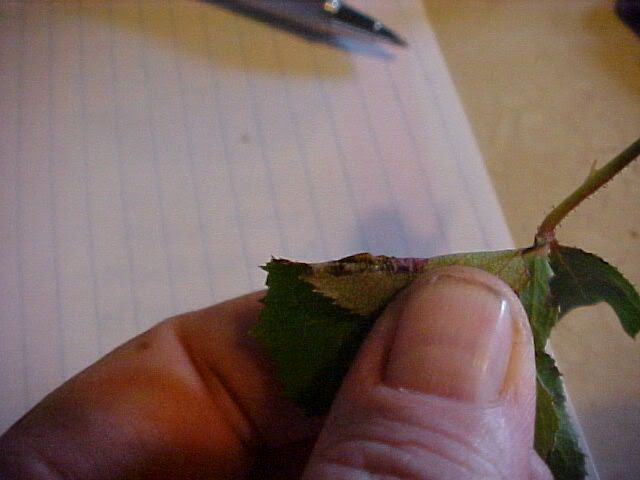
I think this is butterfly eggs. Looks like it. But the eggs are hatched so I may never find out. If they are butterfly eggs, I never saw the catapillars. 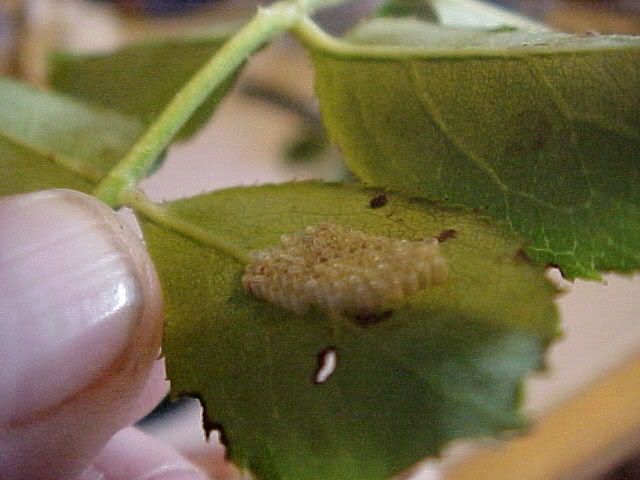
This is puzzling. The white/gray is a waxy ,shiny stuff that you cant scrap off with your finger nail. It feels like wax. Its only on one rose, the Perfume Delight. Now that rose isnt growing very well. It doesnt look sick. But looking at it you would think its a healthy plant but its stunted. Its only on the stem. 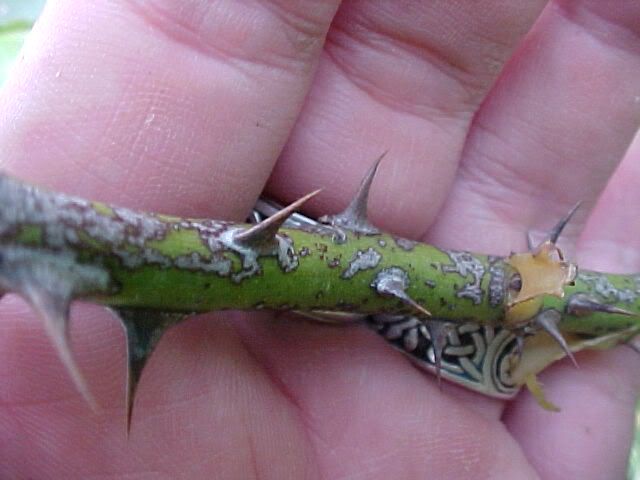
This blog entry has been viewed 652 times
Comments (0) | Leave a Comment | Permalink
My bi-weekly inspection of roses
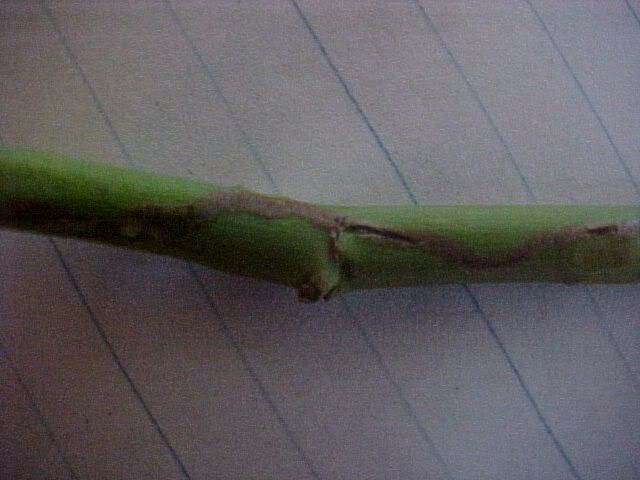
Category: Roses | Posted: Mon Jun 19, 2006 5:47 pm It really doesnt seem like its been two weeks since the last bi-weekly inspection. Its because Ive had a daily battle with the beetle thats been munching the roses. But it was so I chemically (because of the beetles) sprayed the roses and tomorrow I will feed them. Moving around the roses, everything looked good except for minor damage to some of the leaves (munched on). But when I came to my Climbing Gold Glow, something caught my eye. Its on the only two stems over 4 ft tall...the only two stems that are starting to climb. 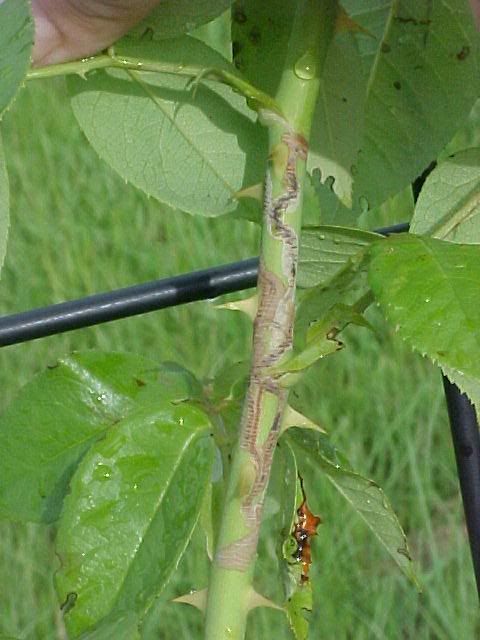
I cut one of the stems off (the smallest)to do some investagating into find out what it was. I first pulled off all the leaves and thorns. I was able to see the tracks better this way. It covered about 14 inchs of stem. I found the point of entry...or could be exit but the fact thats the only place where it went into the "wood" of the rose, makes me think the eggs were laid there. It went up about 6inches above the POE and about 8 below the POE. Whatever insect it was used the area where one of the thorns had been pulled off or was torn off when I trained it to the trellis. Point of entry. 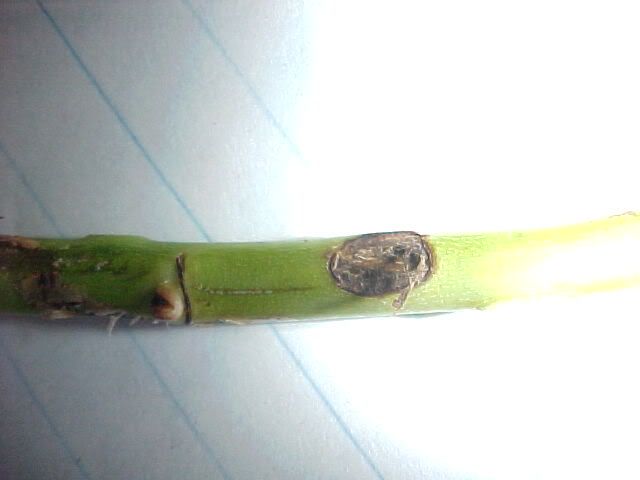
I took a smoothed edge knife and gently scratched the area. The skin around the area where the "tunnel" was gave away easily. Heres the "tunnels" 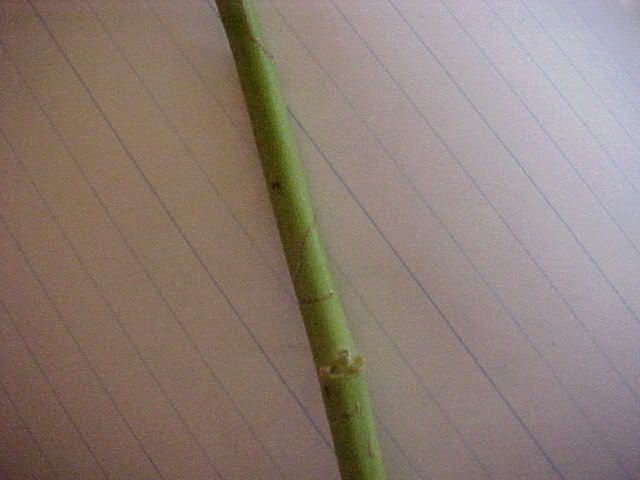
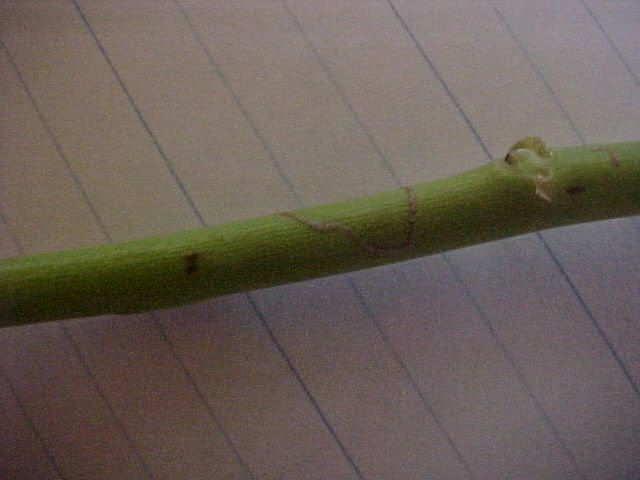
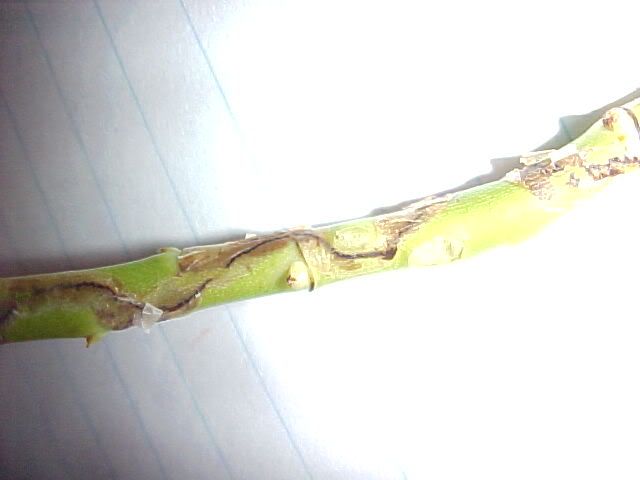
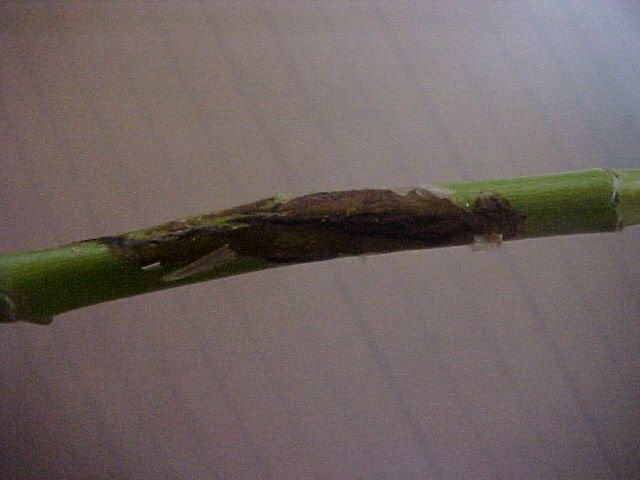
It doesnt appear that this "borer" fed off the rose stem. The tunnels ran to the leaf stems and every leaf stem had been chewed at the base....but just the base...... puzzling, I know. 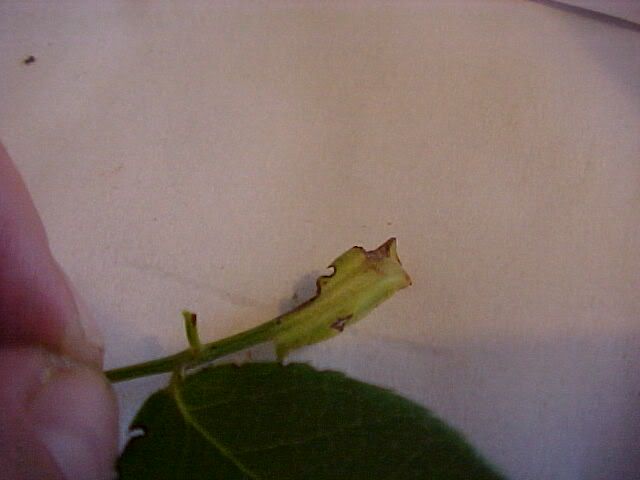
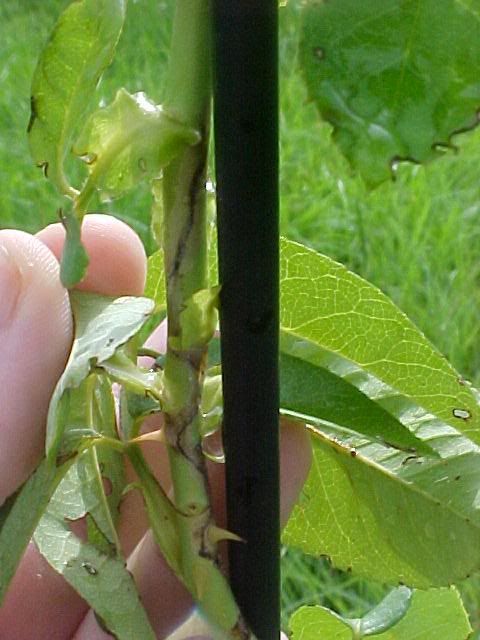
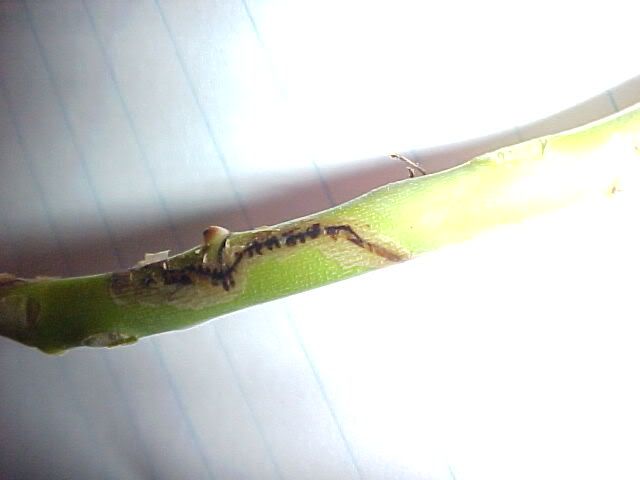
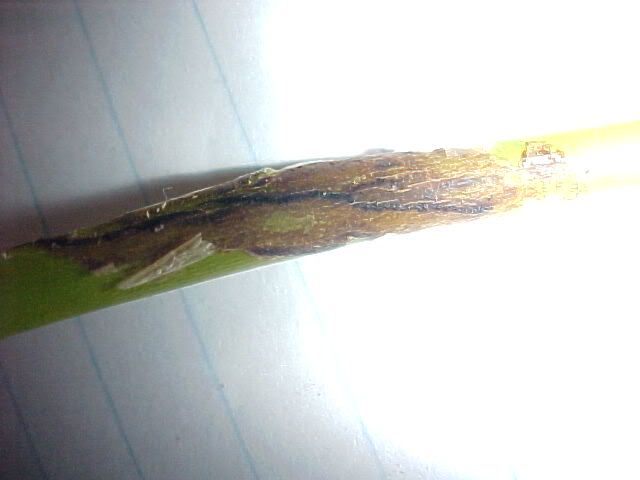
I scraped away the tunnel hoping to find the little critter but nothing unless he is just so small I cant see him. I then skined the rose stems in section to check the wood. Like I said before except for the POE, the wood was clean and free of tunnels. The tunnels were only skin deep. Here you can see the POE in the one closest to the bottom of the four. Its the dark area at the top.. 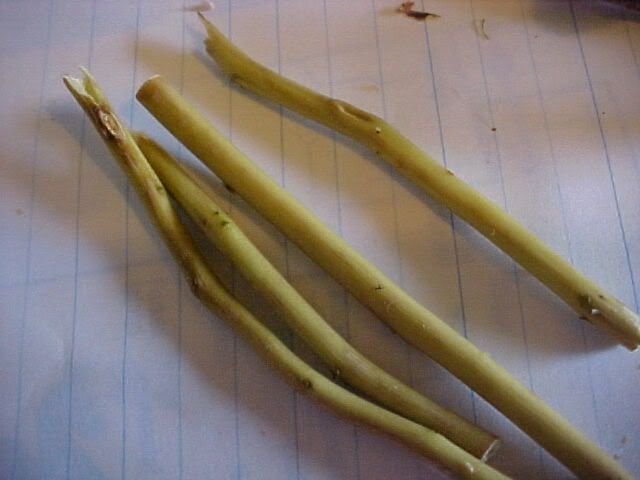
Heres the skin from the inside... You can make out the tunnels. 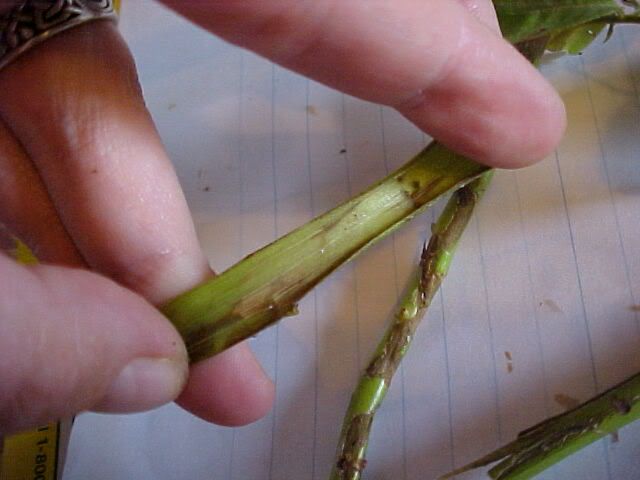
I didnt cut the other one off. I want to see what comes of this as I havent found the insect doing this online. Lets hope that it isnt a borer that will end up in the crown of my rose!!!! If you happen to know what this is, please let me know!! This blog entry has been viewed 763 times
Leaf Beetle on roses
Category: Roses | Posted: Thu Jun 15, 2006 7:43 pm This is a type of Leaf beetle. Because of the exetreme damage it did to my roses Ive decided to start a blog on just this critter. 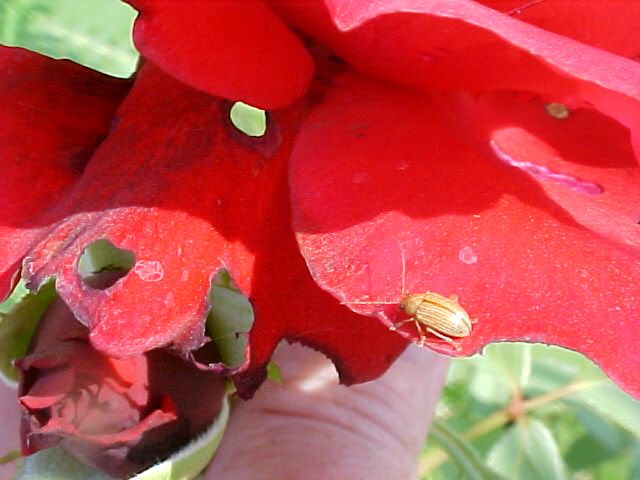
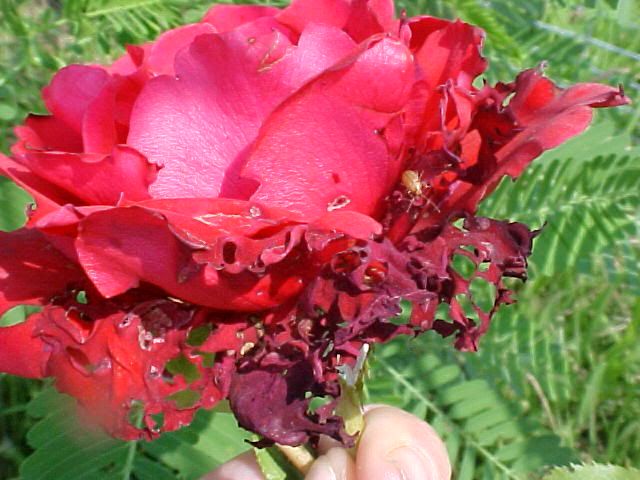
Damage done to roses 
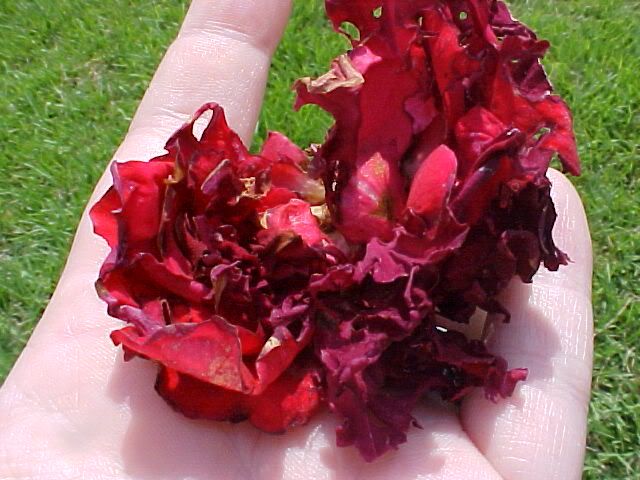
If you see damage done to the rose that looks like the roses above, pull the petals off and you will see this beetle inside. I was testing different organic treatments on my roses. The Don Juan wasnt treated and it went through the blooms in a matter of two days. I treated all my roses with a health does of cayenne pepper spray yesterday. I get up this morning and went to check on them. Not a bug anywhere on my roses EXCEPT for this beetle. Over night , it took out the blooms on my Blue Girl, Knockout Rose (which is pest resistant), Gold MasterPeice , Cyrstal Fairy and all my mini roses. It attacks only the flowers and the results are devasting. I grabbed a few samples of the beetle and headed to the closest pest control company. I had a good talk with one of the tecs. He said that the leaf beetle, of any sort, will destroy anything with a leaf or bloom. But this kind is just on the blooms and he says that he nor his co workers have ever seen this beetle before (he kept the samples). I told him about trying to use only organic treatments and he only shook his head. He says that the only thing that will wipe these guys (leaf beetles) is Melothion Liquid. Sadly, I will have to chemically treat my roses. Below is a link to leaf beetles with pics. http://www.uga.edu/vegetable/beetles.html The closest I could come to IDing this beetle was the Sweet Potato Flea Beetle and the Bean Leaf Beetle. Warning! They do bite! Last edited: Thu Jun 15, 2006 9:21 pm This blog entry has been viewed 7901 times
Couldnt wait any longer
Category: Roses | Posted: Wed Jun 14, 2006 9:07 pm I had treated some of my gardens with different types of organic treatment. Theres a few plant scattered around that I hadnt treated. My little experiments, if you will. While I hadnt treated my Don Juan yet. Today I went out to have lookies sees and found this unknown beetle had his whole family and extended family invited over for dinner....main course? My roses. 5 Don Juan roses to be exact. So exetreme measures were in order! The organic recipe I had been using all over the yard(grass only) I used on my roses. I will see if it works. And Ill post the results. Please see my first trouble shooting roses blog for pics of this new enemy to my roses and the damage done. If you happen to know the name if this little guy , please, I beg you, share. This blog entry has been viewed 570 times
Organic treatments and prevention for Roses
Category: Roses | Posted: Sun Jun 11, 2006 10:32 pm This is recipes for organic sprays and ways to treat your roses with. There is nothing here that I havent tried. If its here, it works. Ill add to this as I expermint. Feel free to ask questions or comments. As you learn, I learn. Before using ,please read. ~Spray in the early morning or the cool of evening as plants may "burn" or have a reaction to what you are using in excessive heat. ~perform a test on a small portion of the plant material first, wait 24 hours to observe any negative reaction and proceed if there is no damage. ~more is not necessarily better; if you are not getting good results don't increase the strength of these remedies without testing first. ~target just the area you need to treat. ~when working with sprays or dusts always protect your exposed skin and face. Some of these ingredients can be very irritating to your skin, eyes and mucous membranes, especially any hot pepper sprays. Diseases Powdery Mildew The Vinegar Rinse 2 tablespoons white or cider vinegar (5 percent) 1 gallon water Pour undiluted vinegar into the container of a Gilmour Metering Dial (dial-a-spray) hose-end sprayer. Set the dial to deliver 2 tablespoons per gallon and start spraying. Soak the entire plant, making sure to get the undersides of the leaves. Spray in the morning. Apply once a week as needed until the weather warms up. I use a dial a sprayer. Works like a charms but if you dont have one, mix 2 tablespoons per gallon of water and mix well. Add to hand held sprayer. For Black spot Fungus to fungus spray Mix ordinary fat-free milk with water in a 1:1 ratio and apply it using a spray bottle. Spray the solution directly onto the clean leaves of your roses. The milk-and-water solution coats the leaves and leads to the growth of an invisible--and harmless--fungus. That benign fungus will prevent the formation of damaging black spot fungus. Basic Baking powder spray mix 3 tablespoons of baking soda into 1 gallon of water and spray the roses. PEST PLEASE NOTE: Nothing below works on Leaf beetles.Im told there is no organic treatment for the leaf beetle. please see blog link below for more details on this beetle. http://www.gardenstew.com/blog/e283-63-leaf-beetle-on-roses.html For Japanese beetles Dishwashing detergent jar ~Put 1 tablespoon of liquid dishwashing detergent into a wide mouthed jar. Add 2 inches of water. Pick or knock the beetles into the jar and they will die in minutes. I am using this on my Passion vine to deter all the bugs and it works great. I would think that it works on roses too. Detergent,oil and alcohol spray ~Mix 1 teaspoon of liquid dishwashing detergent with 1 cup of vegetable oil and shake well; then add it to 1 quart of water. Add 1 cup of rubbing alcohol and shake vigorously. Pour this mixture into a spray bottle and use it at ten-day intervals on pests. Cayenne pepper spray The orignal recipe goes as follows: 2 tablespoons of cayenne powder to every 2 cups of water. Shake well and spray on roses coating top of leaves, bottom of leaves, stems, and flowers/buds. I use a dial a sprayer so I had to figure out how to do it as with a dial a spray it has to be liquid so I added 5 tablespoons of cayenne powder to one cup of water. Shook well and poured it into my sprayer. I then turned the dial on 2 oz to every gallon. It does work. I have not a bug on my roses...not even to rest except the Leaf beetle. If you have a recipe of organic treatment and/or prevention, feel free to leave me a comment with the recipe and Ill try it. If It works , Ill add it to my list. Ot if you have tried one of the above recipes and it works for something other besides with it is listed for, please leave me a comment so that I might test it. Thank you!! Last edited: Thu Jun 15, 2006 10:11 pm This blog entry has been viewed 17729 times
You're reading one of many blogs on GardenStew.com.
Register for free and start your own blog today. |
Entries by Category
All Categories
Archives
All Entries |
