|
Recent Entries to this Blog
My new life is shapping up nicely
Posted: 23 Dec 2006 Posted: 29 Oct 2006 Posted: 09 Oct 2006 Posted: 27 Sep 2006 Posted: 25 Sep 2006 All Entries |
Pinkiered's BlogRoses, Roses and more Roses PLEASE!
My new life is shapping up nicely
Category: Pinkies LIfe | Posted: Sat Dec 23, 2006 12:28 pm Yes yes its been a wlong while. Ive thought about you guys often. Im sitting here waiting for my clothes to get done in the dryer so I can finish packing. Im going home for Christmas..Im leaving this morning and will be in FL until the 3rd. A little vacation for me and I deserve it. Alot has been happening in my life. It all seems to be happening so fast. Im just hanging on tight and enjoying the ride. I have to say, that with everything going on, Rob cheating was the best thing he could have done for me. Im discovering so much about myself that I didnt know. I am holding down 3 jobs...not because I have to (he has to pay $1200. a month in spousal support)...but because I want to. I have discovered I enjoy being this busy. I enjoy the fast pace my life has taken on. Ive discovered that I am so much stronger than I thought. There is nothing in the world that get me down and hold me down for long. My marriage ending has been a hidden gift to me. I am a firm beleiver that everything happenes for a reason. I couldnt think past that when I was in so much pain, but at this point in my life, it couldnt have happened a better time. I am woman, hear me roar!!! And boy is it LOUD!!!! LMAO! Ive discovered and still discovering the type of woman I had turned into while all my attention was on him...taking care of him and being the wife I thought he wanted. I am doing for me now. LOL I was going through my closet one day...I ended up throwing out all my old clothes and went and bought a whole new closet full of cloest (thanks to Rob ;) ) I started getting my hair done. Im in the gym 2 to 4 times a week...if I have the time. I took up salsa and plan on taking up kick boxing. Ive dropped over 100 lbs. I look and feel great. Im going to make sure I have tons of pics taking throughout the trip home so you all can see the new and improved Denee. And the best part, is I started dating again....nothing serious (so not ready for that...LOL) but Ive gone out on some dates with some great guys. This is my new life and Im having a blast. I love and miss you all so much! I cant tell you how much Ive miss you guys! Everyone have a great Christmas and a wonderful New Years! 'May your greatest wish be the least you receive this Christmas and in the coming year' Denee Last edited: Sat Dec 23, 2006 12:43 pm This blog entry has been viewed 2525 times
Busy busy Pinkie
Category: Pinkies LIfe | Posted: Sun Oct 29, 2006 11:29 pm Well, alot has changed in my life.I left Rob and had to became a grownup. Scary , I know. But its all good. Im working with a little help from him...but for the most part am doing it on my own. I am starting school soon. Ill be so busy busy. Home, school, work, home ,school, work...... god being a grown up is rough. But I am Denee....I can do this! Thank god its fall or all my plants that didnt die would do so now...LOL Ive lost almost 85 lbs total....got my hair cut into a very cute layered look (yes even shorter now) and highlighted it. After being married so long, I forgot what it was like to take care of me and Im having a blast learning me all over again. I am fabulous! I feel like superwoman and Im ready to take on the world. SUPER-DENEE!!!! This blog entry has been viewed 1648 times
Ohhhhhhh Im so sick
Category: Pinkies LIfe | Posted: Mon Oct 09, 2006 7:53 am On Tues, I drove with my little brother on a 4 hour trip to pick up my mom for a visit. She came here to Lafayette for the night on her way (out of the way) to New Orleans. Well, my sister, her roommate and my sisterinlaw all were getting over a sinus infection...some nasty little thing going around. They did all the cooking...... Did they tell us they had all been sick?? Not until after we ate.....so now everyone who wasnt sick before dinner is now. I had been very tired the last few day butI felt fine until last night I was sitting at the computer printing some paperwork when I sneezed...and instantly my nose filled up and I could feel my sinus' start burning. If Im not sneezing and trying t breathe, Im sniffing water because my sinus are so dry it burns so bad. BAck and forth....stopped up or dried out. My mom called this morning to tell me that she is sick too and on vacation...poor mom. She sneezed and her nose started bleeding. I started running a fever of about 103 this morning and slept pretty much all day. I woke up not long ago and am ready for more sleep. I dont think I have ever felt this bad in my life! Im never eatting thier cooking again. This blog entry has been viewed 2188 times
My space
Category: Houseplants | Posted: Wed Sep 27, 2006 3:31 pm Ive been so busy!!! Which is what I need right now. But I never shared something that happened. It happened at the same time this whole thing with Rob happened. Let me tell you, that was a very bad week....just a bad month. It was about 2 days after I had posted the blog on why I wasnt around...about what was going on (I deleted that blog...didnt want to have to look at it.) I live in a very out of the way, country trailer park. Its so quiet out here. I love it but the only problem I was having was the maintence man at the time, Chris. Most will remember that on the first week of Aug we moved from a smaller place to a this larger place. Long story short, Chris didnt do his job. It was his job to have this trailer ready for me to move in. He had a month to do it. The day I moved in, I had to finally just do everything myself so I would have a clean place to put my stuff. The ppl who lived here before me was arrested so all their stuff was still here........and I do mean everything. Closet, drawers, rooms...everywhere was full of thier stuff. Before I could put my stuff away, I had to go through and move everything out. And we arent talking nice stuff either...these ppl were nasty. These ppl lived here for over a year and during that time, I seriously doubt they cleaned once. My sister and I had to move all the beds, chairs, couchs, a broekn down pool table out of the house to make room for my stuff. This was all stuff Chris was suppose to do. About two weeks after I moved in, I had just had it. So I have the landlord bring Chirs to my house. I confronted Chris in front of the landlord. Chris had told the land lord I wanted everything, thats why he didnt clean out the house...... Common sense would tell a person that I have a brand new bed...why do I want a urine covered old one?? I have a brand new couch, why do I want one covered in filth?? My dryer is less than a year old...now why would I want one that is broken??? COMMON SENSE PPL!!!! Well, the landlord beleived Chris and called me a lier and troublemaker. Lets just say, with this going on at the same time my life with Rob was completely turned upside down....there were fireworks that day....very big and loud ones. I found out later, I am the only person that has ever talked....or should I say fought, with the landlord that way. I am quite proud of myself that day. I held my ground. I didnt let Chris or the landlord, Marius, push me around. I told the landlord that Chris was lying to him and ripping him off. That he was stealing him blind and he was.....Chris actually bragged to me about it. >roll eyes< Well, when they left the house, I started looking for a new place to live. I didnt feel safe anymore in my own place. My stress level had reached dangerous levels. Well, about two weeks ago, I get a call from Marius. He comes over and tells me he had to have Chris arrested because he refused to turn in some of the rent he had collected.....hmmmmm....didnt see that coming ,did we?? LOL What a putzz. He then starts to talk and I can tell he is very nervous....ahhhh to eat crow!!! It wasnt going down easily!!! LOL He first tells me, that he likes my attitude and no BS way about me. He likes how I will just tell it how it is and be dam*ed if you dont like it. He wants me to be the new Park Manager. I am not the maintence person, I just run the park and make sure everything gets done, the rents are paid and it looks good out here. I get to tell everyone else what to do. Ahhhhh Karma! That was just a good day for me....very good. In fact, that was the day, I walked out into my garden for the first time in over a month. So, now Im playing catch up. Im having to find out what needs to be done and get the new maintance man to do it. Chris was suppose to fix all these things in the trailers and around the park and never did. 80% is now done. He was suppose to cut the grass around the park but hadnt done it in over 2 months..... I had a crew come in yesterday...it looks great out! We found out Chris was charging everyone $35. dollars to cut thier grass!!!!! ARE YOU KIDDING!!! I had them all pitch in $25. for the crew to do a professial job. AND none of the crew weedeated or mowed over any of my plants. NOW THATS HOW ITS DONE! Ok so that wasnt the short version.....but it was shorter than the long version..LOL So, because I have ppl coming in and out of my house all day and evening and my phone rings even more now, I had to set up my own little office area so I could keep track of all the papers and notes. My living room is huge so I had the room to take divide it up. I first found a old desk and sanded it and stained it a very nice red mahogany.I had one too many dressers so I turned the nicest one into storage. Its place right up against the front of the desk. I got everything set up and running and something strange happened. Alot of my plants somehow made it onto the desk and dresser and now have started hanging themselves from the ceiling and I found one in the big window over the desk......strange how that happens.....heres my office....(can you tell theres 22 plants around my desk? this is what I see whenever Im at my desk. Beleive it or not, I had just cleaned off my desk too! HAHA! 
My office area...I still need a small table for my printer/scanner and some shelves on the wall behind the desk. 
In front of the dresser.. 
And what you see when you first walk into the living room...yes my desk is behind there!!! LL But you cnt see my mess!! Im planning on staining all the wood in this room that red mahognay like the desk. I just fell in love with that look. Very nice. PSSTT can you see my computer behind the stereo?? :D You dont even know somethings back there until you walked around the dresser. 
Last edited: Wed Sep 27, 2006 3:35 pm This blog entry has been viewed 2206 times
Winterizing your roses
Category: Roses | Posted: Mon Sep 25, 2006 4:49 pm Its that time of the year. I walked outside this morning and saw my breath...where did summer go? Well, its time to get the roses ready for winter. To do that is simple if you live here in the South. We dont have to bury our roses to keep them safe. All you have to do, is prune them back and mulch well. See my pruning and transplanting blog to see how to prune them back. If you are jsut pruning, just skip the transplant part. You want all the leaves and branches gone. Any branch that are growing off a main branch (which grows off the crown). Any stems or branches that are damaged, rubbing each other or growing against another. I have a rule of thumb when pruning for winter....I heard it somewhere...not sure where but I used it last winter and my rose looked beautiful early spring. I leave three branches coming off the crown if possible. A thick older stem, a thinner stem and a new smaller stem. If its not growing off the crown, prune it off. See pruning and transplanting blog on the measurements to prune back. When mulching for winter, clean out the older mulch and replace it with fresh mulch. I make sure its a inch thick when they are in the ground but when its in a pot, I mulch it 2 inches thick and place the pot on a piece of heavy duty plastic and raise the edges of the plastic with large stones to keep the edges off the ground. This does two things...it keeps a majority of the dew off the plastic so when it freezes, the frost stays away from the pot and it keeps the ground under the pot from freezing which in turns keeps the roots of the rose from getting damaged from frozen ground. My mom goes one step farther by actually placing a thick layer of mulch on top of the plastic and sets the pot on top. It works well for those who lives near water or gets alot of rain in the winter as North Florida does. This is also the time to stop feeding your roses and to cut back on the watering. Being here in the Deep South, we dont get many long freezes. Usually, as soon as the sun comes up, the ice melts away. So, if my rose is in the ground, I dont have to water as much in the winter. Ill water maybe once every 2 to 3 weeks, depending on the temps(the lower the temps, the longer I wait to water)...unless it rains during those weeks. Dont over water and dont drown it. Just about a inch of water will do. Now if its in a pot, I will shallow water it once a weeks. Meaning about a half a inch once a week. You dont want to water it until it comes out the bottom. Count to 5 and stop watering. Now, if you live in the North or the "frozen" south(where you get snow or it does freeze reg), as I call it, You will have to find a site to help you prepare your roses for winter if they are in the ground. If they arent ,Just place them inside near a window to get its daily dose of sun. I know nothing about overwintering roses where it snows or freezes on a reg basis. Sorry. This blog entry has been viewed 6228 times
Its PINKIE!!!!
Category: Pinkies LIfe | Posted: Wed Sep 20, 2006 1:15 am Could it be?? No its not a plane! Its pinkiered!! MZZZ Denee herself! Im back! I started gardening today for the first time since Aug 11. My plants have faired not well. I really wish they would just jump out of their pots and turn on the hose every once in awhile!!! I lost a few and if it hadnt rained as much as it has in the last month, I would have lost more. Sadly two that I lost were mini roses. :( BUT That just means, I will have to replace them, right? hehehe BUT not til spring. Too late in the season for new roses. I had a few surprises waiting for me in the garden. The comos I planted but didnt want to bloom all season finally bloomed. Lets over look the fact the whole thing is almost 6 ft tall...and lets talk about the color. I planted white ones to go with the orange comos' that , by the way, stoped blooming in July. These arent white. They are a very light purple. Very pretty. But the whole plant looks like a weed and is getting on my nerve. I have to fight the urge to pull it. On of my elephant ears is taller than me and one ear is wider than me. I LOVE MY EARS! But I think yall knew that, huh? My banana tress have faired very well. I think I have triple the pups now. LOL!!! One of the rescued roses, turns out to be yellow. One is mauve and the other Im starting to think, is a fake rose...jut looks like one but never blooms. :D The two are English Roses so Ill bet the third is too. Both smell better than my Chrysler!! Go figure! Ok...Im off to get caught up! This blog entry has been viewed 1016 times
How to transplant and prune roses (graphic heavy)
Category: Roses | Posted: Mon Jul 24, 2006 10:07 pm Ive titled it that way because when you transplant your rose, youll have to prune it back like you would when youre getting your rose ready for its winter nap. The pruning is the same on both sides. So just look through and take what you need. Ask any questions you have and Ill be more than happy to help you. Note Some of you might disagree to how I do mine. Let me say here, to save future nasty post, this is how I do did. Ive done it this way MANY times and I havent lost a rose this way. Ive lost them in other ways, but Ive never lost a rose due to a transplant. I am a lazy gardner and will find the easiest way to do something. So, if it works for me, it will work for you IF you follow the steps as they are. ~~editted~~ I know I said I would do a step by step of bushes, trees, shrubs and climbers but with the move this weekend and it wont stop raining, I just dont see how Ill be able to get the pics. Below is for the bush. If you follow those step by step, but keep the prune back inches in mind for each, youll be able to prune and transplant any kind of rose! The only thing different is the amount you prune back. YOU CAN DO IT...I KNOW YOU CAN! ~~edit done~~ Im starting with the bush. What you need to know BEFORE you get started No matter what kind of rose you are moving, there are basics to follow regardless. 1.You cant not just dig up the whole bush and replant it without taking the steps to insure its survival. 2.The root mass MUST be larger than the stem mass. You want more at the bottom than the top. If you have more stem mass than root mass, the rose doesnt have the roots to insure that it gets enough food and water, in turn ,energy, to recover from the shock of a transplant. This is VERY important to remember. 3.Regardless if you are transplanting from the ground to a pot, from the ground to the ground OR transplanting from a pot to the ground, you should follow these steps to insure a healty happy rose. There is one rose I didnt prune back when I moved it from the store pot to the ground and that is my shrub. She dropped all her leaves and in the 2 months Ive had her, she has yet to recover BECAUSE I didnt take the time to prune her back. Concider it a lesson learned. ;) 4.Never never NEVER, leave your rose roots exposed to the elements!!! When you start a transplant, follow through! Dont stop in the middle of a transplant, leaving the roots exposed! Your rose is having enough stress being transplanted, dont add undue stress to it. 5.When pruning back your roses, trying to figure out how far to prune it back can be confusing. Heres a simple way to do it... Intervals of 9 -For ALL rose bushes, prune it back to 9 inches of the crown (the knot where all the stems are coming from at the base of the rose bush). -For a small climber(up to 5ft), 9 inches from crown -Large climbers and ramblers (anything over 5 ft)18 inches from the crown. - small shrub, 9 inches from crown -large shrub, 18 inches from crown so on and so forth...you get the idea. Below you will find a easy to use guide on transplanting a rose bush. There are pics and detailed instuctions so you should have no problems transplanting. Now I am transplanting from the ground into pots because Im moving but like I said before, take what you need to do whatever kind of transplant you are doing. I have 13 roses in the ground to move and dont want to just leave them to the next person. What you need for a transplant Sharp pruners gloves shovel root hormone mulch wood glue gravel (if your potting) pots (if your potting) extra pots (for gravel, debris and soil) Tip about pots If you are making a move and you will be planting your roses into the ground or in my case, keeping them potted and you dont have alot of money to spend at the moment on good pots, dont fret! There is an answer to your problem! Grab your phone book and write down the names and addresses of local nurseries. DONT CALL! Drive to each of them and ask them if they have any disposible pots. These are the black plastic pots that thier plants are shipped to them in. For roses you will want up to a 5 gallon. The price is right esp if you are moving and dont have the money to spend on the more expensive pots. For a used disposible pot (5 gallon)ran me $.96 per pot. For a new one, it ran me $1.19 per pot. I even got a 50 gallon tub (too big to be called a pot! HAH!) used, for $5.50! Now my roses will fine in these for a few months. This isnt a pot to keep them in forever. Because they are black you will need to water your roses once to twice a day depending on the heat in your area. This is something to think about for other gardening projects. I had to 4 different nurseries before I found someone who had them. Summer to late summer is the best times. Their plants have either grown out of those pots, died or been transplanted into a decortive pot. example of the pots I bought 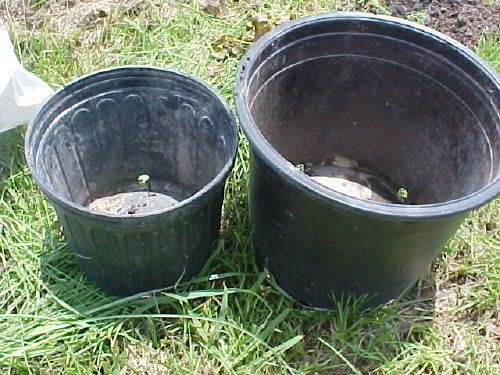
I am using my New Years as the transplant suject here. Let me note here that this is NOT the ideal time to transplant because it during the summer blooming cycle for roses. I have waited until the last min to do this so I can enjoy my roses just a little longer. The idea time to transplant and/or prune a rose would be after the summer blooming cycle is over. In my area is about Sept. Check your area zoning to find out when you should prune. That would be the ideal time to transplant too. Now lets begin the transplant!!! And try not to cry when you see my beautiful rose blooms! I teared up! OK My New Years as it looked before I started. 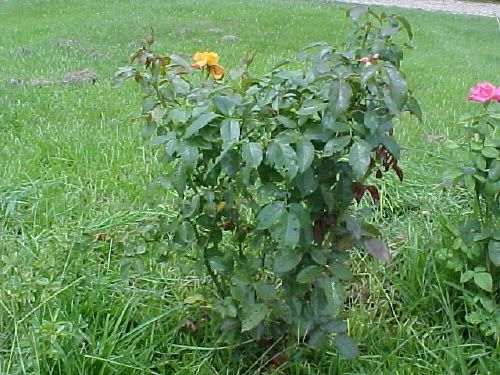
pretty, huh? Step 1 Before you start cutting away, find the inches above that it should pruned back to. In my case, as its a bush, 9 inches. Now, when you go to prune, you want to ALWAYS do it right above a leaf. Heres why. If you look closely at where the leaf and the stem come together, youll most likely see a bud. This bud will leaf or branch out after you transplant. Cutting it back to there will insure that the energy is directed to those areas and grow. See below pic If you look were my finger is, youll see where you should cut. 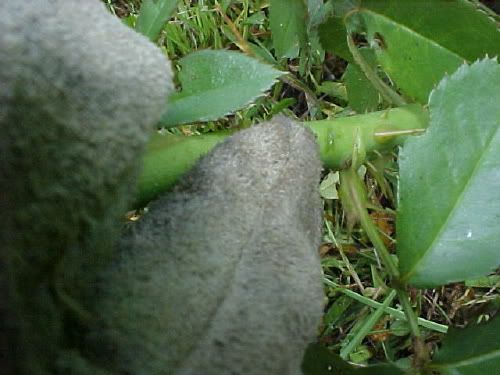
When you cut, you want to do it an angle, not straight across. This is the perfect angle. 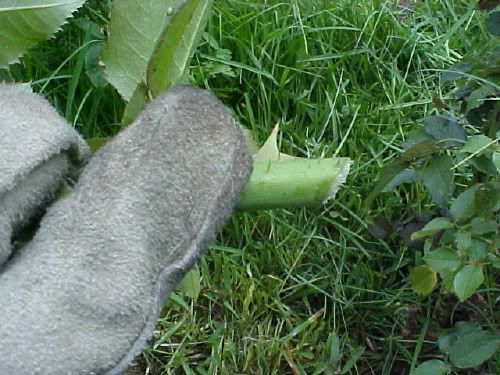
Now dont worry if your cuts arent clean. You can go back after the transplant and clean up the cuts. Step 1- pruning away the larger stems (dont worry about the smaller stems and branches just now.) 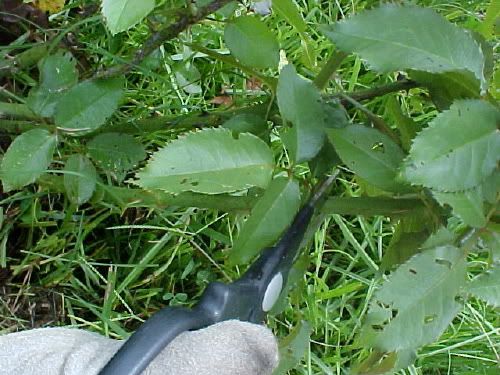
Be sure to have a pot or container handy to put your debris in. 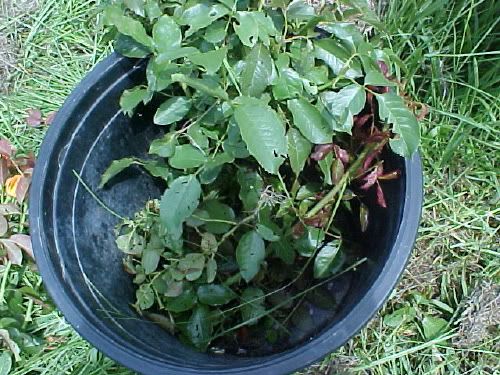
After cutting the larger stems off, this is how it should look 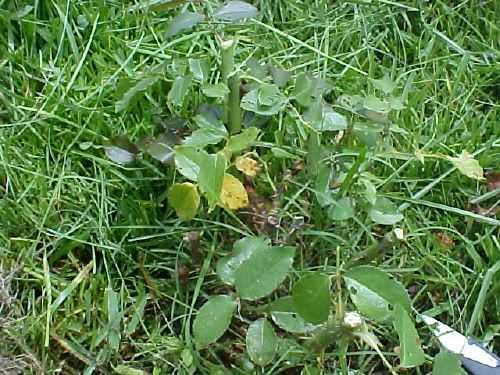
Now we will cut the smaller branches off. When you cut these, do so as close to the main stem as possible. Note here... you dont want branches coming off the main stems after a completed pruning. It goes back to the energy needed to recover. And yes I have branches on this one but Ill clean it up once its potted. 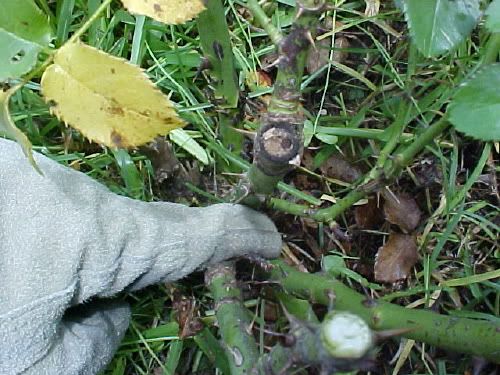
Now time for the leaves to come off. You dont need your pruners for this. Grip the leaf stem close to where it comes off the stem. (during this step, youll start seeing the buds I was talking about before) 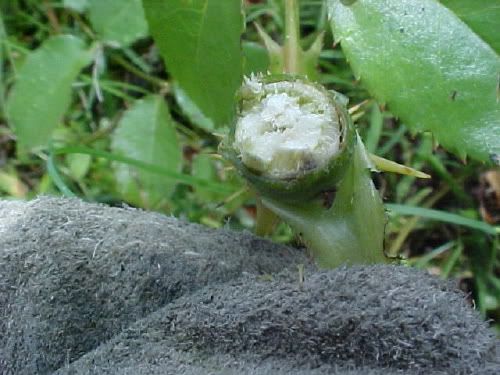
Now very gently pulled the leaf stem down and it will start coming off at the "seams". Repeat until all the leaves are off. Take care not to just jerl the leaf branches off as you might rip the main stem. 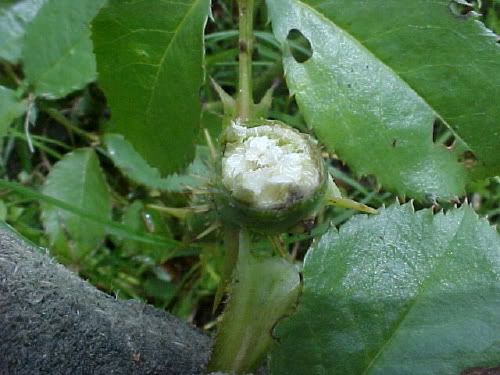
and its off 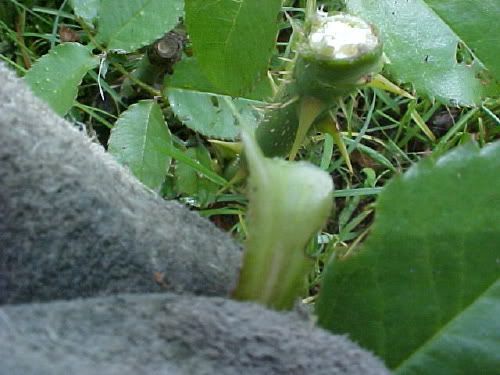
Now if some of the leaf stem is left behind, no worries mate! It will die and fall of on its own. Once all the pruning is done, this is how it should look. You want to prune any stems that cross over another or is rubbing against another. You want only straight ,thick stems left. 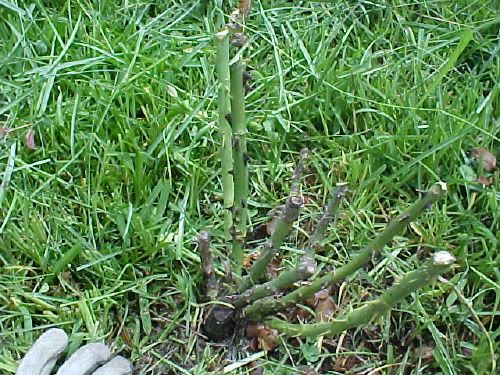
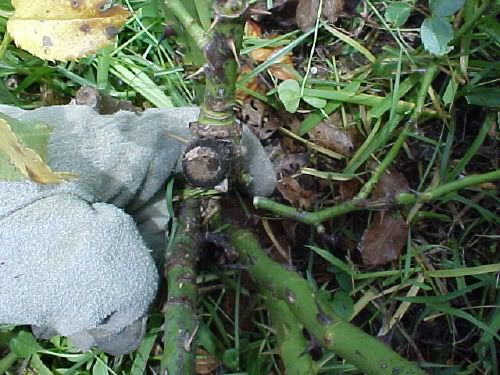
Now its time to dig! A rule of thumb when digging your rose up. Dig as far as the farthest stem sticks out. And dig that far all the way around. I start with the stem sticking out the farthest and level the shovel there 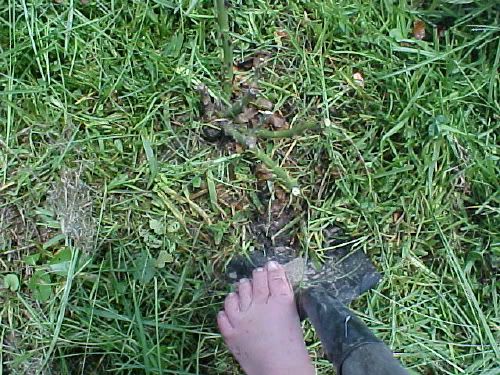
And yes, I garden barefooted...another reason for ..
Now when you start digging, dont just shovel dirt out. Pull the blade of the shovel in the ground as far it will go and gently pull the handle down. Youll see the rose move...you are going to lever it out of the ground. The point is to NOT cut or break the roots. Note the angle of the shovel where its in the ground. I placed it in the ground with the hadle straight up in the air. Once in the ground, gently angle it down until its almost even with the ground. 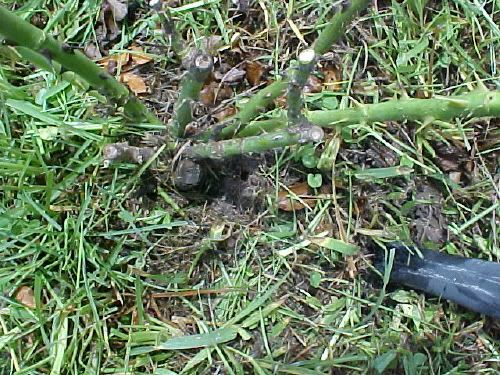
When you complete the circle around the rose, You will find you have complete circle of loose soil. Take your shovel and slid it under as far as it will go And gently push the handle down. 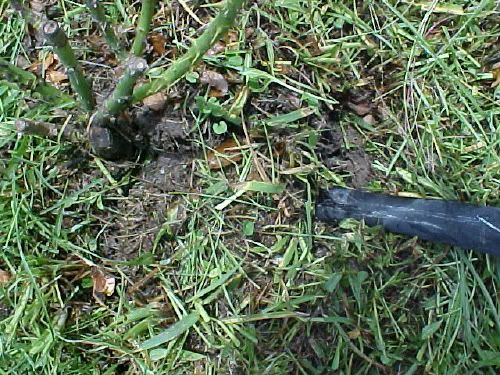
Once you have it under, youll see the whole area you just cut into will lift up. Now to get it out the ground. Grabbing the rose UNDER the crown...my finger is on the crown 
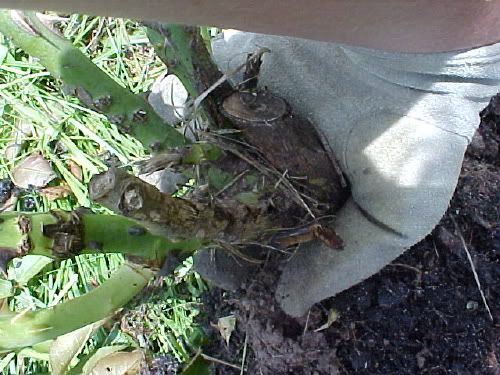
Grab it firmly (you dont want to drop it), and at the sametime pushing the handle of the shovel down, lifting the rose out of the ground 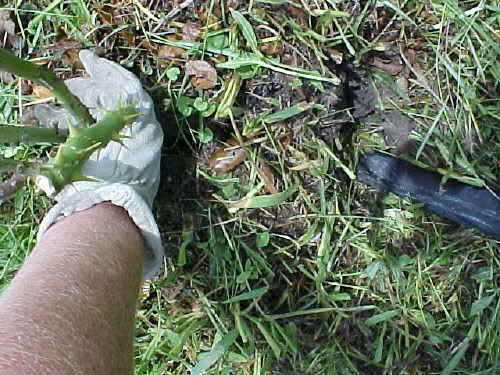
WAAA LAA! And I didnt cut or break a root! 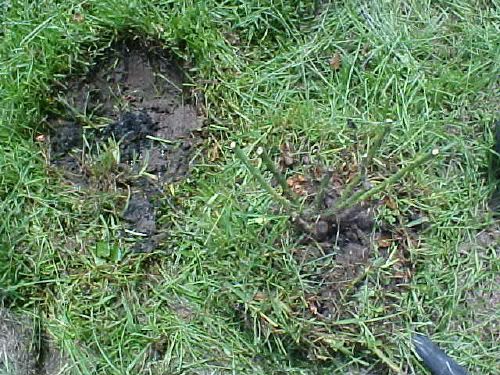
Ok now to get the grass off the rose The easiest way I have found is to grab a handful of grass and pull it straight to the left or right away from the crown. This will pull the shallow roots of grass away from the deeper roots of roses. 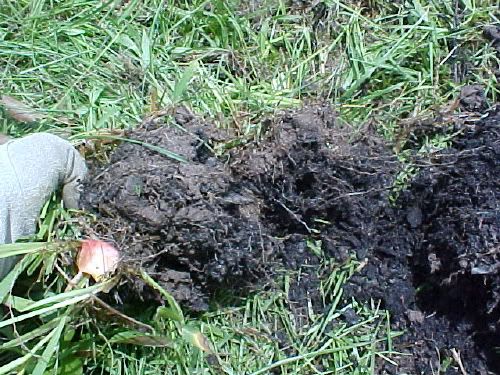
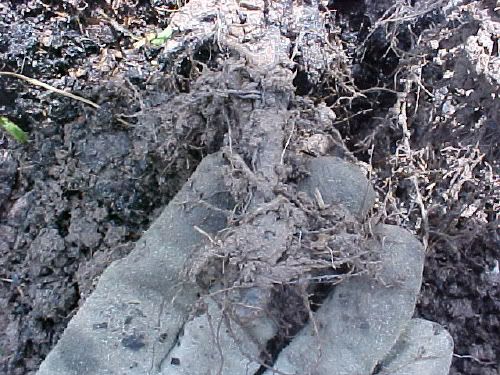
Now we must find the longest THICK root. That will determine the size pot or hole you will need. Try not to cut these larger roots. They dont bent will and will most likely break if you try. 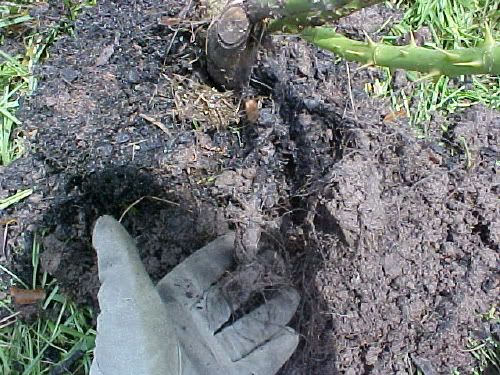
Now its time to find the pot that fits! This one is too small. You dont want to shove the roots into the pot..that means its too small. It needs room to grow. 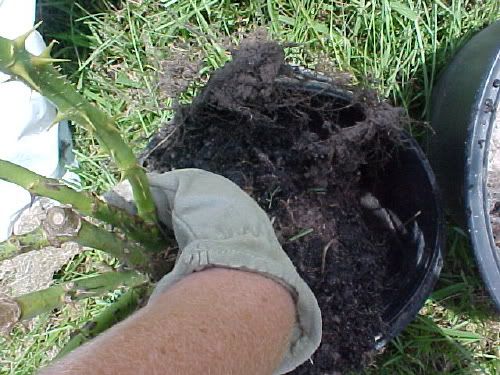
Now this one is just right! Notice the space between the edge of the pot and the longest roots. They have room to move and grow. 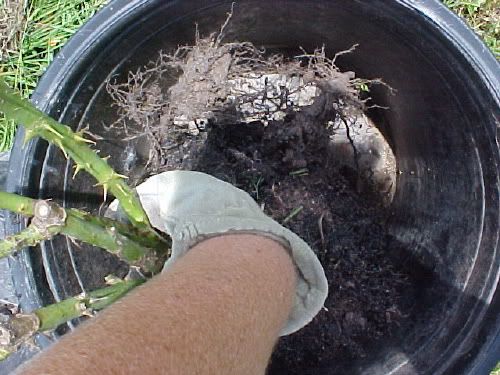
Now set the rose to the side just for a min. You can do the following BEFORE you start digging but I do this as I go along. You want to put gravel into the bottom of the pot. If you put soil straight into the pot without gravel, you run a risk that the soil will clog up the holes and excess water cant run out, in turn rotting your roots. Concider gravel in the bottom as preventive meatures. You can buy bags of gravel at any home improvement store. Ive seen them at Lowes and Home Depot. I have a ready source at hand!! The lane in front of my house! 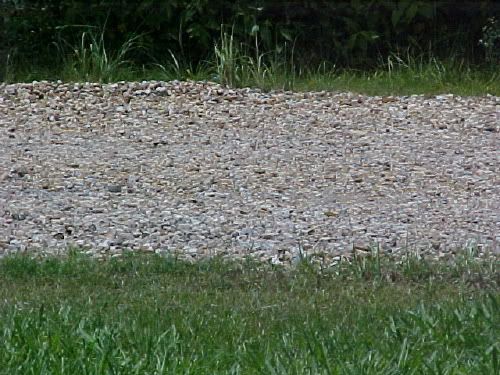
Now you want enough gravel in the bottom to cover the holes.. 
Now once you have the gravel in place, you want to add soil over it. Fill it about 1/3 full. You want to able to set your rose at the right level in the pot. Depending on where you live (once again, look into your zoning), depends on where the crown of the rose goes. I live in a warm area so I leave my crowns above the ground about an inch. If it freezes in your area, you want to protect the crowns, so bury the crown no more than an inch underground. The stems grow out of the crown and if you bury it too deep, youll smother the stems. Perfect height. Youll notice that the crown is almost even with the top of the pot. 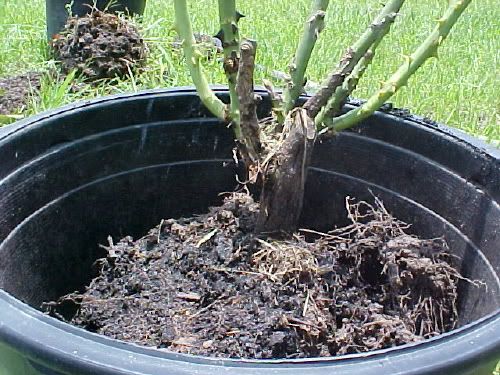
Now its time to fill 'er up! I use another pot for this so as not to just dump soil onto the rose. You want about 2 inches of space between the soil and the top of the pot. 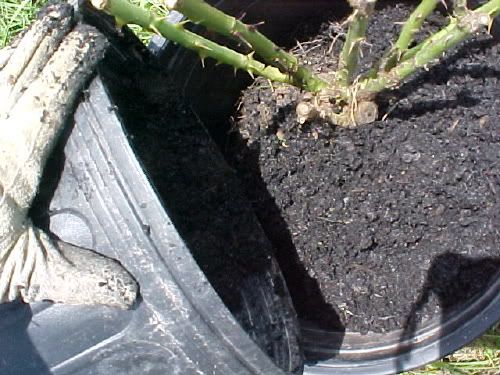
And this is how your bush should look once she is transplanted, either in the ground or pot. 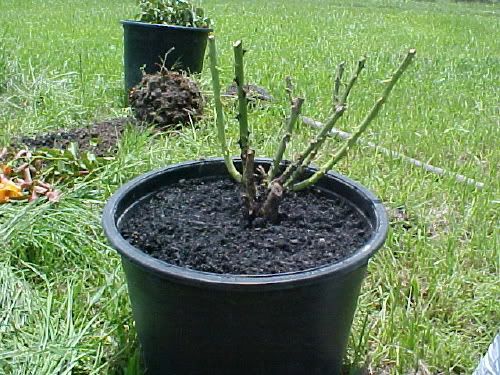
Now if your crown is a little high, theres no reason to yank it out of the pot and start over. The next step, either potting or ground, is very important to the survival of your newly transplanted rose....... mulch! This will keep the moisture it needs in the soil and in turn the roots. I use dried grass clippings. Whenever I am potting a rose...or any plant for that matter, I will fill up the pot the rest of the way with mulch. Once its showing signs of recovering from the transplant, I will remove about an inch of the mulch. When you mulch, you want to leave about a half inch to an inch space between the main stem of the rose (the one UNDER the crown) and the edge of the mulch. She needs room to breathe! 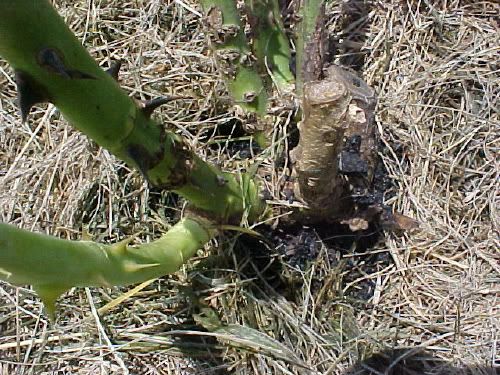
Now is the time to tidy up your transplanted rose. Clean up your cuts. Add wood glue to the tips of the cut stems to prevent borers. Add a root hormone to help the roots recover from the shock of a transplant. I use this on all my trasplanted plants and flowers.Use whatever brand you want. 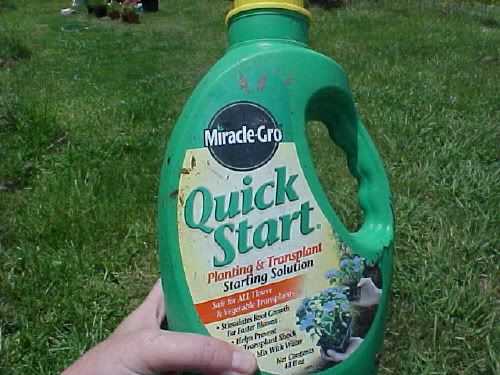
Note about mulching your roses. If you are using organic mulch such as grass cutting, you need to change it out every so often. I change the grass out at the end of every season. And an extra thick layer for winter. Ok thats it!! easy, huh?! If you have any questions, just ask. You wont know the answer unless you speak up! Until next time! Last edited: Fri Jul 28, 2006 2:56 am This blog entry has been viewed 170646 times
Transplanting roses blog to come
Category: Roses | Posted: Mon Jul 24, 2006 4:24 pm For everyone out there that come to peek at my rose blog, I will be starting a How to transplant your roses blog. Its becuase, I am moving and have to transplant 13 roses.....you cant see it but whenever I say that, I roll my eyes. LOL Oh the work to come! I will be including step by step pics and details so to make it easier for you to follow and transplant your roses with care. Until then, May your roses thrill you with every bloom! This blog entry has been viewed 1471 times
Update on rescued roses
Category: Rescued plants | Posted: Mon Jul 24, 2006 4:17 pm I have leaves on all my rescued roses! Sorry, I got excited! Does the happy happy joy joy dance! Last edited: Mon Jul 24, 2006 4:19 pm This blog entry has been viewed 838 times
Glendanns trade plants(graphic heavy)
Category: trade | Posted: Sun Jul 23, 2006 5:52 pm I was trying to write on the pots but because its so wet out, the marker wouldnt write on the wet pots. So I was trying to figure out a way to label them and tell you about them so you would know how to care for them. The the idea hit me....my blog! Perfect! I took pics of each of them so you can come back to see them as a reference. Once you get to know your little guys, I can delete this blog! :D With each pic of YOUR plant, I will either post the "Mother" plant of mine or link you up with a link to a pic of that mother plant here on Gardenstew. Under each pic, Ill tell you how I care for them. Cannas are a given so Ill post nothing there. If a plants has special needs, Ill let you know that too. K? Lots to cover so lets get started! Ill start with the Cannas I dont know the name if them but I do know they are Dwarfs. This one has purple leaves and the flowers are light pink and while the plant is dwarf , the flowers are full size. The only problem Ive had this them, is the flowers dont want to open all the way sometimes and they are very fragile. If you touch them, the flower started to droop. That goes for both dwarfs. 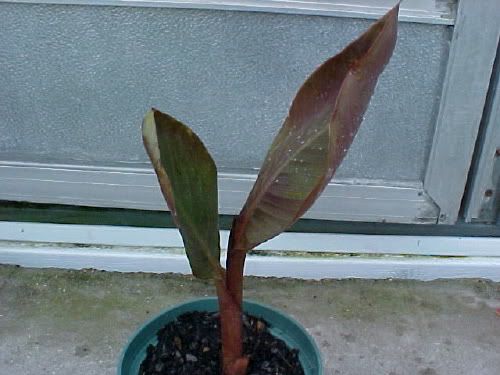
And this one is the hot pink flowers.. 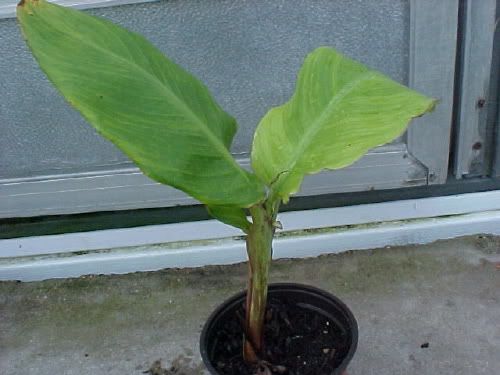
These are mine. I have them in a pot. They are only about 2 foot to 3 foot tall and dont pup out as much as the full size cannas do. And they dont produce seeds...well mine havent. The whole stem dies when the flowers die off. 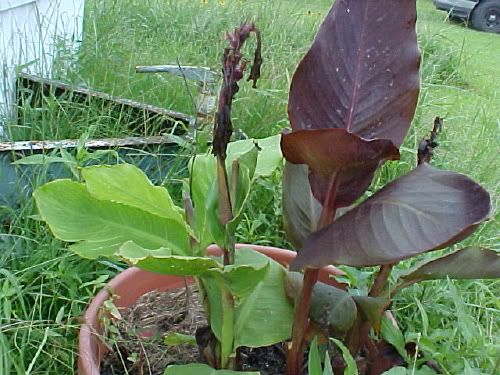
And of course the orange canna I thought it was going to die on me after I transplanted it. Some of the leaves are browning but its blooming so just cut back the leaves. AND! It pupped out! If you look in the pot on the right, theres a pup. Mine are a little top heavy and the high winds have caused them to try and lay over. You might want to put them somewhere to protect them from high winds. 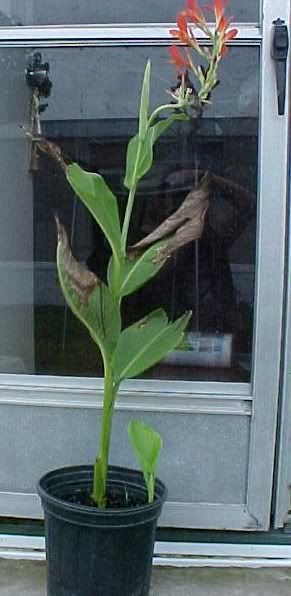
Banana Trees- all banana trees are greedy feeders. Lots of water! I have mine in full sun but I have to water deeply every morning or the leaves will fold up and droop. Part sun is most likely better for them. I had a topic on them http://www.gardenstew.com/about1644.html The mini tree..yours has pupped out since being repotted 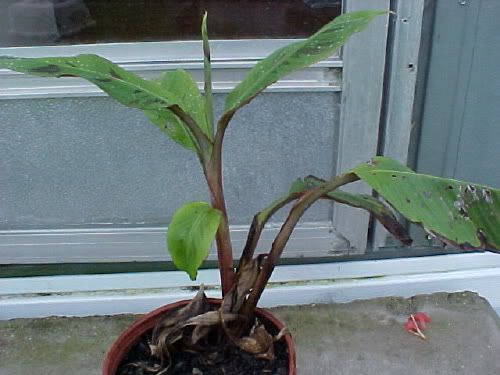
pup 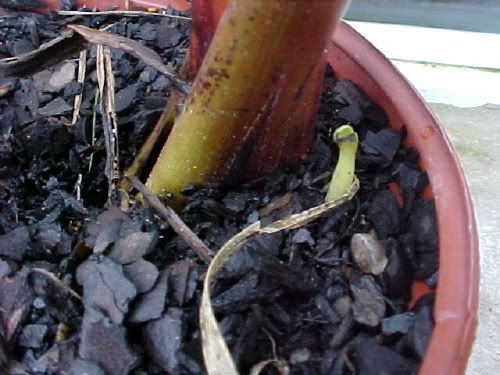
My tree is about 4 1/2 ft tall now. Its not suppose t oget much taller than that. This one pups out alot but some of the pups dont live. They seem to rot at the stem. But the ones that live seem to be stronger for it. 
Dwarf Cavendish Banana tree- not so dwarf! LOL Mine got up to 6-7 foot! If you look in the link above, the mother plant of these is the four pic down. All my cavendish pups ,pupped out twins this year. That means two trees per corm. So I cant divide them without risking one dying. So I was sending you a set of twins....well....when I dug them up and potted them, one of the twins tried to die on me. Well, I gave it some root hormone..and it did its job a little too well. Instead of two pups on one corm...now you have two sets of twins and a single off one corm!! LOL sorry! 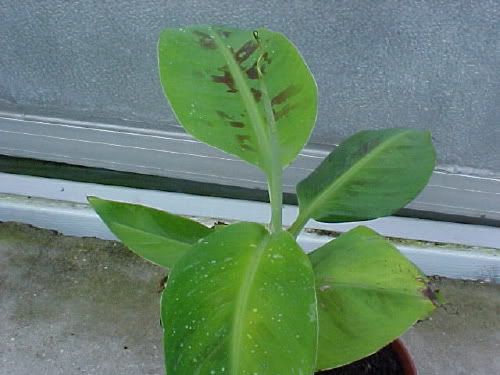
all the pups...the set of orignal twins and thier pups.. 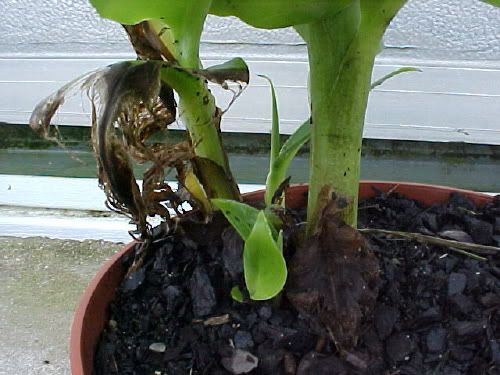
the new set of twins. 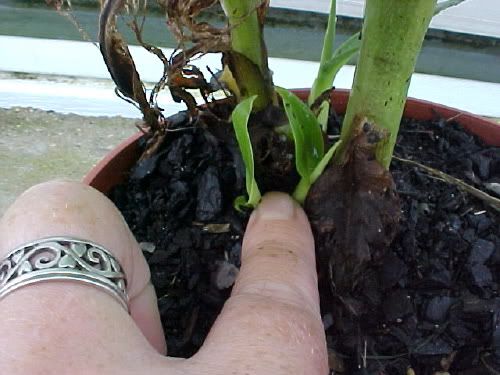
This is the reg ol' banana tree. If you look in the link above, the first three are the pics of the "Mother" plant of these. Beautiful trees! Now these get really tall. We have them everywhere around here. Ive seen them as tall as about 20 ft. The flowers come after the 2nd year. And you cant eat the fruit until the 3rd year, from what Ive heard. Now when I dug it up, it did die. But I gave the corm root hormones and within days, you have two pups on one corm. But they are just tiny things. To the left of the larger one, theres a tiny little leaf sticking out of the soil. Thats your second one. You cant tell, but the big one is only about an inch high. 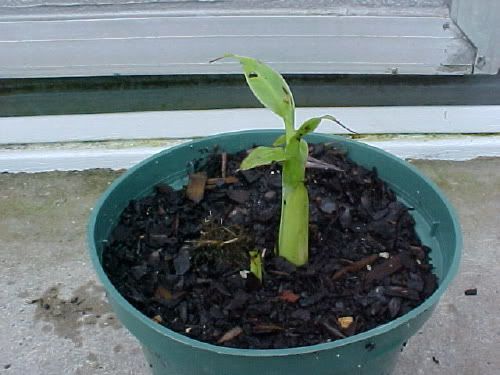
Elephant ears Ok now this might get a tad confusing! LOL Sorry in advance if it happens. I have so many! Ill start with the Black magic. Theres no need to take a pic of the mother plant because...well it looks just like the mother plant. This isnt something you can confuse with another elephant ear. Black magic- Lots and lots of water! If you put it in the shade the leaves are a darker purple, almost black but if you have yours in the sun, they are more of a dark plume purple. Still very pretty. And it will put out runners and alot of them as soon as its roots are in the ground or larger pot. It has VERY deep roots so if you pot it, make sure the pot is deep. Mine grew out the holes of a 5 gallon pot and into the ground within a week of being potted . Its now in a 10 gallon and running like crazy! 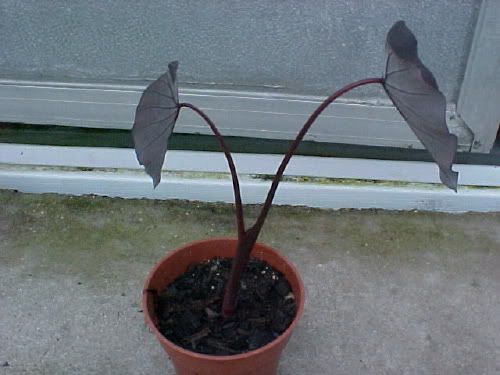
Illustris elephant ears I gave you two. They dont seem to run alot. They seem to cluster together. Mine are fairly new so I dont know much about them except, They LOVE water and the leaves turn orange when they die. 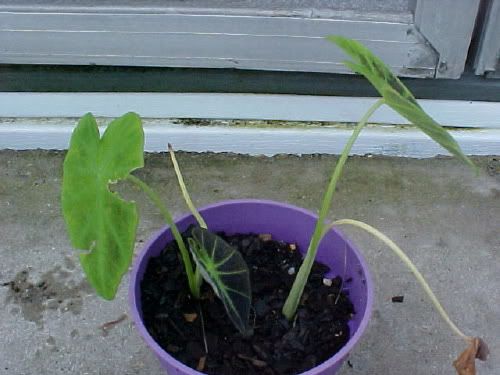
My plant- they will get alot bigger than this but like I said, mine are fairly new so they are still growing. Mine are in full sun but when I dig them up, Ill be putting them in full shade. Theres some leaves that in the shade of the larger ones. They are very bright in color. The "black" on them are more intense while the ones in the sun look faded. 
Now the purple stems...I thought I took a pic of your but I cant find it now. Its raining cats and dogs so I cant get a pic of it now. Youll know it because, theres a purple dot in the center of the leaf. Purple stems are called that becasue ..well they are purple stemed! LOL..heres a link to some closer pics of them...a very beautiful plant! http://www.gardenstew.com/viewtopic.php?t=1365&highlight= my "wall" of them! They dont seem to be getting very big but they are running like crazy! Im having babies pop up up to 30 ft away from these! So be careful! 
the mini ears..thats what I call them but their name is Alocasia or Night Scented Lily. Mine have NEVER produced a flower of any kind and I have tons of these as does my mother. Now when you dig these up out of a pot or ground, theres a warning. Whenever they produce offspring, they do so by the roots creating something similar to a "water sac" you see in some plants. Where they have stored their water in the roots. I dont know what they are called. But these look like that while they are still attacted to the roots. They will actually complete divide off the root and leaving "large" seeds in the soil. If you dont check for these "seeds" youll have them springing up there. I always run my hands through the soil to check for the seeds. yours 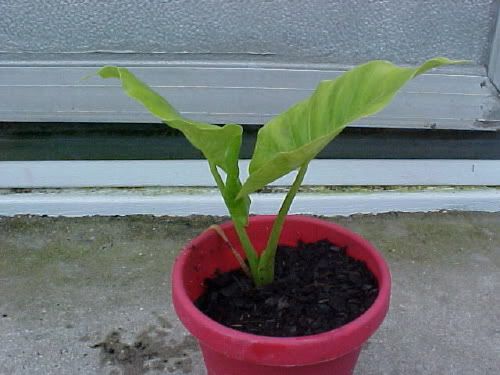
mine..I have mine mixed with caladiums and asparagus fern. They all do well together. 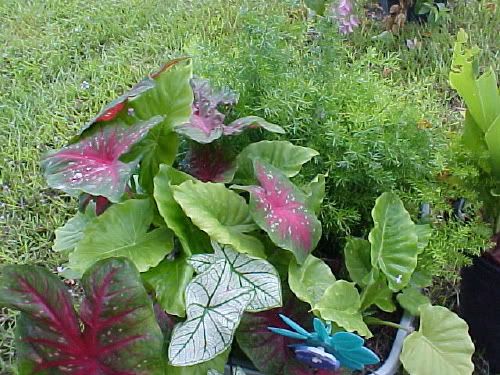

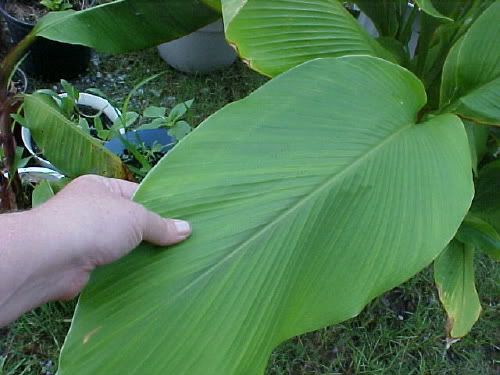
Esculentum or Ive heard them called Ruffles. I call them Ruffles because of the ruffled edges. These will get HUGE! Now, they do pup out but they seem to cluster together instead of running. I havent dugs your yet. Im waiting until the last min because as soon as I cut the root, the whole thing will dye back. If I can cut one far enough away from the mother plant, then she wont die back, only the pup. It will grow back and fast so no worries there. This plant is very fragile but only with the roots. If you cut a root, the whole plant will go into shock and die back. Its happened to me hundreds of times. But it always comes back. So once its in the ground, let it be unless you want it to die back. 
And the one I call arrowhead because thats what its shaped like. I dont know the name or where I even got it from. Its a very slow grower and will die back as soon as its too hot or too dry. Mine is in full sun but when I dig it up for the move, Ill keep it potted and in full shade. Now this one is so slow growing that it hasnt pupped out yet. As soon as it does, Ill send you one. So this one isnt in the box with the others but youll get the pup as soon as I do! HAH! 
OK now to the other plants that fall into nothing. The Purple fountain grass. Now loves full sun and will handle droughts with ease. I dont water mine anymore. The hotter and dryer it is, the better the thing does. Now if all my other plants were like this! Water until its roots are well in the ground. If its really dry out, water maybe everyother day to every three days. Now come winter, the whole thing will turn brown and will look like its dead. Its NOT! Its sleeping. Come spring, the dead leaves will come back to life so if you cut them, they wont come back. Now each stem has its own roots so you can divide them up when you get them or leave as one plant. Theres three there, I think. 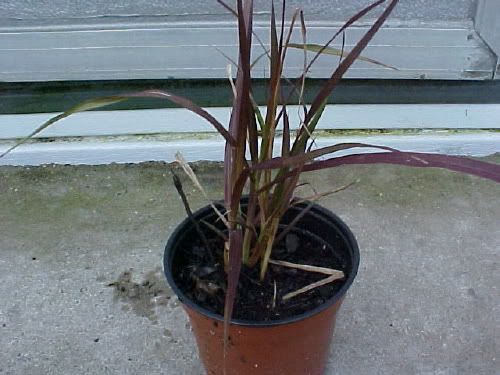
Aussie Plume Ginger. Im waiting until the last min with this one too. I dont know how it will react to being dug up and cut back. Im sending you several of these corms. My plant...its not like this heat too much. It did much better in part shade and does like to stay moist. Doesnt do to well with dry soil. 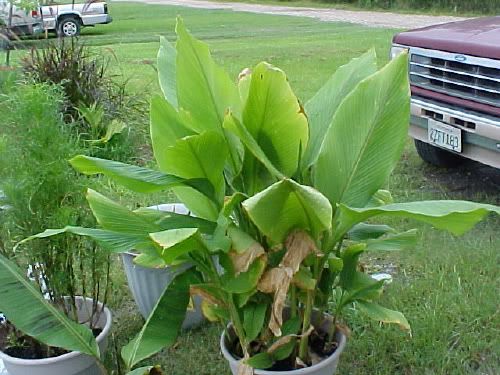
Alligator plant (jubabe said she wanted one) 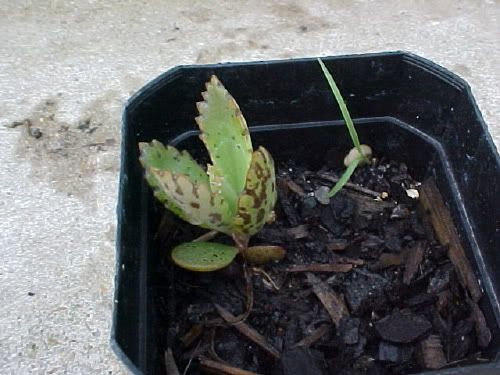
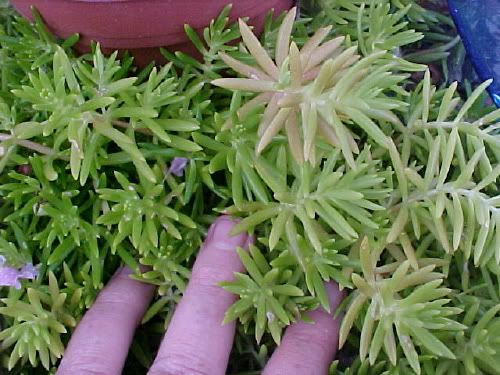
Unknown plant. This one was given to me. Its a very hardy compact plant. You can walk on it! I wouldnt recommend it as the broken leaves will sprout roots. The more water it gets, the thicker it grows. If its in full or part shade, it will stay green. If its in full sun, it will turn bright yellow. I LOVE this plant. I use it as filler. yours 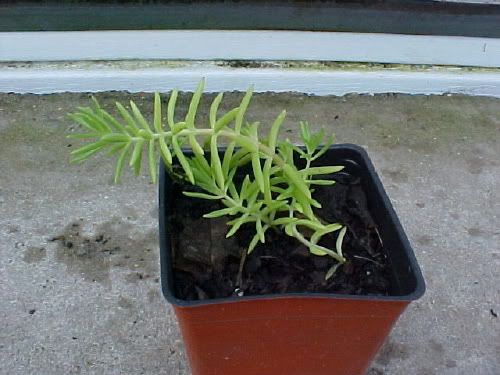
Mine..I have it at the top of my bird bath. Its filled in very nicely. 
Purple waffle This plant is very hardy too! If in the shade, will do well but can get a little leggy. In direct sun, will dry out fast and needs lots of water. I have mine on the bird bath..you can see it in the above pic. It can get big but if you want it to stay little, keep it in a little pot. It wont out grow its pot. I have mine outside because its a magnet for aphids. So in turn, I have ladybugs and thier babies all over it. ;) You can grow these from cuttings. Very easy to do. I pulled a leaf off mine today and stuck it in the pot for you. It should have roots by tonight or tommorw. Its a wonderful plant! So pretty! You can grow it as a house plant too. Thats how they sell them in the stores. yours 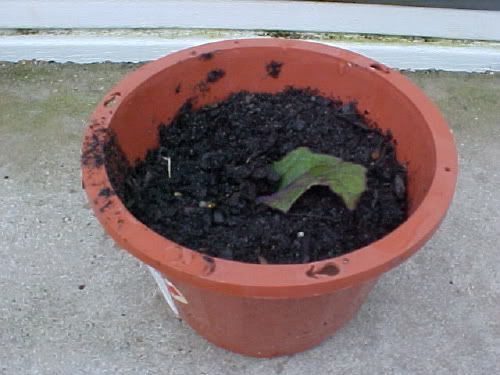
Mine 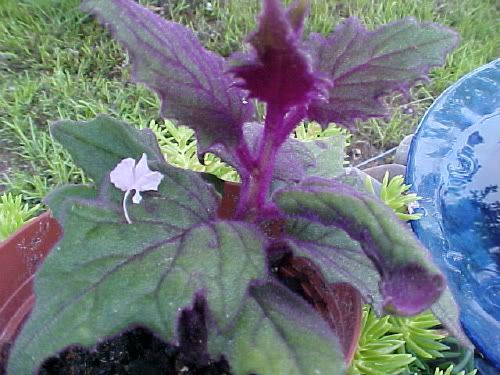
Ok..I think I covered everything! If I missed something, Ill go back and fix it! Last edited: Sun Jul 23, 2006 7:20 pm This blog entry has been viewed 8844 times
You're reading one of many blogs on GardenStew.com.
Register for free and start your own blog today. |
Entries by Category
All Categories
Archives
All Entries |
