|
Recent Entries to this Blog
Overland Park Arboretum & Botanical Gardens
Posted: 27 Aug 2008 Posted: 26 Aug 2008 Posted: 18 May 2008 Posted: 29 Apr 2008 Posted: 27 Apr 2008 All Entries |
Joann's Blog
Overland Park Arboretum & Botanical Gardens
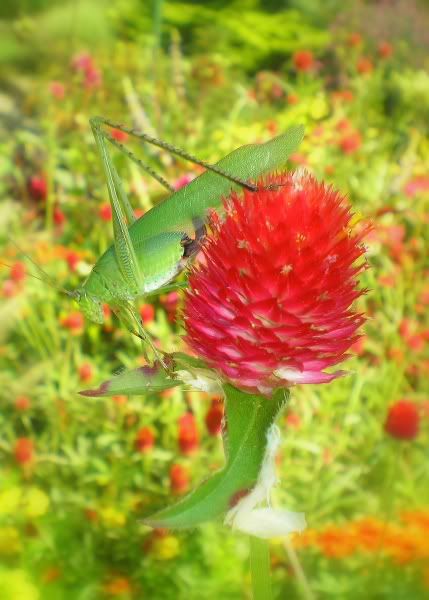
Category: Botanical Gardens | Posted: Wed Aug 27, 2008 4:05 am I had a tough choice today. Cut the grass or go to a botanical garden? The lawn mower lost. I decided I'd go tip toe thru the tulips since it was so nice out. Even though it wasnt peak season there at the gardens I'm certainly glad I went. Overland Park Arboretum & Botanical Gardens http://www.opkansas.org/_Vis/Arboretum/Gardens/index.cfm I saw quite a few butterflies by the parking lot and thought it was my lucky day. Unfortunately they werent cooperating and were a whole lot faster than I. Eastern Tiger Swallowtail 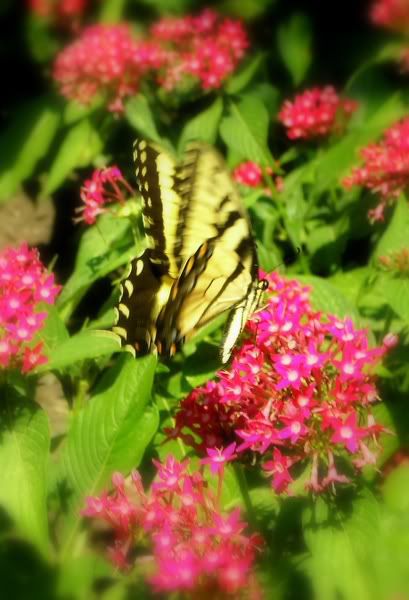
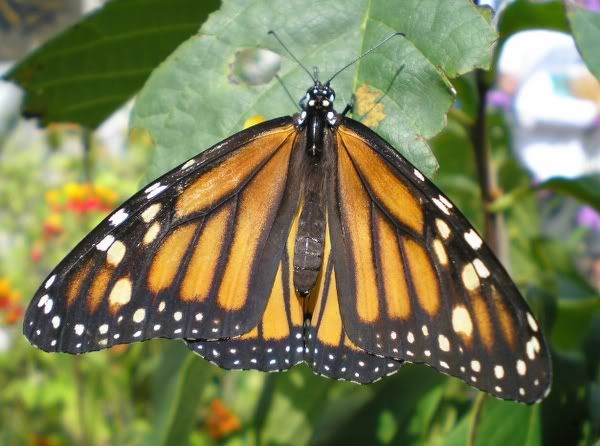
Monarch 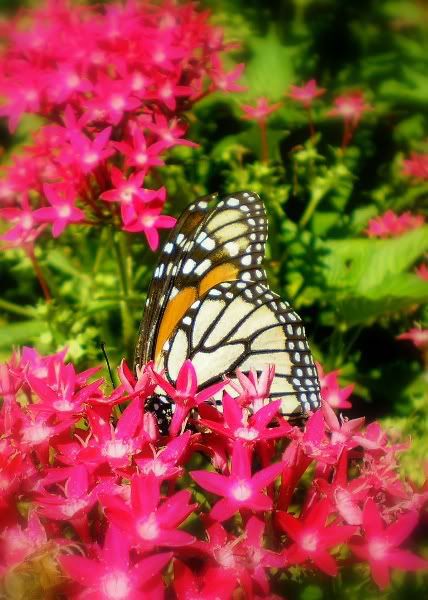
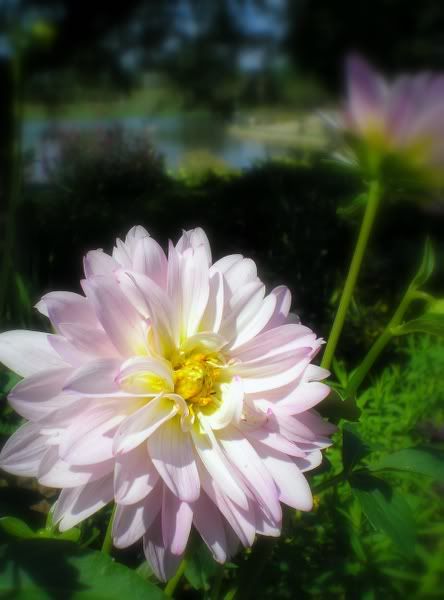
I'd have to say the Monet Garden was my favorite and it still had lots of color for being late in the season. 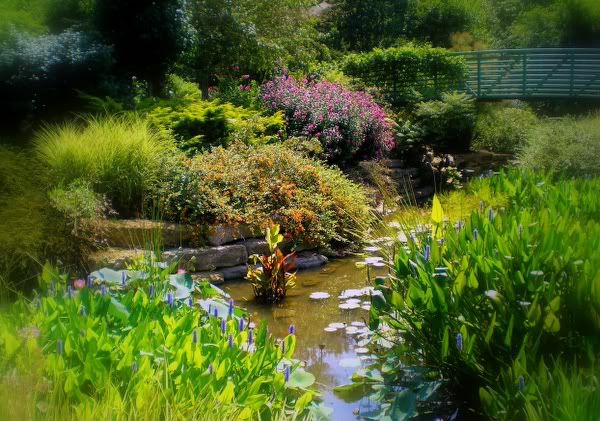


Erickson Water Garden 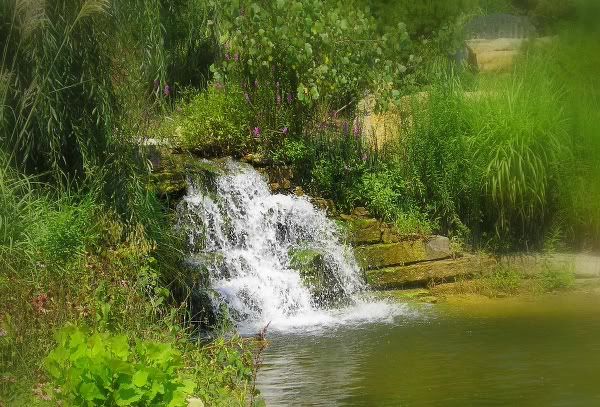
Clouded Sulpher 
Giant Swallowtail 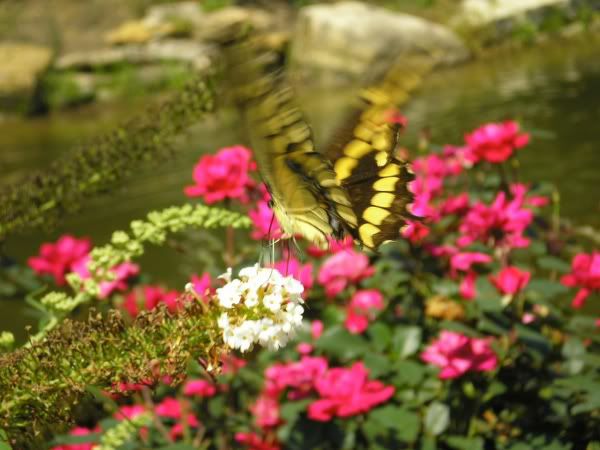
Probably some kind of Skipper 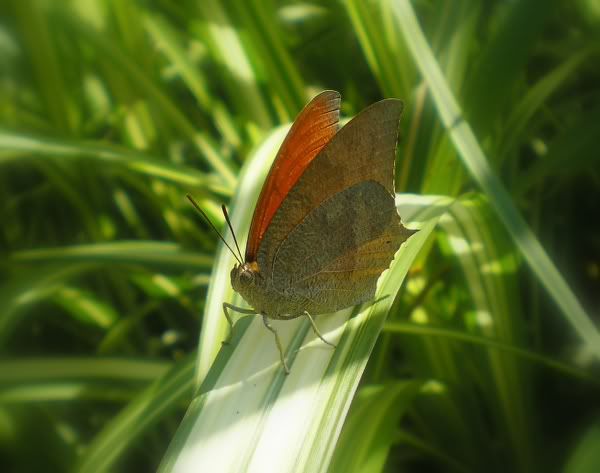
Last edited: Wed Aug 27, 2008 4:15 am This blog entry has been viewed 3403 times
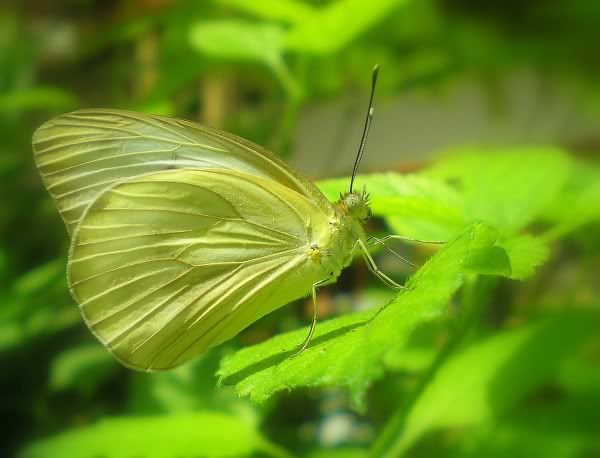
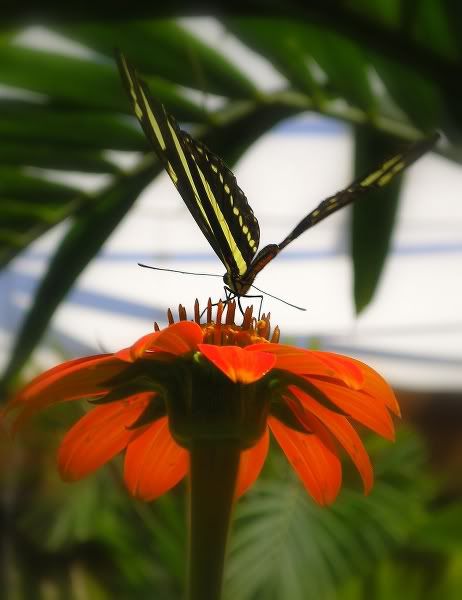
Powell Gardens Festival of Butterflies
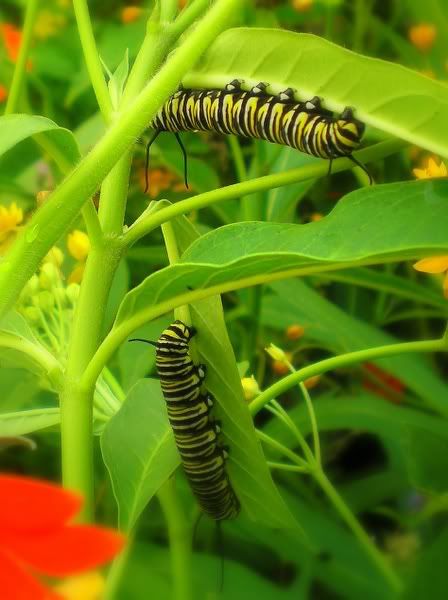
Category: Botanical Gardens | Posted: Tue Aug 26, 2008 2:44 am I'm just putting my butterfly pictures in one spot. Some new and some duplicates from previous forum posts. *All were edited with the Picasa2 free photo editing software download that PianoLady gave the link for last week. I highly recommend it.* Monarch Caterpillars and Butterfly 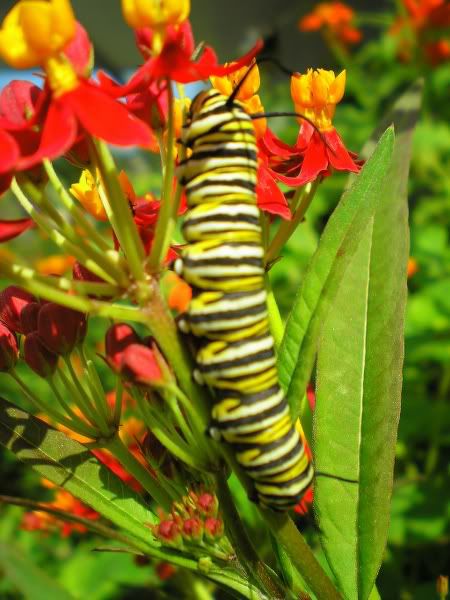
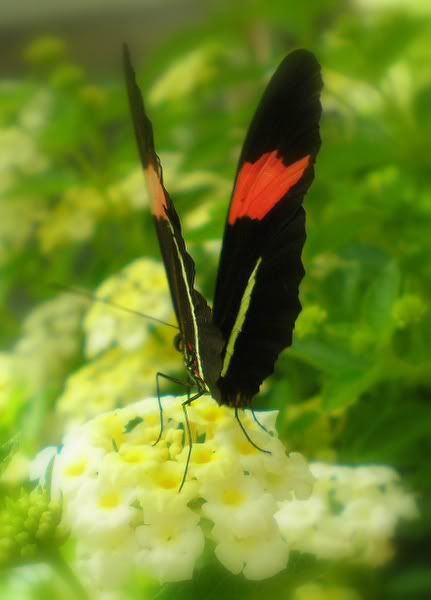
Banded Orange Heliconian Butterfly 

Red-Spotted Purple Butterfly 
Great Southern White Butterfly (with different lighting) 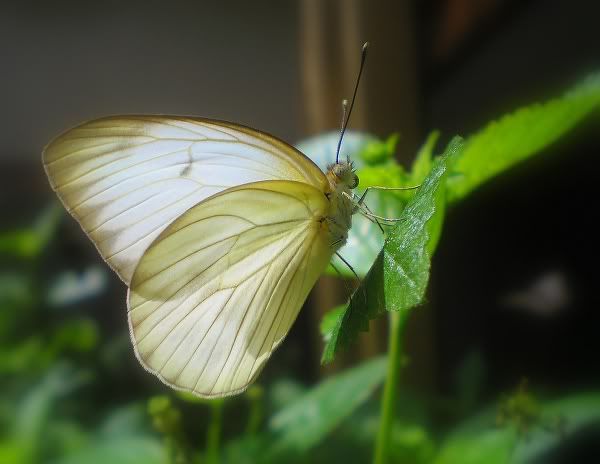
Unknown Butterfly~Can anyone ID? 
Zebra Heliconian Butterfly 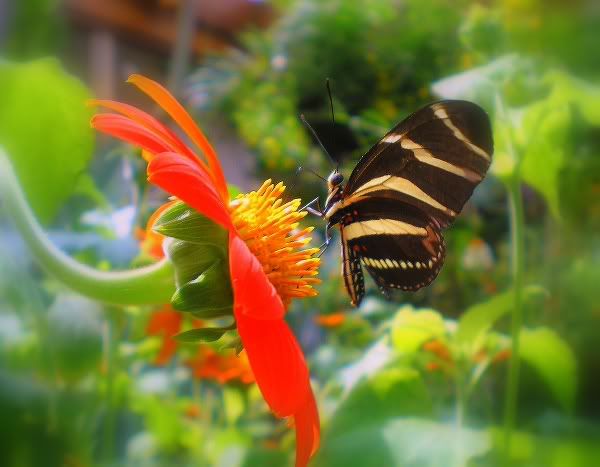
Sleepy Orange Butterfly 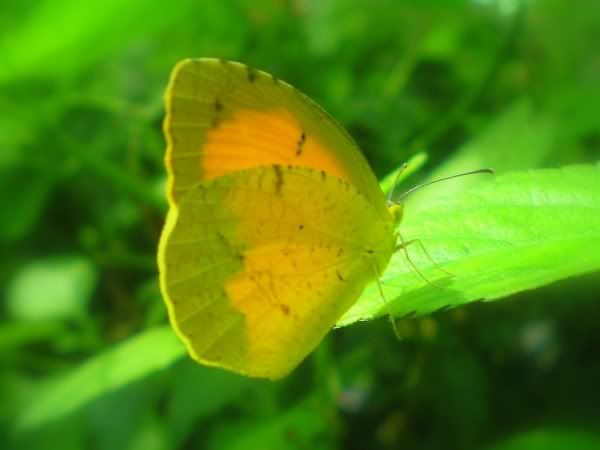
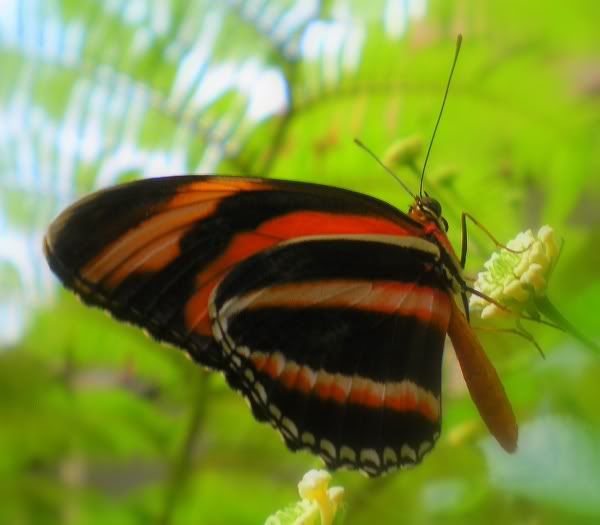
Erato Heliconian Butterfly 
White Peacock Butterfly 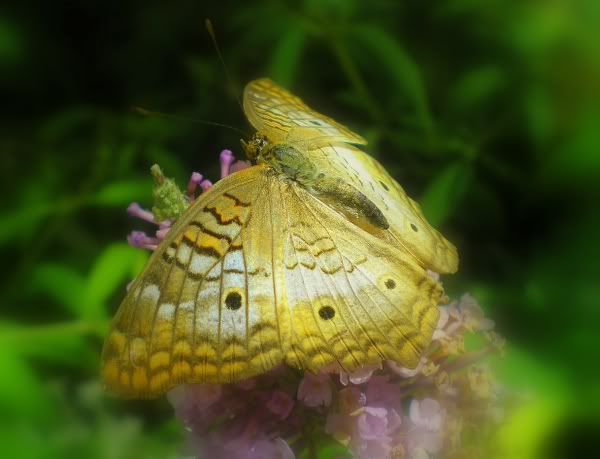
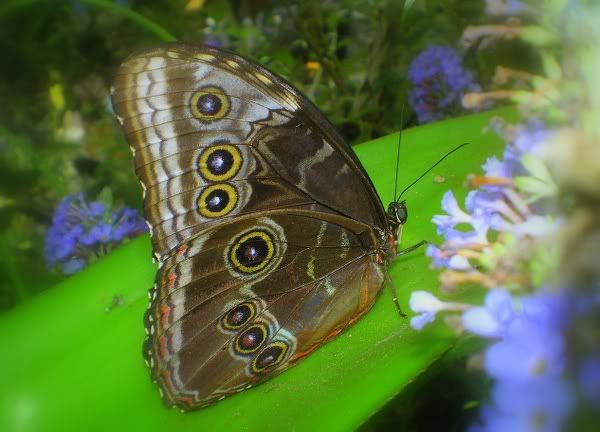
and last but not least.. Blue Morpho Butterfly 
Last edited: Tue Aug 26, 2008 4:30 am This blog entry has been viewed 13232 times
The Swamp Spring Clean & New Plants
Category: Water Garden | Posted: Sun May 18, 2008 7:20 am Well..the swamp is clean! Boy is that a job, it about kills me every year but it's worth it after I recoup. Both fish survived the winter but Bud the Bullfrog didnt. Bud was cool too and provided many entertaining moments for two seasons. I dont know what happened, he was alive in January but by March he was floating. My nephew, Jameson, brought over a bag of 10 new tadpoles so hopefully we'll have frogs this summer. Excuse me, I mean Jameson will have frogs this summer! I have to tell all the other nephews those are Jamesons frogs..Jameson said. My lily pot was looking good after I cleaned all the nasty out of it. They've multiplied to 5 plants now. I probably should have transplanted them this spring but it didnt happen. I'll be kicking myself later if it doesnt bloom. Can you see one of the big tadpoles in the lily pot? 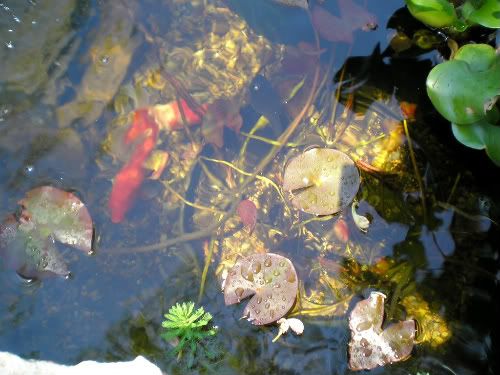
My youngest son gave me a gift certificate to a nursery for Mothers Day. I picked out 3 new not so typical pond plants. I hope they do ok. If anyone else has tried these in their water garden I'd love to hear how they worked out. Since these can take some wet feet I drilled holes around the bottom of the pots and try to keep the tops above water level. Buying these as perennials instead of 'pond plants' was quite cheaper per plant. As an example..these perennials were $4.99 each and I also bought a Dwarf Bamboo which was labled a pond plant. The Dwarf Bamboo was $19.99. It's just something about the word 'pond' that inflates that price... The Astilbe 
Blue Lobelia 
Loosestrife 
Huge Petunia basket atop the waterfall 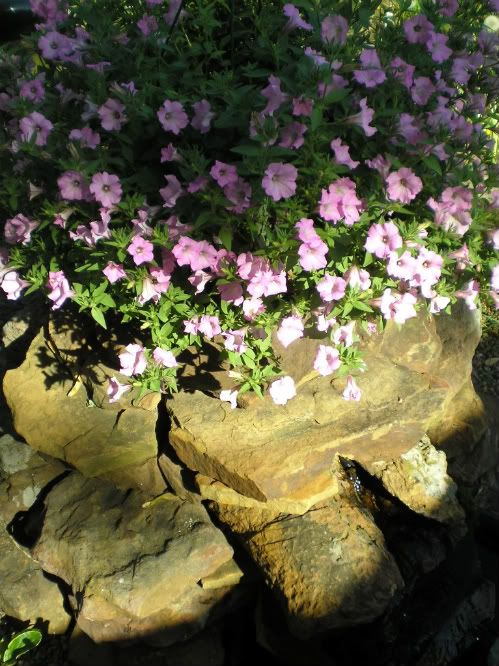
The big picture w/ Jameson, isnt he short? 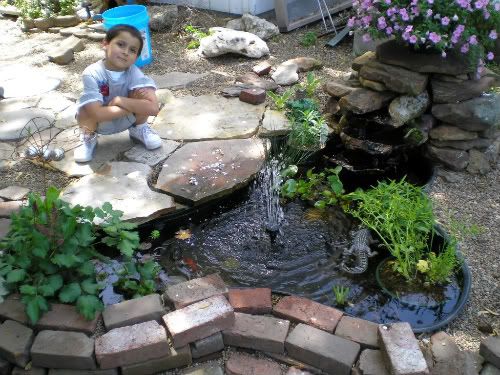
Last edited: Mon May 19, 2008 9:27 pm This blog entry has been viewed 1757 times
Spring 2008 Flower Photos
Category: My Plant Photos | Posted: Tue Apr 29, 2008 6:13 pm I'm loving the way these Lilac photos turned out. 


Old Fashioned Bleeding Heart 
Rhododendron x 'Olga Mezitt' 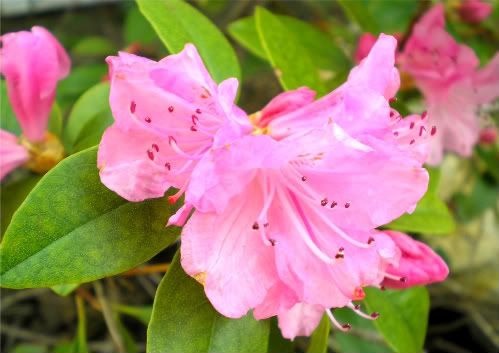
Cape Daisy 
Viola Blue 
Verbena Waterfall Mix 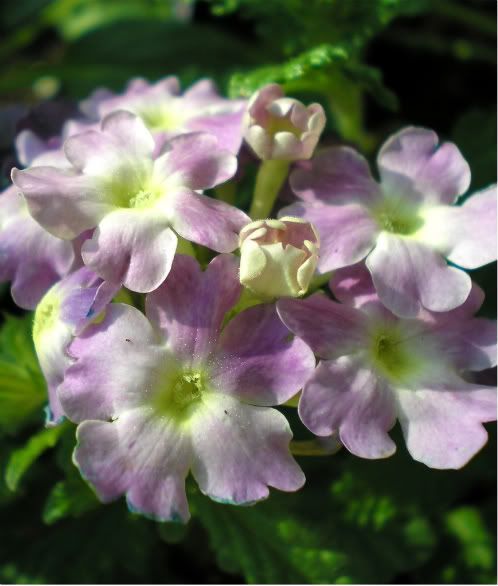
David Auston Shrub Rose 'Mary Rose' 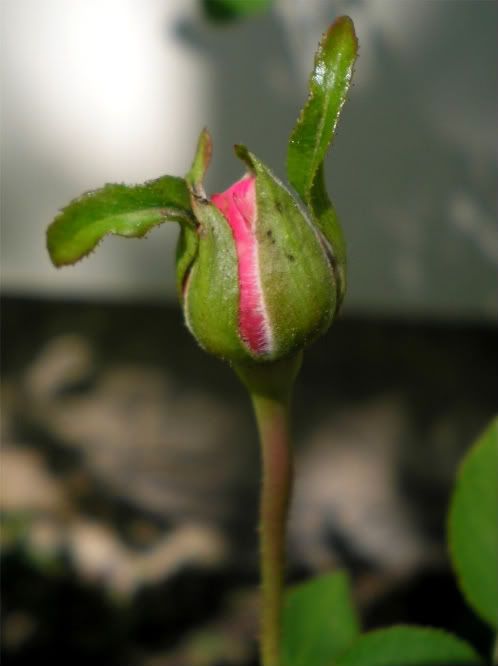
Dogwood 
Nemesia Poetry Mix 
Double Impatiens basket 
Lobelia Basket 
Dahlia Harlequin Mix 
Tulips 
This blog entry has been viewed 1731 times
Bimpwinkle & Dimwick
Category: Cool Gnome Guys | Posted: Sun Apr 27, 2008 4:39 pm I've actually been busy the past month. My sister and I were driving down the road and past a house where an old elm was getting cut down. They were hauling all the stumps to the curb and we past the massive pile. I must of made a noise as my neck cracked trying to look at all the stumps because she ask "you wanna go back?". My sister and I are twins and we do have the ability to know what the other is thinking. She was just a little off because she was thinking Fairies but I was thinking Gnomes. All I was thinking was there's a whole pile of Gnome Homes. She turned around and went back. I'm sure the tree cutter downer guys thought I was a little odd but I didnt care. I knew that a chance of acquiring a couple tree stumps that were hollowed out and big wouldnt come around very often. These stumps were so big that I could barely lift them or roll them around to look. After a few minutes of looking I'd found the perfect stump and one I could lift. They said to take all I wanted but I knew one stump would fill up the back of my sisters small car. After I got it home I was wanting more stumps so I called my brother because I knew the others I'd need help with. My brother told his wife he was leaving to help me get some stumps for Gnome Homes and she said "cant you think of anything better as an excuse to get out of the house?" Probably would sound crazy to most but I know most of you all can relate. Here's a before picture of what "the perfect stump" looked like. 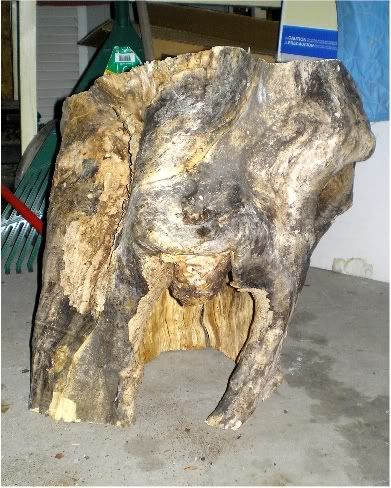
It didnt take long before I knew what I was going to do with this stump. I knew I wanted to put a roof on it. I got lucky as my brother had scrap pieces of plywood and pickets from an old fence that I could have so 'roof'n' it didnt cost me anything. I found an old can of wood protector/sealer in the basement so the entire stump got coated with it. That made the wood colors pop..I was pleased. I made a little sign and found a little tea lite lantern and painted a little wheelbarrow. My nephew was with me and helped pick out my first Gnome last February so he got to name this Gnome. Now before anyone thinks I'm capable of dreaming up cute Gnome names I'll admit that there's a Gnome Name Generator on the web. I picked out a few I liked and the kids to get to pick from that list. Here's Bimpwinkles new Gnome Home. 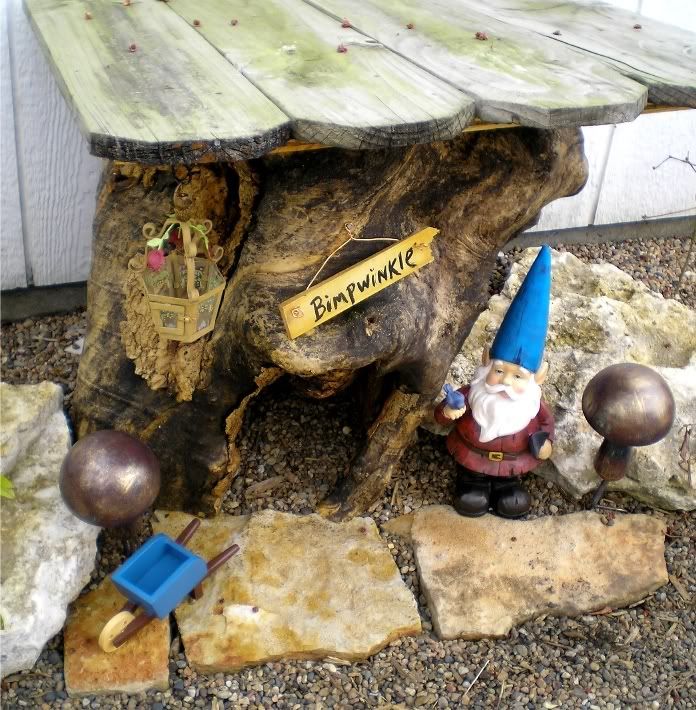
Before the Gnome Home project I'd already made a Gnome door and windows for the tree. I put brick steps leading up to it. My granddaughter Madyson picked out a Gnome and named him Dimwick. I still need to make his name sign and get it hung above his door. Only Gnomes can open a Gnome door. If humans try they'll only see the tree and no opening..as the story goes. 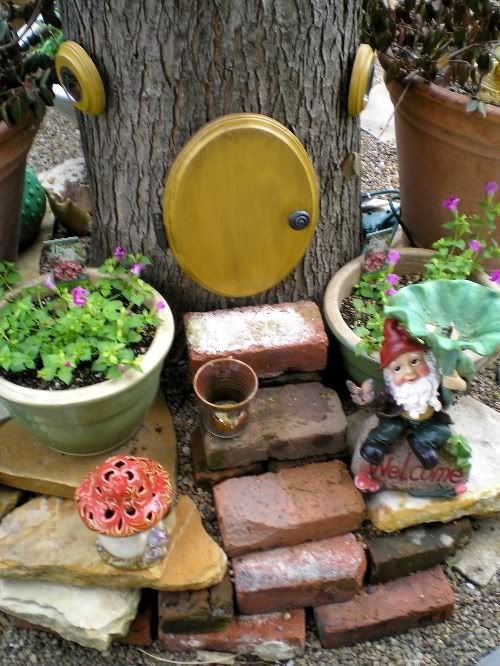
I have two more Gnome Homes to make. One is to go under the lilac bush and I'd hoped to get it done before the lilac blooms..I better hurry. Need help naming your Gnomes? http://nine.frenchboys.net/gnome.php This blog entry has been viewed 7752 times
Can I change my user name?
Category: Garden Totems | Posted: Fri Apr 25, 2008 3:16 am I could now officially be called Junkie Jo. I cant tell you the last time I went to a thrift store..until now! Thankyou fellow Stewbies for making me a junkie. I'd like to thankyou by name but without going back and reading old post I'd be leaving someone out and not giving credit where credit is due. You know who you are..all you thrift store garden totem people! I had to do some garden totems after seeing the ones here in the stew. Yes, I was admiring your junk..lol. Ok..so thrift stores are a blast! I've even developed an eye for totem possibilities. I even, will proudly admit, that I now know what day which thrift store offers additional discounts. So hows that? Am I a fast learner or what! I have two boxes of glass now so more totems are forthcoming. My sister went home with 1 of my totems but here's photos of two. I'm drawn to the amber colored glass. I've picked up alot of it along with greens and blues and of course the clear. Because of the Mean ol'Cat I got these sweet little birds because real birds know to stay next door. 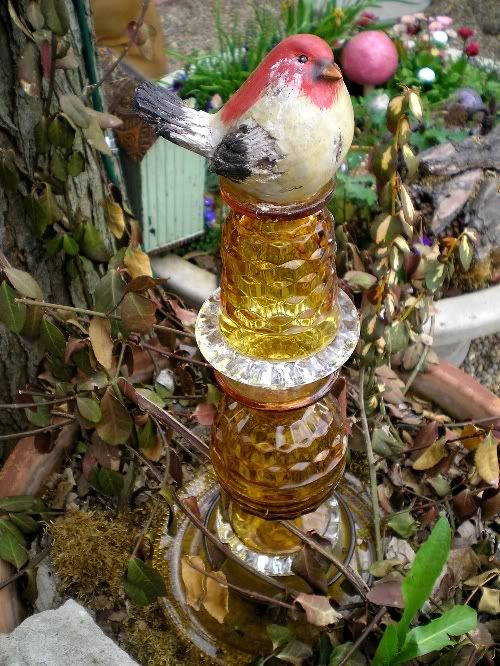
This blue one took a spill during the hail storm but I was able to repair it. I was lucky I wasnt having to replace glass to the tea cart it sits on. (Disregard the project piles in the background. I'm famous for starting to many projects at once.) 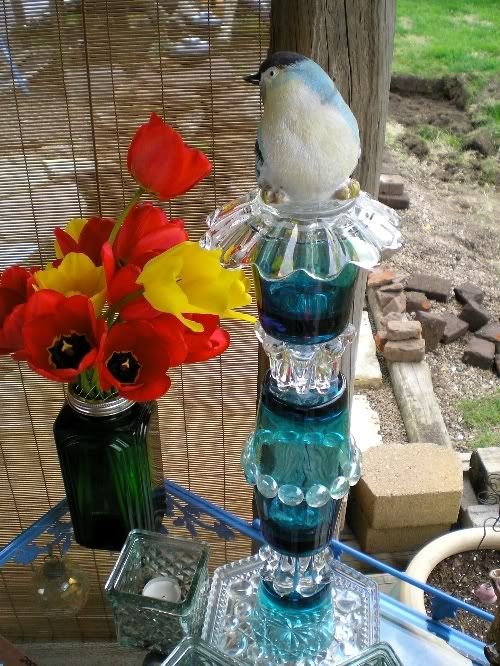
Last edited: Fri Apr 25, 2008 3:20 am This blog entry has been viewed 903 times
It's true..size doesnt matter
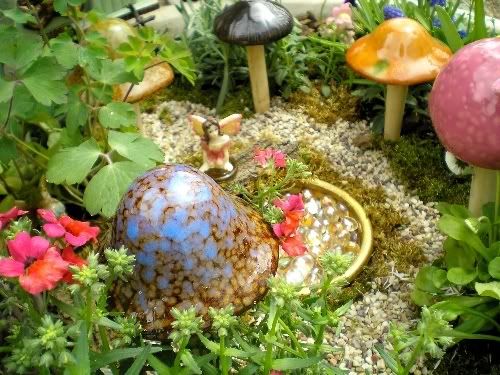
Category: Fairy Garden | Posted: Fri Apr 25, 2008 2:30 am It's true..size doesnt matter, but only when it pertains to hail and Fairy Gardens. Hail, no matter the size, is not Fairy Garden friendly. Last Monday night Kansas City had a few good size severe thunderstorms roll thru. As fate would have it, the part of the storm with a whole lot of hail rolled right over my house. Hail usually just last a minute or two and it's gone but not that night. It just kept coming and wouldnt stop. I was sick..I just stood there watching and listening to all the pops that everything was making as it broke for a good solid 25 minutes. And there was not one thing I could do. Around my covered patio I have two full grown maples. All the new leaves and baby (helicopters) seeds were literally beat out of the trees. Tulip foliage was shredded. A Garden Totem (another blog post coming) was knocked over. A mushroom was lost in the Fairy Garden..and the bridge was broke. That night I'd put a little abandoned Robin egg in the Fairy Hut and it too was smashed. To top it off a green flood light I have hanging in the tree exploded so I had glass everwhere. Oh well..I'll sprinkle more Fairy Dust. Everything white you see here is hail. This is the area that I have covered in pea gravel and stepping stones that's right off my patio. It's where I have the Fairy Garden and my puddle aka water garden. I had just reworked this whole area the day before and layed some bricks and had it looking good. 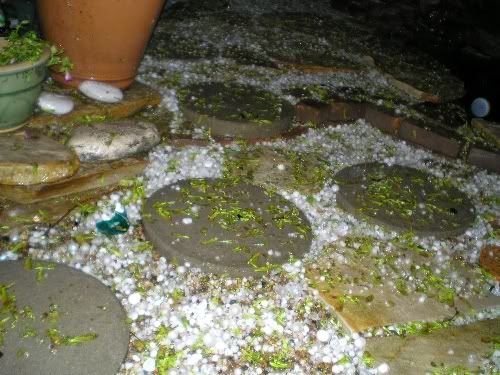
More hail and debris with the 'Mean ol'Cat'(bottom left) hightailing it to the back door 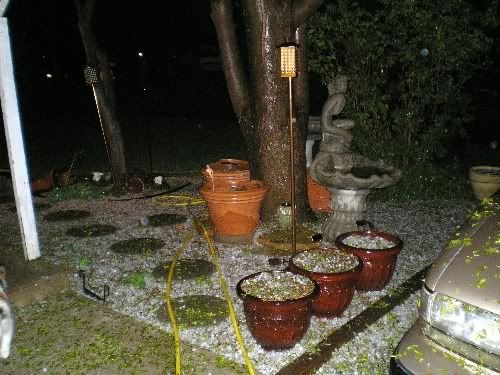
The beat down Fairy Garden the next morning. 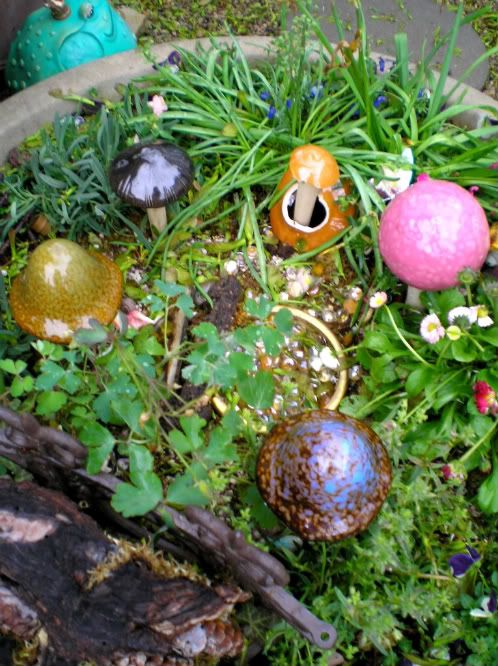
This blog entry has been viewed 825 times
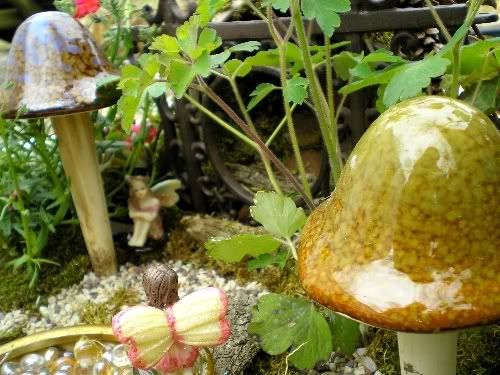
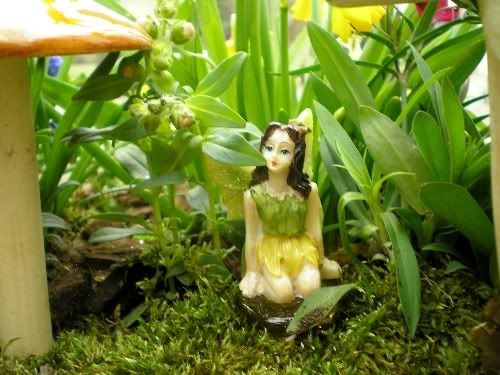
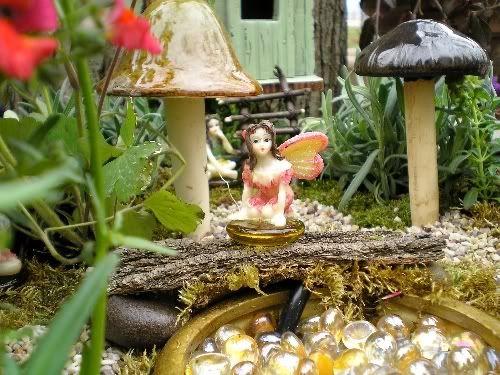
Completed Fairy Garden with Great Photos!
Category: Fairy Garden | Posted: Mon Mar 31, 2008 3:14 am As promised..here's the pictures of the completed Fairy Garden in the planter. 16 pictures to be exact. This shows the entire planter. I tucked moss around the inner circle of flowers and then put tiny gravel down as a path following the edges of the moss. I secured the moss with floral pins hoping to discourage birds and high winds. On the outer edges I mulched the plants with a old bag of orchid mix I had and added my left over moss crumbs pressing it into the soil hoping it stays put. 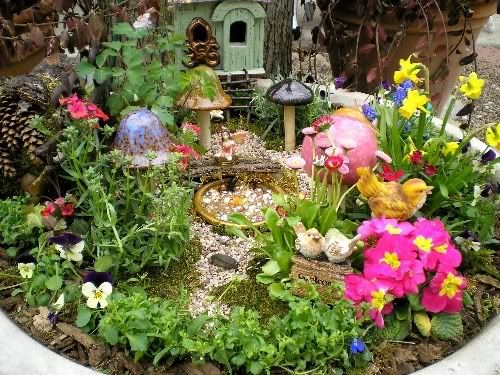
Welcome to a world of enchantment. On with the good stuff. 
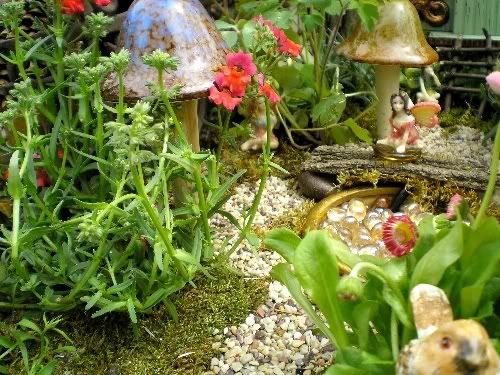
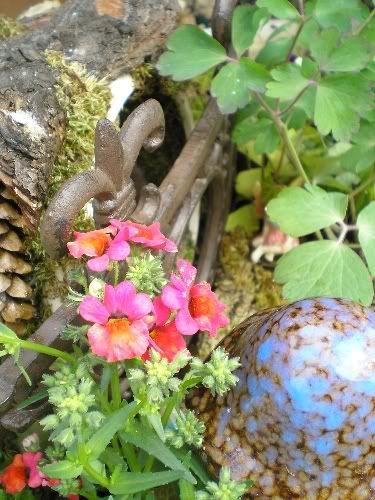


This is the Watch Bird. He tells Ma-Ma when short people are doing things they arent suppose to be doing. Madysons always saying "How'd you know?" and I tell her a little bird told me. Here he is! And yes, he has invisible eyes in the back of his head. 
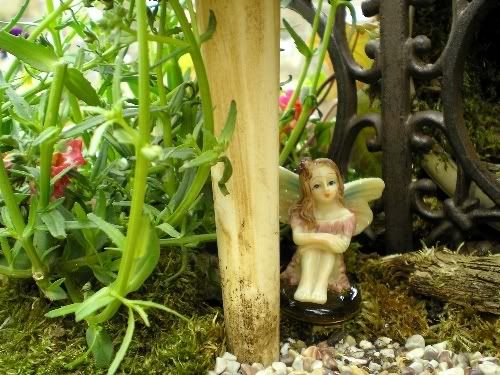
I bought tiny Fairies from this link http://www.miniature-gardens.com/baby-fairies.html It's a great company..I had my Fairies in 3 days. I will say this though..the measurements are listed as 2" high and they are not. They are more like 1 3/4". I was still happy with them and plan to order 2 more that were out of stock when I purchased the first 5. I did alter my Fairies so my photographs and the websites photos will look different. I changed some hair color to make them different, and glued them to some of those bigger flat gems so they wouldnt fall over. They all recieved a coat of laquer hoping to prevent color fade. It's kind of nice to know what kind of Fairies you'll be using so you know how big (or small) to make things. I also discovered that it's hard to find inexpensive Fairies in stores. Hope you enjoyed this..everyone needs atleast 1 Fairy Garden somewhere. Fairies are multiplying at my house so more photos to come : ) This blog entry has been viewed 59105 times
Fairy Garden In a Planter
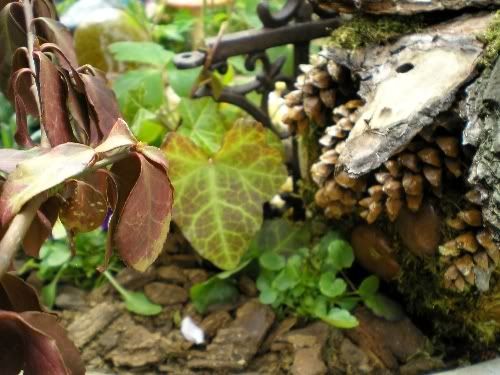
Category: Fairy Garden | Posted: Sun Mar 30, 2008 2:49 am Here's my first Fairy Garden that I've done. I'll do my best to explain what I've done and how I did it. My Fairy Garden is in a planter that's made out of concrete and measures 30", its a big huge bowl planter. Since it will stay outside, everything I've made or bought..I've sprayed with a high gloss laquer hoping it will all hold up better to the elements. Crossing my fingers. I started this project about 4 weeks ago and it's been alot of fun. I was inspired after going to a Flower Lawn & Garden show in February and I saw a small Fairy Garden done up in a bird bath. I searched the net and got ideas and then I was off and running in full Fairy Mode. While it was still real cold outside I started on things I knew a Fairy Garden needed. Structures! I had a few old orchid pots in the garage so I used one of those. This pot is a 9". I had little stones also and went and bought a bag of sheet moss. I stepped into the front yard and picked up pieces of bark that had fallen off one of my trees that has seen better days. For adhesive I used Goop 'marine' since I wanted waterproof. That got expensive so I do plan to find another adhesive that I think will hold up outside but will be cheaper than 6 bucks a tube. First I glued stones inside and outside of the pot. Then glued pieces of moss to fill in the gaps. I wanted to use the bark for the roof. I felt that the roof might need more than moss to be glued to so I used pieces of a broken clay pot for the roof base. After glueing the bark on, when it was set enough, I tucked tiny pieces of moss in the cracks. After everything was dry I sprayed several coats of laquer over the entire pot. I also did a little step for in front of the pot which is just a piece of bark glued onto two stones. 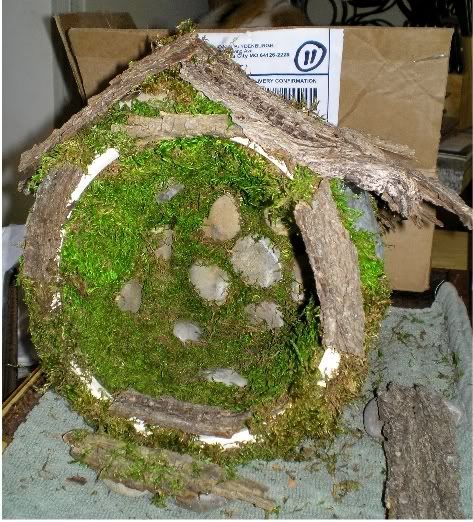
I wanted a Pot O Gold to go in the middle of the planter. I found a clearanced planter at Michaels for $3 and bought a big bag of gold gems. I already had a small water fountain pump. I buried the pump in the bottom of the planter, put a few rocks on top to hold it down, added gems..wahlah a Pot 0 Gold. I have electricity by my Fairy Garden and I'll put this POG down into the dirt. 
I start wondering how I'd cover the cord that's coming out of the POG. I made a bridge..same concept as the step only bigger. 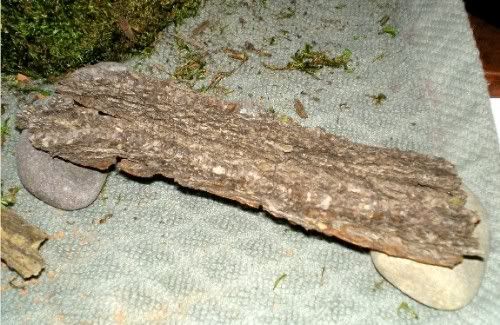
My Fairy Garden was supposed to be built by the Fairies so I had my 4yr old Granddaughter come over to plant The Pink Magic Mushroom! This was fun and she bought it hook line & sinker. She sprinkled Fairy Dust all over this so more mushrooms would grow. Where there's mushrooms..the Fairies surely live. I've also discovered I'm quite capable of telling Fairy (tall) Tales. 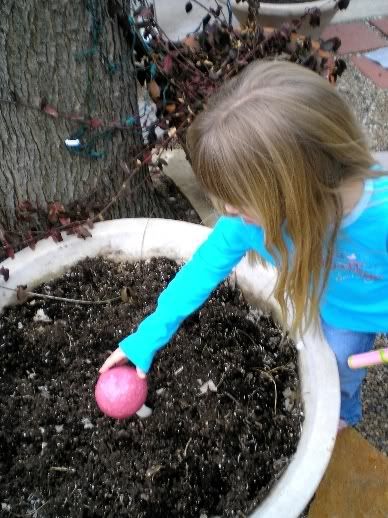
Finally I could go out and start putting the Fairy Garden together. I had to show her a picture of the magical things happening. Her magic mushroom turned into 5 mushrooms and a Pot O Gold. I got to test the water feature buried in the dirt theory and hide the cord : ) 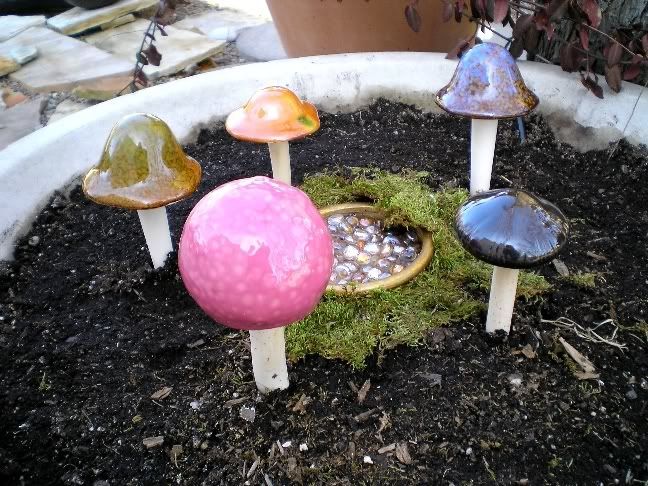
Spring cant come fast enough for me. Lowes was putting out their little pots of spring bulbs so I picked some up and a couple Dianthus. (Trying to do alot of perennials) I also put my Fairy Hut out and found a piece of iron edgeing that had a hole in it. I placed that in front of the hut. 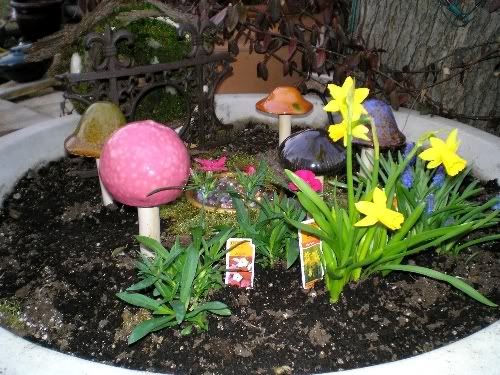
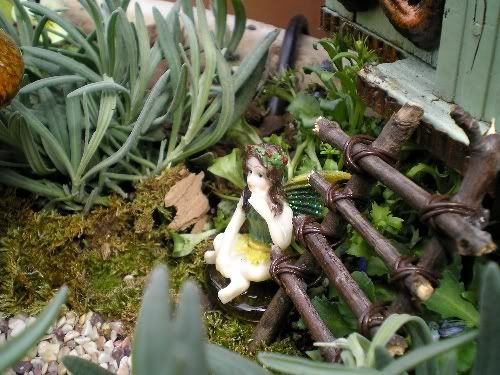
I found this little house at Hobby Lobby for $4 when they had their bird houses half off. I dont know about anyone else, but I find it hard to pay full price at HL when they always run things half off. All I did to this was spray it with laquer and I attached a small triangle hanger on the back. I have it hanging on the tree and I made a ladder out of a few small sticks. After I glued the rungs on I wrapped each rung with small jewelry leather and glued the knots. Sprayed it too with laquer and now there's a tree house. (I later moved the tree house up a few inches) Fairies are good at moving and arranging. 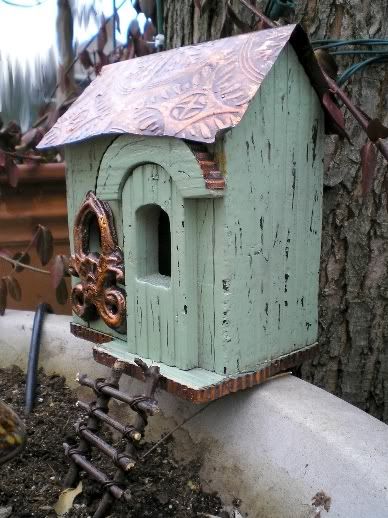
I'd decided that the Fairy Hut was to big and took up to much valuable Fairy room so I made another one out of a smaller 6" pot I had. I added some pine cones to this one. It fits much better. 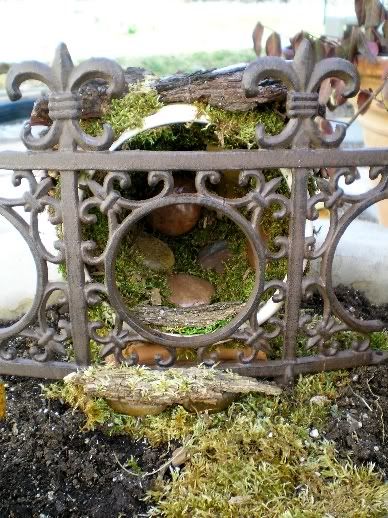
Doesnt it seem like the plants will never get to the garden center? Kinda like Santa Claus..Christmas cant happen fast enough. That's all I was waiting on to finish this up..was plants! The other day I was driving by Home Depot and saw the flower trucks! This was truly better than Christmas. Most people would say.."oh it's too early" but not me. I was in heaven. I planted it all up today and bout froze to death doing it but I was as happy as a pig in..... 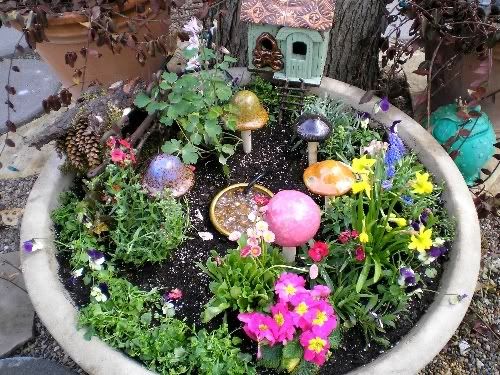
What I planted and hopefully wont have to replace; English Ivy x 2 Angelart Nemesia Primrose Grape Hyacinth x 2 Provence Lavender x 2 Daffodil (dwarf) x 2 English Daisy Columbine Dianthus Viola x 8 Lobelia x 8 Snap Dragon x 4 I also totally finished the Fairy Garden today with more moss and tiny gravel for the paths, along with a few ornaments. There was even a Fairy sighting! As soon as the sun shines I will take more pictures of the finished planter and get them posted. Last edited: Sun Mar 30, 2008 5:09 am This blog entry has been viewed 10627 times
You're reading one of many blogs on GardenStew.com.
Register for free and start your own blog today. |
Entries by Category
All Categories
|
