|
Recent Entries to this Blog
Project Tomato - It's Yummy
Posted: 25 Oct 2014 Posted: 03 Oct 2014 Posted: 23 Sep 2014 Posted: 19 Sep 2014 Posted: 07 Sep 2014 All Entries |
KK Ng's BlogProjects - All things new to me!
"PEEK - A - BOO"
Category: GARLIC | Posted: Thu Aug 11, 2011 4:03 pm The situation in the garlic pot is still very much the same and seems lifeless so I decided to take peek. 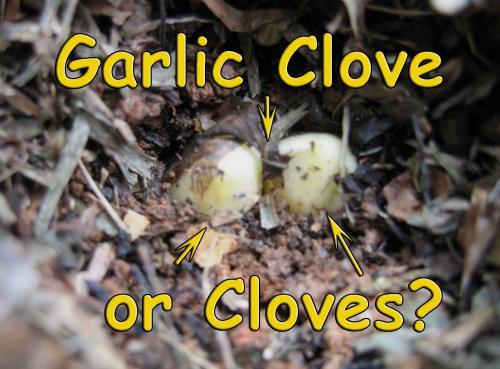
Did it multiply?! ( photo / image / picture from KK Ng's Garden ) I was really surprised when I parted the mulch right in the middle of the pot. I remembered that I only had one clove there when I started and now looks like two ...hmmm. I am very sure that only one clove is planted in each position. Anyway I left it as it is and covered the clove or cloves back with some earth and mulch. Well one thing for sure they are still alive. This blog entry has been viewed 586 times
Resting?
Category: GARLIC | Posted: Thu Aug 04, 2011 2:35 pm 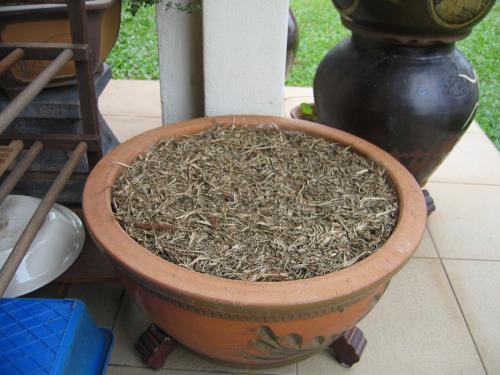
Sleeping? ( photo / image / picture from KK Ng's Garden ) This photo is taken today and still no sign of anything yet. The weather had been really pleasant and cool for the past few with very light drizzle every now and then. Hmmm .... do you think that they think winter is coming? Last edited: Thu Aug 11, 2011 3:48 pm This blog entry has been viewed 1852 times
It's Lifeless!
Category: GARLIC | Posted: Thu Jul 28, 2011 3:13 pm 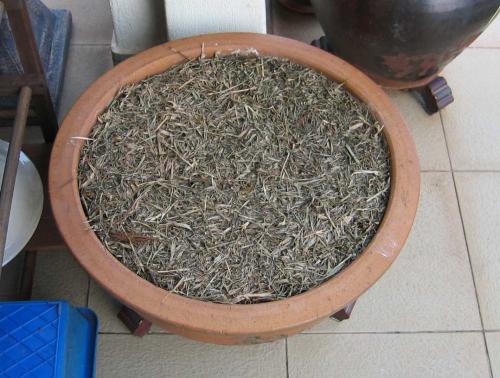
Lifeless ( photo / image / picture from KK Ng's Garden ) Is it lifeless? It sure did take care of the intruder problem but what is happening to the residents? Maybe they are building their foundation first .... I mean growing roots. Guess just have to keep my fingers crossed, keep watering them and hope one of them will pop up real soon! Last edited: Thu Jul 28, 2011 3:13 pm This blog entry has been viewed 787 times
Mulch in a Pot
Category: GARLIC | Posted: Fri Jul 22, 2011 4:09 pm 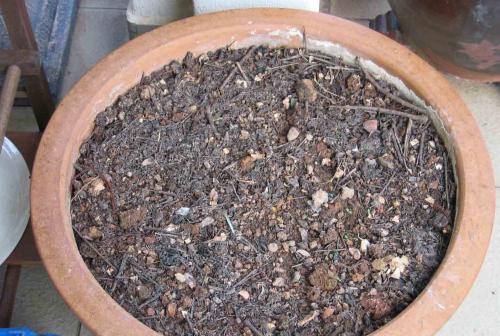
Garlic ( photo / image / picture from KK Ng's Garden ) I noticed that the earth in the pot gets quite dry during the day because of the hot weather and intruders are raring their ugly heads! 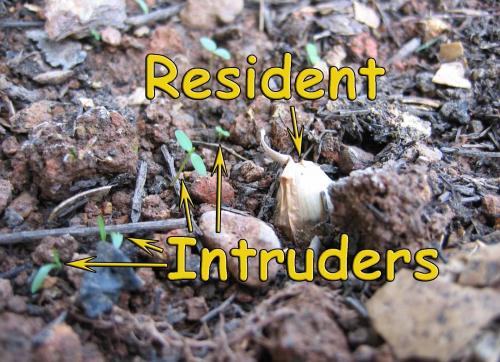
Still Lifeless ( photo / image / picture from KK Ng's Garden ) The garlic seems to be happy just sitting there while the intruders were busy marking their territories. 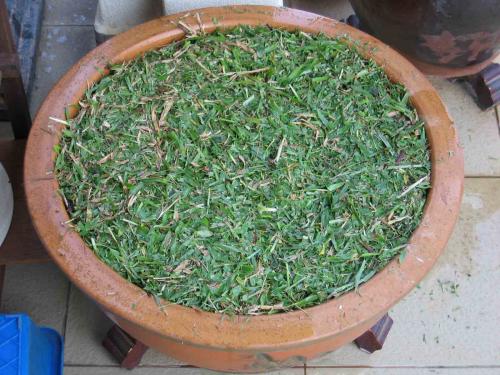
Mulched ( photo / image / picture from KK Ng's Garden ) I was mowing the lawn and I thought why not mulch it with the grass clipping to keep the intruders at bay and the earth in the pot moist. I have never put mulch in a pot before and it looks like a good idea at that time. Now I'm thinking ... will it affect the garlic? This blog entry has been viewed 1348 times
Will it or will it not?
Category: GARLIC | Posted: Fri Jul 15, 2011 3:07 pm Yes that is the question, will it grow. I have not planted garlic before. Wanted to try growing it before but was discouraged because garlic is not a tropical thing but then again it is fun just to try it out. After reading most of the posting here in Garden Stew, I decided to plant them in a container for more control. 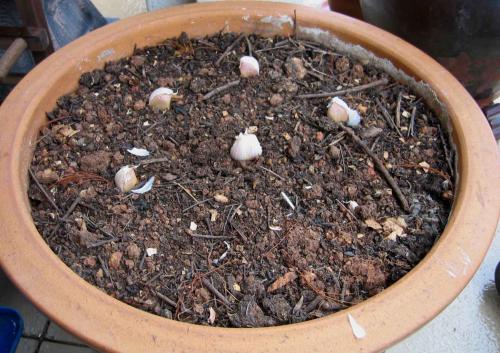
Garlic ( photo / image / picture from KK Ng's Garden ) Totally I planted 7 cloves, 2 already partially buried. 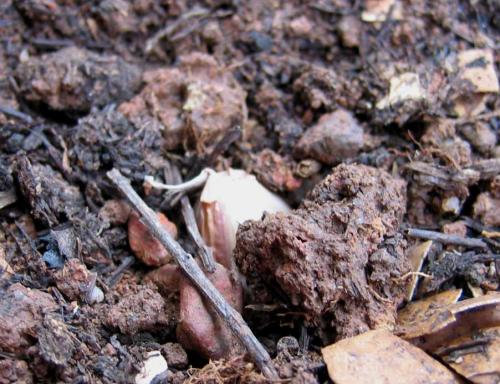
planted ( photo / image / picture from KK Ng's Garden ) This is how far I had them buried, I hope it is the rigth depth or should I push deeper in? Last edited: Fri Jul 29, 2011 3:10 pm This blog entry has been viewed 1400 times
A Filter is Needed!
Category: Aquaponics | Posted: Tue Jun 21, 2011 3:12 pm The water in the fish tank was getting polluted with more and more suspended solids and the fish were getting depressed. The suspended solids were mostly from the fish pooh and loose earth that came with the pebbles. I did not wash the pebbles because they seemed to be OK when I started moreover I guess it is impossible to wash them. From what I observed, the outer layer of the pebbles seemed to have melted with the constant contact with water and is causing the water to be murky. The discharged nozzles got clogged after a week with these suspended solids in a slimy clump and cleaning is done on a weekly basis. The sliminess is an indication that there are organism breaking down the waste into nutrients and I am pleased but not with the clogging. The murky water, sad fish and clogged discharge nozzles is not a good sign. I decided to do something because I want to have tasty fish and like Jerry said "Happy fish are tasty fish", also not having to clean the nozzles that often. At first I thought of just a simple suspended solid trap like a sieve of some sorts and after some considerations I guess it would be a waste of good resources. 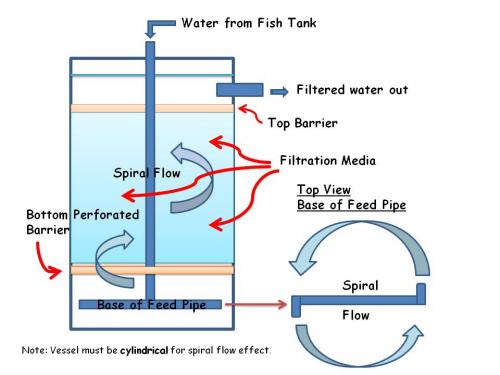
Bio Filter Schematic ( photo / image / picture from KK Ng's Garden ) Maybe I can just build a bio-filter base on the same principle as what I did for my little water fountain. It had been running for almost 3 years with no maintenance at all and it is still functioning perfectly. OK I'll do that. Checked the water pressure at the regulating valve purging side and the discharge water looks strong enough so no need for additional pump. Take stock of what is available to be recycled and reused. I had to spend $4.80 only for a short length of piping and some fittings. I have quite a few of these pigment drums which I got them free quite a few years ago and I just had no real for them for the time being. It is just the right size and is perfect for the bio-filter vessel body. Made a hole to fit a return tube for filtered water into the fish tank. 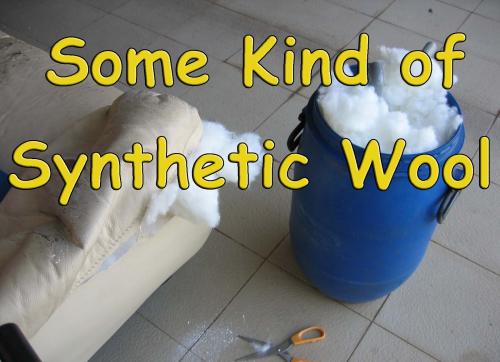
Filter material ( photo / image / picture from KK Ng's Garden ) The filter material is some sorts of synthetic wool which I extracted from an old couch waiting to be dismantled. The actual material used were scrubbies but I guess the synthetic wool will work just as well. 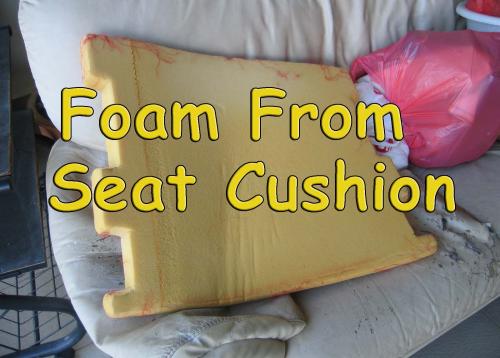
Foam ( photo / image / picture from KK Ng's Garden ) In case of scrubbies you can weight them down with some pebbles but with this synthetic wool I'll have to make use of a foam to keep them down so that any loose fibres would into flow into the tank. 
Shape for tight fit ( photo / image / picture from KK Ng's Garden ) I have some old foam seat cushion and it was just perfect for this purpose. I have to cut it slight larger than the circumference of the tub for a tight fit so that it can hold the wool down. 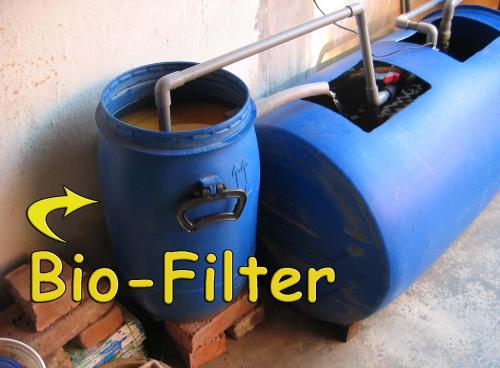
Installed ( photo / image / picture from KK Ng's Garden ) The bio-filter took me slightly more than an hour to make and it was being installed in the evening. 
Happiness ( photo / image / picture from KK Ng's Garden ) When I take a look early the next morning, the water was already crystal clear and guess who were smiling and going to be tasty again? This blog entry has been viewed 738 times
One More & One to Go!!
Category: Aquaponics | Posted: Thu May 19, 2011 3:11 pm I made a post and lost it yesterday due to computer problem!!! Grrrr!!! Two days ago I planted another bed with Romaines which I did not have much luck when I planted them on the ground. The bolted maybe due to the weather condition. 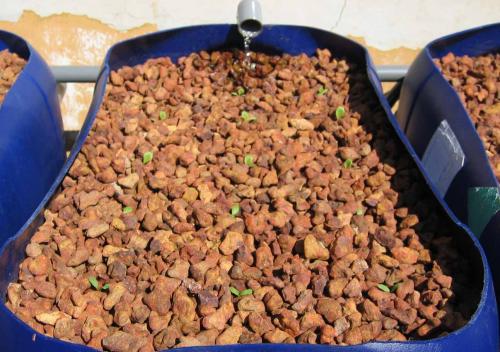
Romaine ( photo / image / picture from KK Ng's Garden ) This is my final attempt with romaines in this weather which I think they will bolt again because of the extreme hot weather. 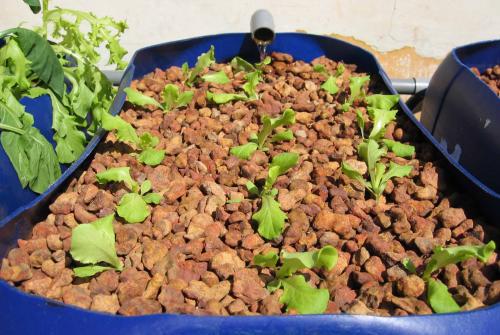
Local Lettuce ( photo / image / picture from KK Ng's Garden ) The local lettuce is doing well and this is my first experience with it. 
Mini-Boks ( photo / image / picture from KK Ng's Garden ) Mini-boks are doing great. 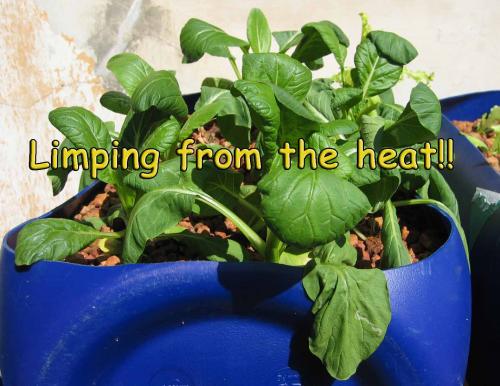
Brassica ( photo / image / picture from KK Ng's Garden ) The brassica looks like it is a bit under the extreme hot weather ...... hmmm, anyway they should be ready for the table soon. 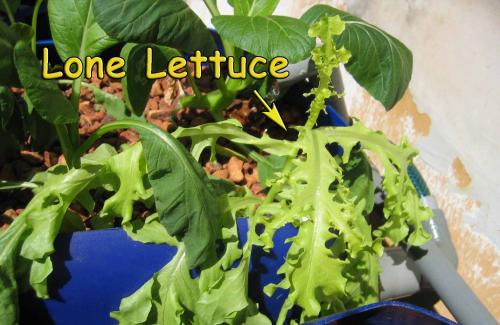
Lone Lettuce ( photo / image / picture from KK Ng's Garden ) The lone lettuce is a foreigner from a cooler climate which is the only seed that germinated. Looks like it is bolting instead of producing leaves. 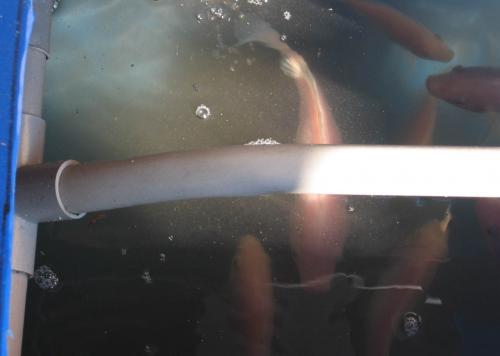
Fishes ( photo / image / picture from KK Ng's Garden ) These fellas are growing real fast. Not to worry, I did not name them or talk to them ....... yet!!! This blog entry has been viewed 1249 times
And Some More!!
Category: Aquaponics | Posted: Fri May 06, 2011 3:15 pm 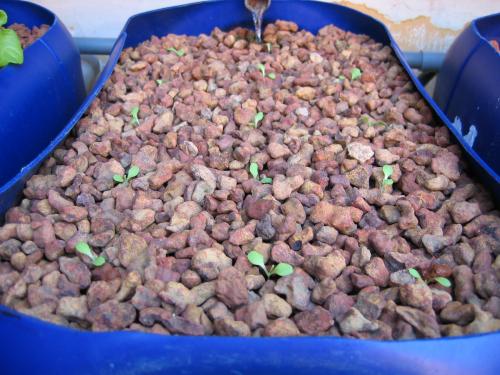
Lettuce ( photo / image / picture from KK Ng's Garden ) Filled up another bed with lettuce. Now that I had some experience of planting seedlings in peebles, it is getting easier! 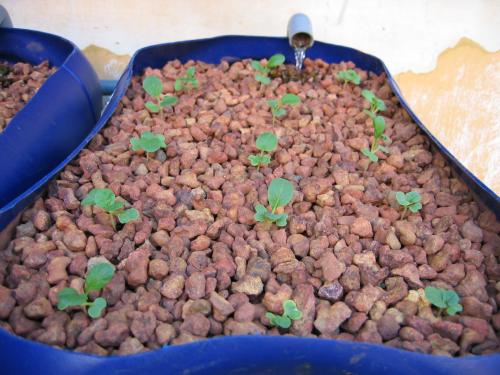
Mini-Boks ( photo / image / picture from KK Ng's Garden ) The mini-boks transplanted on 28th April are doing great. 
Brassica ( photo / image / picture from KK Ng's Garden ) The brassicas will soon be ready for the table. The lone lettuce is hidden right at the back and is doing fine too. Got a batch of romaine going and is the next batch going in!! Last edited: Fri May 06, 2011 3:18 pm This blog entry has been viewed 1609 times
More Plants :)
Category: Aquaponics | Posted: Thu Apr 28, 2011 3:38 pm Today I added more seedlings to the aquaponics system. These new seedlings are specifically grown to be planted in the system. 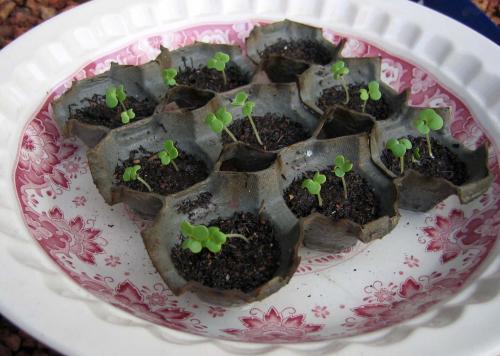
Mini-Bok ( photo / image / picture from KK Ng's Garden ) These are min-bok-choi or "nai-pai" in Chinese which is Milk White directly translated. One of our fellow member had planted this before but I cannot recall who. 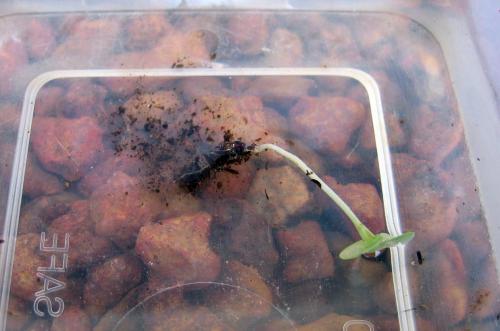
Cleaning the roots. ( photo / image / picture from KK Ng's Garden ) After carefully removing the seedling from the growth media, the seedling is gently put in water to remove as much as possible whatever is stuck to the roots. 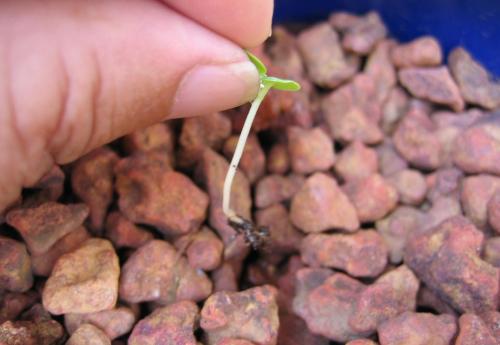
Planting the seedling. ( photo / image / picture from KK Ng's Garden ) A couple of the pebbles is removed to make a cavity so that the seedling can be inserted. 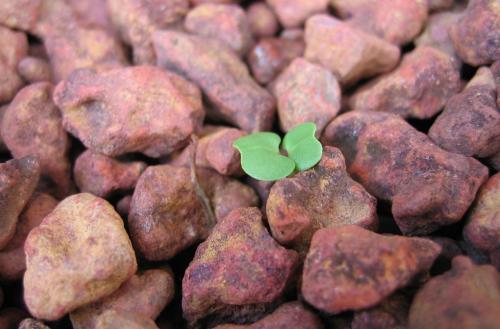
Planted ( photo / image / picture from KK Ng's Garden ) After inserting the seedling, the pebbles were carefully replaced and it is planted. 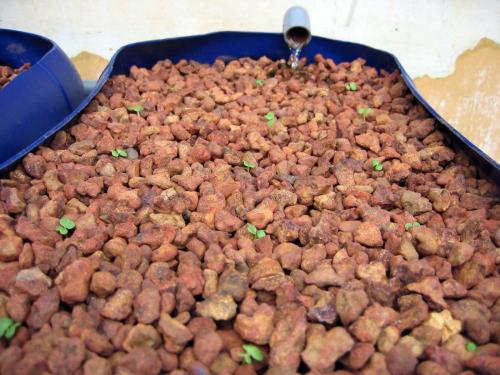
It's done! ( photo / image / picture from KK Ng's Garden ) I decided to go on a 3X3in grid and I managed to get a total of 15 plants in a bed. Isn't that a pleasant sight? 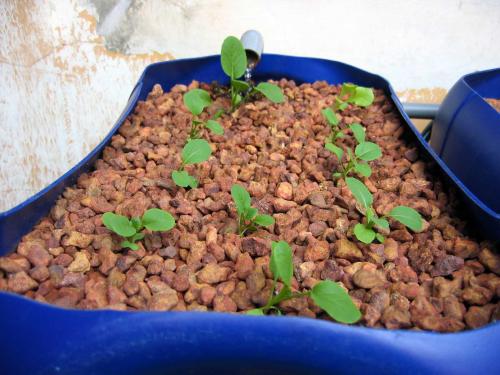
Brassica and a single lettuce. ( photo / image / picture from KK Ng's Garden ) A check on the first bed and I am please to say that they are doing well including the lone lettuce on the far right. I bought a packet of fresh lettuce seeds today and had sowed some seeds to be planted inthe systemm next. Keeping my fingers crossed that they will germinate. This blog entry has been viewed 1471 times
Did I learn the trick?
Category: Project Red Chili Pepper | Posted: Fri Apr 22, 2011 4:18 pm From day 1 since I started planting, I was never able to get the chilis to ripen on the plant. Frustrated with the situation, I tried planting it in pots so that I can have better control and I managed to get some red chili peppers. The yield was very low and quality I would say grade C. I thought it could be bacteria/virus in the earth in my mini-farm that was causing the chilis to rot before ripening. After checking ways to sterilise the soil, the only effective is by steam and it is costly so I stay away from chilis for awhile. A bed in the mini-farm was vacant and I had never plant chili there before so I decided to had a go at it again. Everything went well until before the chilis ripen, they start to rot as usual. Decided to post my predicament and got lots of help. Thanks everyone. So I did something and got ripened red chili peppers. The quality is good and yield is decent. The conclusion is that they were attacked by thirsty micro juice sucking pest which is not visible to the naked eyes. So today I planted 2 seeds from the fruits of the last plants and hoping to conclude that my home brew pesticides is my success story ... haha!! This blog entry has been viewed 1452 times
You're reading one of many blogs on GardenStew.com.
Register for free and start your own blog today. |
|
