|
Recent Entries to this Blog
Project Tomato - It's Yummy
Posted: 25 Oct 2014 Posted: 03 Oct 2014 Posted: 23 Sep 2014 Posted: 19 Sep 2014 Posted: 07 Sep 2014 All Entries |
KK Ng's BlogProjects - All things new to me!
A Year and 2 or 3 Months Since ......
Category: Aquaponics | Posted: Tue Jul 03, 2012 4:38 am It had been a a year and 2 to 3 months since when I planted my very first seedling in my aquaponic bed. These are the latest that I just planted a couple of days ago. 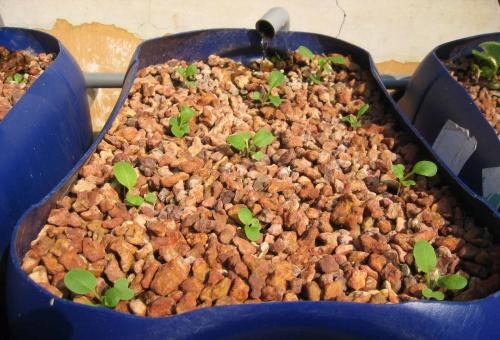
yummie nai pai ( photo / image / picture from KK Ng's Garden ) Just about a year after, I had to make a real difficult decision to eat or not to eat the tilapias. They had grow so large and is splattering water all over the place when they fight. The alpha male would then occupy almost 50% of the tank with its mate making the rest look like sardines in a can. I just couldn't bring myself to harvest them but I know they had to go. My neighbour's maid offered her services to harvest and turn them into food which I gladly accepted. In just a matter of hours the tilapias were history ... tasty too deep fried. With the tilapias gone, I decided to use aquarium fish as poo generators. I started with platies and tiger barbs. Platies because they are hardy and live bearers. Platies reproduce fast so I do not need to a lot on buying them. Tiger barbs because I like them and they come cheap. I started with 10 platies and 10 tiger barbs but I know I need at least a 100 to produce enough poo for the five beds to get healthy veggies. The platies got pregnant, gave birth and the other fishes treated the fries as hors-d'oeuvres because there is no place for them to hide in the tank. 
New Addition ( photo / image / picture from KK Ng's Garden ) In view of this situation, I decided to add in a breeding tank to the system. I made use of the water from the system because when I transfer the pregnant fish from the main tank to the breeding tank, the fish will not suffer any shock because the water condition is the same. With the addition of this tank, the population grew. 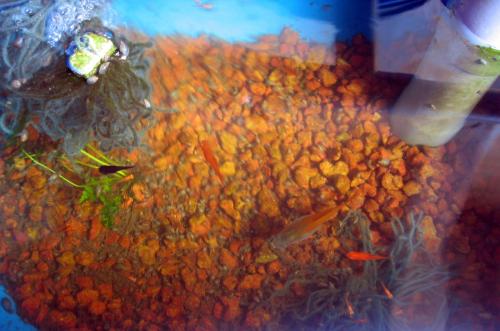
Inside the breeding tank ( photo / image / picture from KK Ng's Garden ) You can see a mama fish and some fries in the breeding tank and some different species too. I wanted to increase the population fast so I got myself some black mollies and swordtails too! These little fishes brought back lots of sweet memories of my childhood days, yes it is indeed pleasant :). I used to rear and breed lots of these fishes including those that lay eggs when I was a child and exchanged them for fish food or other fishes with my favourite aquarium shop. 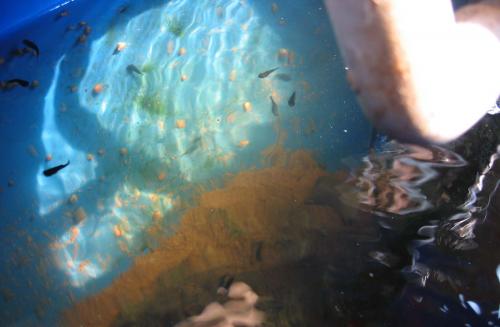
Main Tank ( photo / image / picture from KK Ng's Garden ) The poo generated was a little slow so I had the filter removed, only the filtering media was removed but the tank remained just in case I need it later. With the filter media removed, the clarity of the water was just slighty affected but the quality improved for the veggies. Now the system is running the way it should be again and the fish reproduction is controlled. Last edited: Tue Jul 03, 2012 5:02 am This blog entry has been viewed 1118 times
A Filter is Needed!
Category: Aquaponics | Posted: Tue Jun 21, 2011 3:12 pm The water in the fish tank was getting polluted with more and more suspended solids and the fish were getting depressed. The suspended solids were mostly from the fish pooh and loose earth that came with the pebbles. I did not wash the pebbles because they seemed to be OK when I started moreover I guess it is impossible to wash them. From what I observed, the outer layer of the pebbles seemed to have melted with the constant contact with water and is causing the water to be murky. The discharged nozzles got clogged after a week with these suspended solids in a slimy clump and cleaning is done on a weekly basis. The sliminess is an indication that there are organism breaking down the waste into nutrients and I am pleased but not with the clogging. The murky water, sad fish and clogged discharge nozzles is not a good sign. I decided to do something because I want to have tasty fish and like Jerry said "Happy fish are tasty fish", also not having to clean the nozzles that often. At first I thought of just a simple suspended solid trap like a sieve of some sorts and after some considerations I guess it would be a waste of good resources. 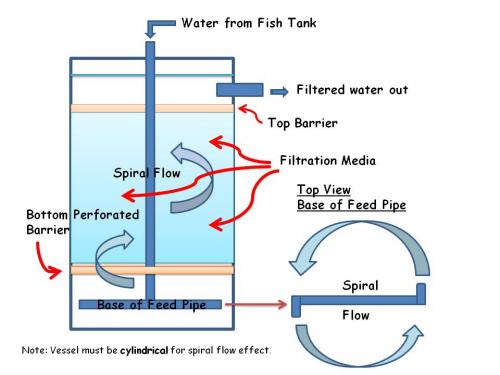
Bio Filter Schematic ( photo / image / picture from KK Ng's Garden ) Maybe I can just build a bio-filter base on the same principle as what I did for my little water fountain. It had been running for almost 3 years with no maintenance at all and it is still functioning perfectly. OK I'll do that. Checked the water pressure at the regulating valve purging side and the discharge water looks strong enough so no need for additional pump. Take stock of what is available to be recycled and reused. I had to spend $4.80 only for a short length of piping and some fittings. I have quite a few of these pigment drums which I got them free quite a few years ago and I just had no real for them for the time being. It is just the right size and is perfect for the bio-filter vessel body. Made a hole to fit a return tube for filtered water into the fish tank. 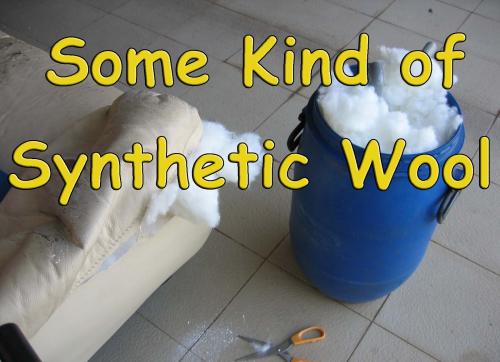
Filter material ( photo / image / picture from KK Ng's Garden ) The filter material is some sorts of synthetic wool which I extracted from an old couch waiting to be dismantled. The actual material used were scrubbies but I guess the synthetic wool will work just as well. 
Foam ( photo / image / picture from KK Ng's Garden ) In case of scrubbies you can weight them down with some pebbles but with this synthetic wool I'll have to make use of a foam to keep them down so that any loose fibres would into flow into the tank. 
Shape for tight fit ( photo / image / picture from KK Ng's Garden ) I have some old foam seat cushion and it was just perfect for this purpose. I have to cut it slight larger than the circumference of the tub for a tight fit so that it can hold the wool down. 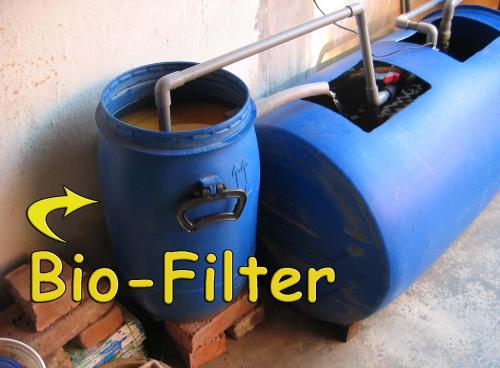
Installed ( photo / image / picture from KK Ng's Garden ) The bio-filter took me slightly more than an hour to make and it was being installed in the evening. 
Happiness ( photo / image / picture from KK Ng's Garden ) When I take a look early the next morning, the water was already crystal clear and guess who were smiling and going to be tasty again? This blog entry has been viewed 738 times
One More & One to Go!!
Category: Aquaponics | Posted: Thu May 19, 2011 3:11 pm I made a post and lost it yesterday due to computer problem!!! Grrrr!!! Two days ago I planted another bed with Romaines which I did not have much luck when I planted them on the ground. The bolted maybe due to the weather condition. 
Romaine ( photo / image / picture from KK Ng's Garden ) This is my final attempt with romaines in this weather which I think they will bolt again because of the extreme hot weather. 
Local Lettuce ( photo / image / picture from KK Ng's Garden ) The local lettuce is doing well and this is my first experience with it. 
Mini-Boks ( photo / image / picture from KK Ng's Garden ) Mini-boks are doing great. 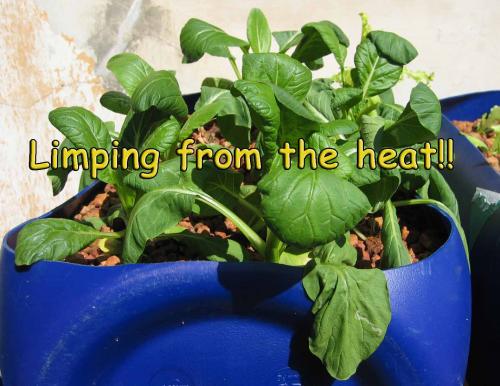
Brassica ( photo / image / picture from KK Ng's Garden ) The brassica looks like it is a bit under the extreme hot weather ...... hmmm, anyway they should be ready for the table soon. 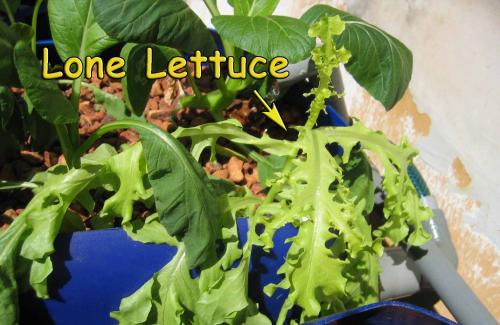
Lone Lettuce ( photo / image / picture from KK Ng's Garden ) The lone lettuce is a foreigner from a cooler climate which is the only seed that germinated. Looks like it is bolting instead of producing leaves. 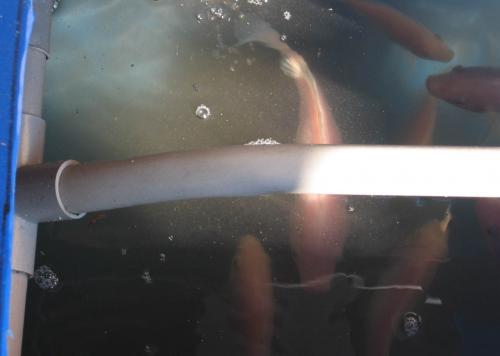
Fishes ( photo / image / picture from KK Ng's Garden ) These fellas are growing real fast. Not to worry, I did not name them or talk to them ....... yet!!! This blog entry has been viewed 1248 times
And Some More!!
Category: Aquaponics | Posted: Fri May 06, 2011 3:15 pm 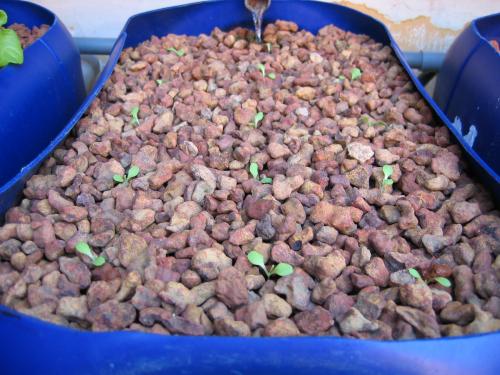
Lettuce ( photo / image / picture from KK Ng's Garden ) Filled up another bed with lettuce. Now that I had some experience of planting seedlings in peebles, it is getting easier! 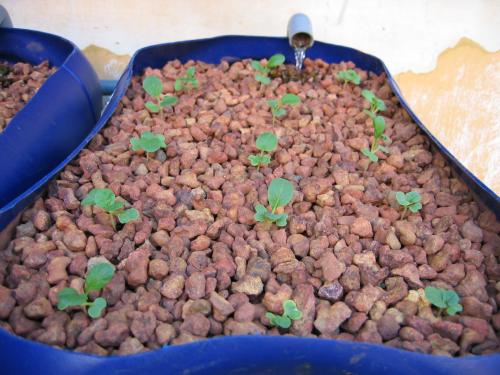
Mini-Boks ( photo / image / picture from KK Ng's Garden ) The mini-boks transplanted on 28th April are doing great. 
Brassica ( photo / image / picture from KK Ng's Garden ) The brassicas will soon be ready for the table. The lone lettuce is hidden right at the back and is doing fine too. Got a batch of romaine going and is the next batch going in!! Last edited: Fri May 06, 2011 3:18 pm This blog entry has been viewed 1609 times
More Plants :)
Category: Aquaponics | Posted: Thu Apr 28, 2011 3:38 pm Today I added more seedlings to the aquaponics system. These new seedlings are specifically grown to be planted in the system. 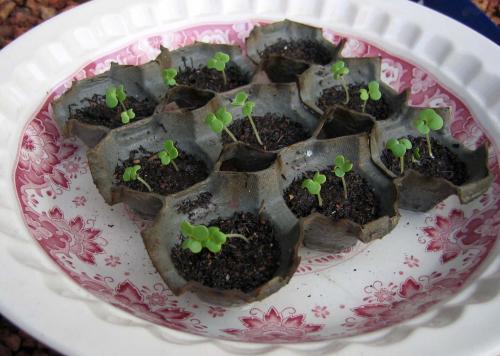
Mini-Bok ( photo / image / picture from KK Ng's Garden ) These are min-bok-choi or "nai-pai" in Chinese which is Milk White directly translated. One of our fellow member had planted this before but I cannot recall who. 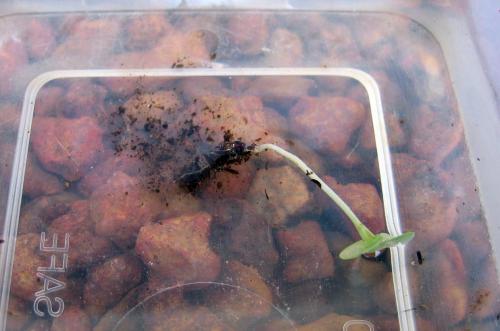
Cleaning the roots. ( photo / image / picture from KK Ng's Garden ) After carefully removing the seedling from the growth media, the seedling is gently put in water to remove as much as possible whatever is stuck to the roots. 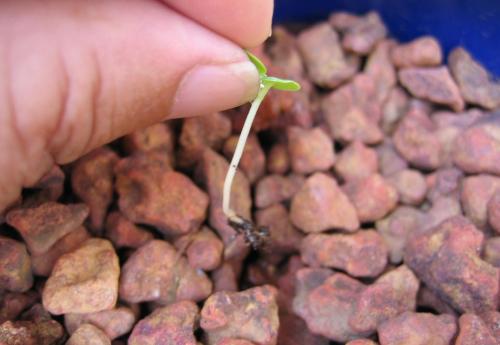
Planting the seedling. ( photo / image / picture from KK Ng's Garden ) A couple of the pebbles is removed to make a cavity so that the seedling can be inserted. 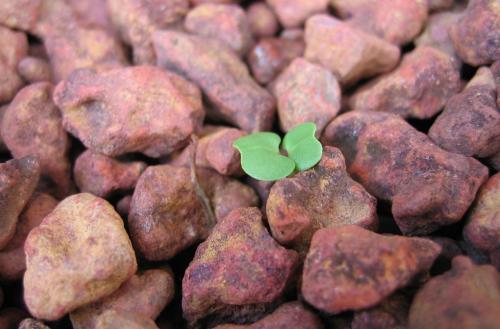
Planted ( photo / image / picture from KK Ng's Garden ) After inserting the seedling, the pebbles were carefully replaced and it is planted. 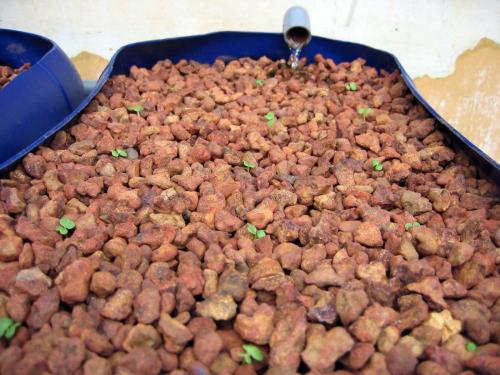
It's done! ( photo / image / picture from KK Ng's Garden ) I decided to go on a 3X3in grid and I managed to get a total of 15 plants in a bed. Isn't that a pleasant sight? 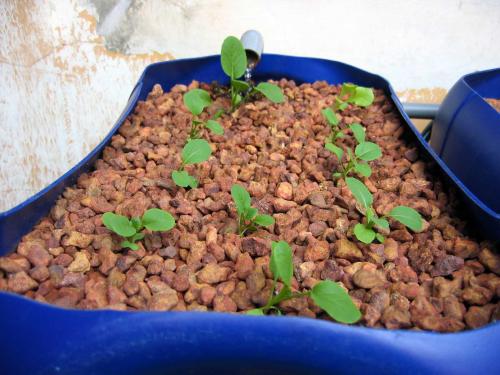
Brassica and a single lettuce. ( photo / image / picture from KK Ng's Garden ) A check on the first bed and I am please to say that they are doing well including the lone lettuce on the far right. I bought a packet of fresh lettuce seeds today and had sowed some seeds to be planted inthe systemm next. Keeping my fingers crossed that they will germinate. This blog entry has been viewed 1471 times
Let the planting begin!!
Category: Aquaponics | Posted: Thu Apr 21, 2011 3:59 pm Got the talapias in on March 23 and the got down to work immediately. 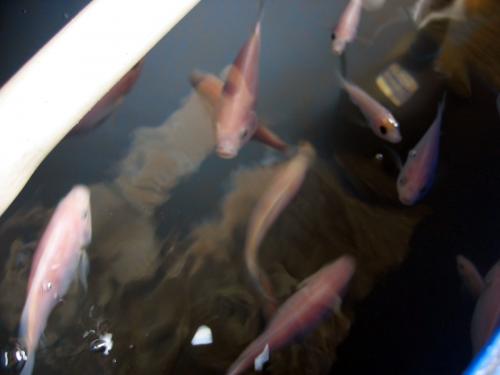
Talapias ( photo / image / picture from KK Ng's Garden ) These fellas are growing real fast, more than four times the size when I got them. I feed them with commercial fish pellets and lettuce leaf once in a while. Still looking for duck weeds inactively anyway they are keeping the tank real clean from algae. 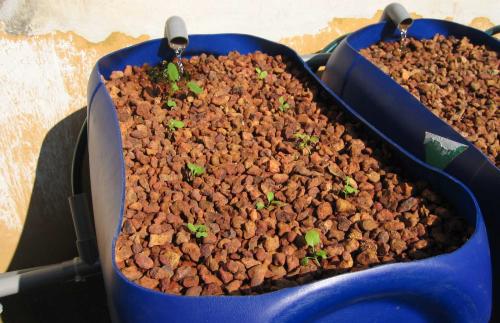
First Batch ( photo / image / picture from KK Ng's Garden ) These are the first batch of seedlings which is what Marlingardener would call "Orphans Plants" except for the one on the far right corner which is a lettuce. I wanted to start with lettuce but I only got a single seedling from the 20 seeds that I germinated. I hate waiting, don't you? As a matter of fact from what I had read, I am suppose to wait like 2 or 3 months to let the bacteria grow to produce the necessary nutrients but I couldn't wait. Now is to watch how this first batch of veggies is going to grow. I have four more beds ...... maybe I'll start more seeds tomorrow!!! This blog entry has been viewed 1684 times
All System Go!!
Category: Aquaponics | Posted: Tue Mar 15, 2011 3:57 pm After ironing out all the problems (I hope!) I had the fish tank filled out to the brim. 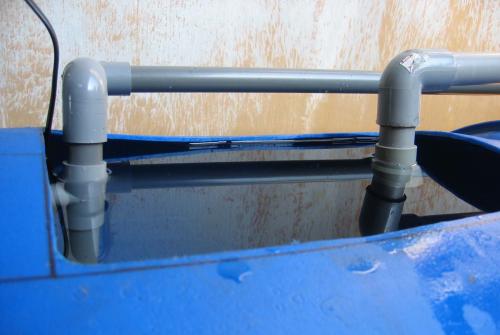
Filled to the brim ( photo / image / picture from KK Ng's Garden ) I made sure that all the water in the grow tanks were siphoned out before filling in the fish tank. In this way I am able to determine how much water is left in the fish when all the grow tanks were filled. 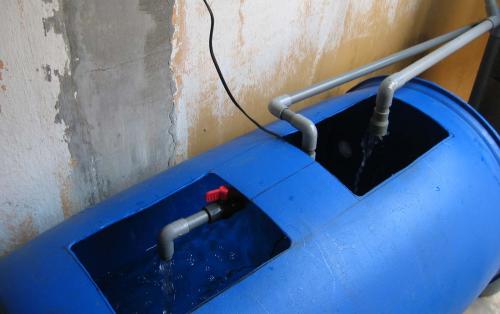
Water level after filled grow tank ( photo / image / picture from KK Ng's Garden ) The water level is about 6 inches or 16cm below the brim, That is a comfortable level to work with and I think if I were to add one more grow tank, it would be no problem. 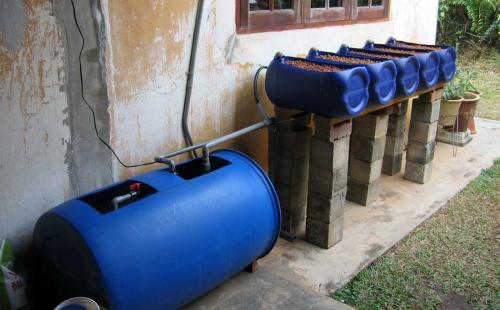
All system go!! ( photo / image / picture from KK Ng's Garden ) After feeling everything is running smoothly, I started with the cycle time adjustment. The best time I could get is about 11 to 13 minutes, any slower the siphon will not start. I guess I just had to work with that even thought I mentioned theoretically is 15~20 minutes. Would a couple of minutes make a difference?? Hmmm ... Well the only way to find out is when the planting start and I am OK with that. I had also inoculated the water with some water from my fountain so that the maturity of the water can be shorten. And I the final cost: Total Hardware purchase: $175.00 Old parts cost estimate: $25.00 Total Cost : $200.00 I guess $200.00 is reasonable and I am sure once it is productive, it should pay back in less than 6 months. Next, should I get edible fish of just fish, buy or go fishing? This blog entry has been viewed 1883 times
Problems and headaches!!
Category: Aquaponics | Posted: Sat Mar 12, 2011 4:26 pm After sleeping on the flow problem I came up with a simple solution which I thought should work, restrict the flow at the throat before the outlet. Instead of adding regulating valves on each and every outlet which will attract and increase cost, I guess the simplest way to achieve this is to reduce the diameter at the throat by inserting a sleeves. Got hold of tubing of different diameters and cut short section of it to make sleeves. Inserted it into the throat of the outlet with the fastest flow rate and the result was encouraging. I had turned the flow regulator valve to feed the grow tank at the most minimal rate as possible in order to see the effect of the flow. 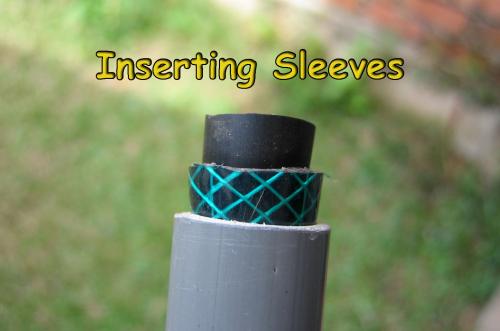
Sleeving ( photo / image / picture from KK Ng's Garden ) After lots of trial and error in establishing the diameter of each throat with all sorts of tubing and even plastic drinking straws, I managed to get the almost best even flow rate for all the 5 outlets. Once this is established, I can then adjust the cycle time . While adjusting the cycle time, I noticed that the drain did not stop and continue trickling at a steady pace. Oh no not another problem! Could it be the draining rate equals the feed rate? Checked the siphon hose one by one and confirmed that the two grow tanks that is the furthest away from the fish tank is the culprit. If the feed rate is equal to the drain rate then increasing the feed rate would solve the problem so I thought. Tried increasing the feed rate but problem is still there! 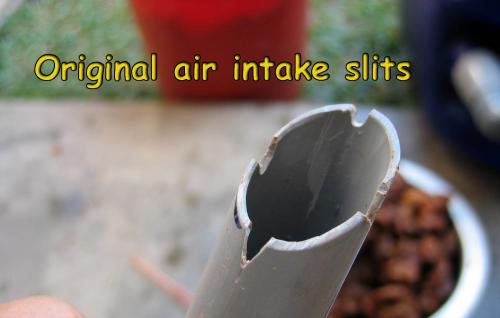
Version 1.0 ( photo / image / picture from KK Ng's Garden ) 
Version 1.1 ( photo / image / picture from KK Ng's Garden ) 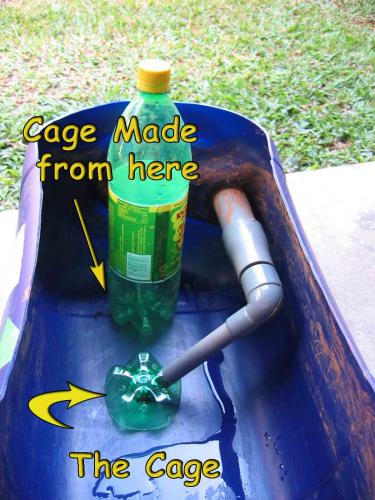
Insurance ( photo / image / picture from KK Ng's Garden ) It was getting late and decided to pack it in for the day and surfed the net till late at night looking for a solution but there was none. The next day I thought could be the air access hole being too small to break the siphon must be the problem and decided to make them bigger. It was a tedious task having to remove the pebbles from the two tanks but it was done after nearly 4 hours. Since I had all the pebbles removed from the tank, I decided to add a cage to the opening of the siphon tube to reduce the possibility of getting blocked in future. All the siphon system have the same size air access hole when I made them so I decided to redo the other three tanks as well. Even though it is tedious, if it must be done, it must be done - better safe than sorry or is it better now than later? Anyway cages were also installed as well to be on the safe side 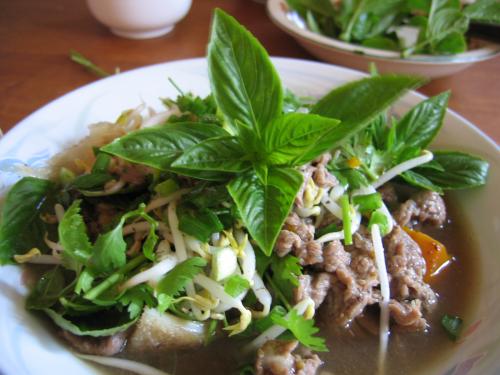
Pho bo - yummy ( photo / image / picture from KK Ng's Garden ) The next day got all the components and pebbles back in the grow tank and got the pump running again and ...... no, no...oh NO!!! it was still not working. Ah well, decided to help Becky with the very delicious "pho bo" or Vietnamese beef noodle soup preparation for lunch. This was the very first time we were making it and it was really yummy. After satisfying my tummy and rested, I headed to the aquaponic area to look at it again. Hmm ...... this maybe if I can just see what was happening under the pebbles maybe I would be able to find a solution. 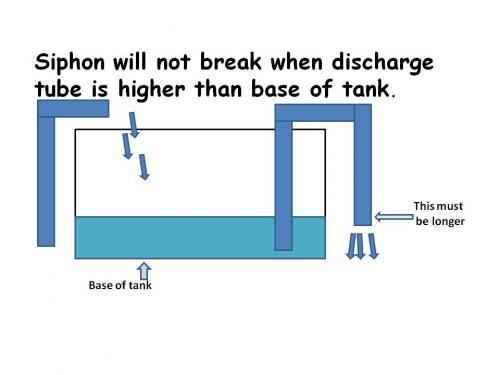
Siphon 5 ( photo / image / picture from KK Ng's Garden ) OK I decided just to make an opening in the pebbles until I can see the cage and observe the whole process from fill to siphon to break siphon to fill again. It was a long wait before the siphon started and again a very very long wait for the siphon to break because it did not. The siphon just slowed down when it reached a certain level and equal out to the feed, when I push the siphon loop lower the siphon speed increases. This must be the culprit, remove the hoses of the two problem tanks and compared them with the others and confirmed that they were shorter. Guess what, this problem was self inflicted, remember when some of the water was purging out during the very first run I cut the hose shorter to ease the flow, guess I cut a bit too much. Now to set the cycle time. This blog entry has been viewed 616 times
It's done ..... IS IT?
Category: Aquaponics | Posted: Thu Mar 10, 2011 3:18 pm Got the water pump which is the heart of the whole system which is reasonably priced and very reliable. Best of all the shop is just walking distance from my place. 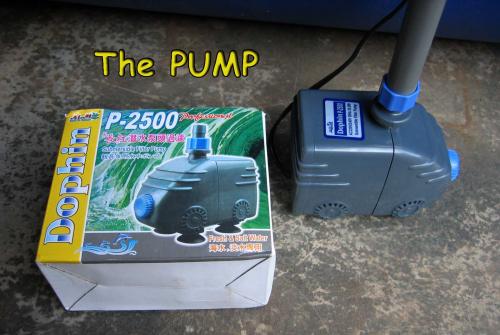
The Heart ( photo / image / picture from KK Ng's Garden ) It is a submersible pump exactly the same as the one that I have in my fountain which had been running continuously coming to three years now without any attention needed. It is rated 2,000 liters per hour with a power consumption of 28watts. Took a piece of left over 15mm pvc piping and it fitted nicely over the discharge port of the pump. With the diameter of the feed plumbing settled, I sat in front of the incomplete aquaponics system to imagine and decide on the best delivery system to feed the tanks with the water from the fish tank. Once decided, I started to make a shopping list for the hardware needed. From my measurement, I needed about 14feet of the rigid pvc piping but I decided to get a whole standard of 20 feet which is more cost effective than buying it base on foot run. 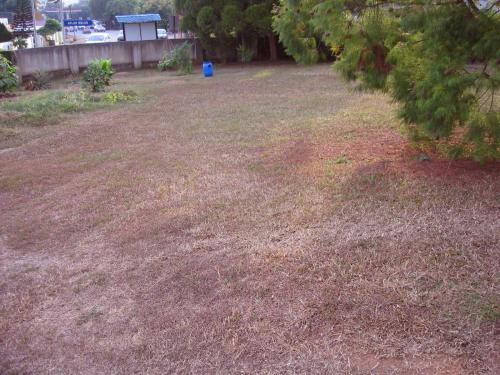
Dry, dry, dry! ( photo / image / picture from KK Ng's Garden ) After getting the hardware together, I had to stop work for the day because it was getting late in the day and the plants in the mini farm need to be watered, no thanks to the extreme hot weather and dry spell. I have to water them 3 times a day for the moment. 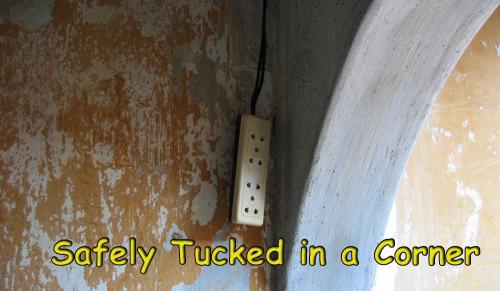
Power Point ( photo / image / picture from KK Ng's Garden ) Started immediately after breakfast the next day with the pump in hand and realised that the power was not done yet. Spent almost the whole day getting the cables and power point done up. The hardware were all left over from when I rewired the house. The wires were all new and the power was drawn from the main switch board with a dedicated mini circuit breaker. A switch is placed in the house for convenience of easy reach in case of emergency. 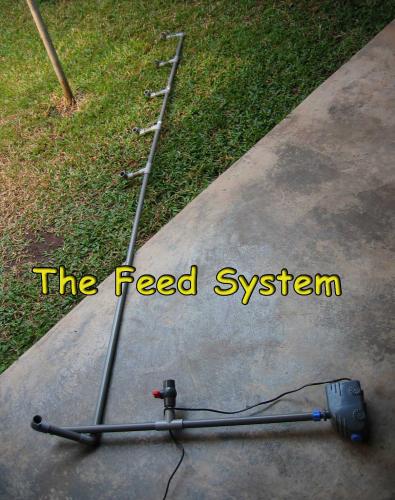
Feed ( photo / image / picture from KK Ng's Garden ) Basing on the principle that level of water will be the same if all vessels containing the water is connected, the feed pipe design is rather straight forward. The stopcock is to regulate the flow of the water. If the pump capacity is not enough, I had already convinced myself to buy another same pump if necessary because it did look a little small 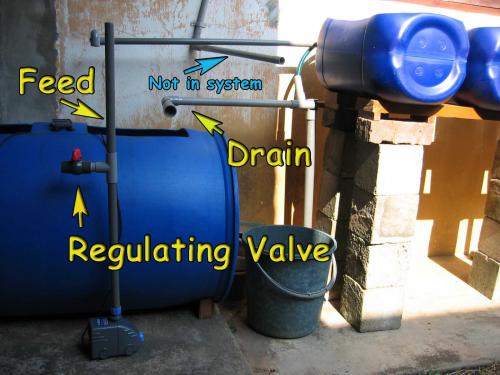
Feed System ( photo / image / picture from KK Ng's Garden ) Once everything was hooked up and ready to go, I decided to filled the fish tank with tap water because I had no more rain water and I don't think it'll rain soon. 
First Run ( photo / image / picture from KK Ng's Garden ) Once the tank was 50% filled and it was all system go! I was surprised the volume of the water that small pump can really pump up and in a matter of minutes the grow tank was filled and some even flooded before the siphon kick in. I was excited, really excited to see the system in motion. While adjusting the level of the flooded tank, I felt water splashing on my foot ......o..oh!! 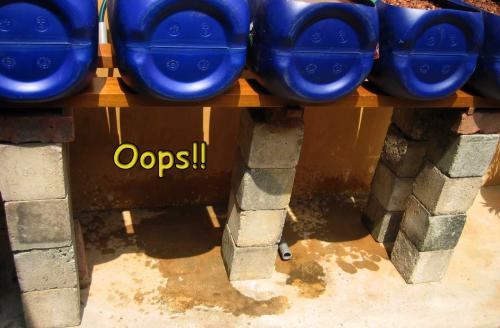
O, oh!! ( photo / image / picture from KK Ng's Garden ) 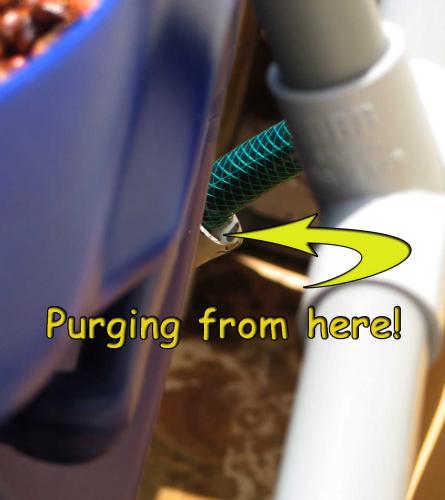
The Culprit ( photo / image / picture from KK Ng's Garden ) Made a quick inspection and found that water was splashing out of the hole where the hoses go into the drain pipe. Hmmm.... check the hoses where the water is splashing and concluded that they were too deep inside thus restricting the flow of the water and causing a back flow. Without another thought those hoses were reduced in lenght by about an inch or so and the problem was corrected. I am pleased that it was running and took a moment to admire it in action The flow regulating valve worked like a charm but I was wrong with the principle that level of water thingie, it only works base on arguhhh!!! I don't know!!! the flow to the five tanks were all at different rates. 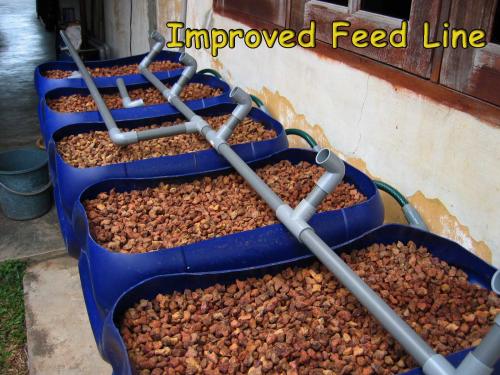
Feed Version 2 ( photo / image / picture from KK Ng's Garden ) Decided to change the design to this improved version with the main feed flow coming from more or less from the center. For this design I had added in the pressure from the pump and hope that the flow pressure would be distributed evenly through the outlets. Well it did not but at least I got even flow in pairs, that is the 2outlets at the ends were the same, the 2 mid-way have a flow rate of their own and the one closest where the feed is coming from was the strongest. Tried to find a solution but it was getting late and the mozzies were having a feast of me!! And the cost so far: 1 pc 200 litres Drum = $45.00 5 pcs 25 litres cans = $20.00 1 pc Funny Hand saw = $3.90 1 tube 300gm silicone sealant = $6.00 8 pcs Reduction Adapter 32 to 25mm = $5.60 8 pcs Reduction Elbow 25 to 15mm = $4.80 1 meter 32mm pvc thin wall pipe = $2.50 1 meter 15mm pvc thin wall pipe = $1.50 1 pc best quality hacksaw blade = $3.80 4 pcs 20mm pvc T junction = $3.80 1 roll teflon tape = $0.50 1 pc submesible pump = $48.00 5 pcs pvc 15mm T joint = $5.00 1 pc 20ft 15mm pvc pipe = $10.50 1 pc 15mm pvc/nylon stopcock = $8.50 7 pcs 15mm pvc elbow = $5.60 Last edited: Thu Mar 10, 2011 3:23 pm This blog entry has been viewed 608 times
Almost There!
Category: Aquaponics | Posted: Wed Mar 02, 2011 3:44 pm Done with the sorting of the pebbles and assembly of all the grow tanks with the drainage plumbing in place. The sorting of the pebbles was rather boring but it must be done. In total I made 3 trips to pebble land and spent more than 10 hours doing the sorting. Good things doesn't come easy in life ya!! The first batch of the pebbles was filled into the prototype tank to make sure that it would work fine and it did. 
Pebbles ( photo / image / picture from KK Ng's Garden ) The pebbles were filled in the order of the coarse right at the bottom to small at the top. 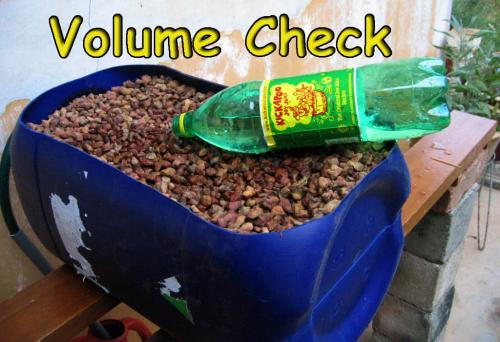
Water Capacity ( photo / image / picture from KK Ng's Garden ) The amount of water that was being held in the grow tank before the siphon start was also determined after the pebbles were in. It is about 11 liters and with 5 grow tanks a total of 55 liters of ............ oops!! mental mathematics block!! Will look at this matter when I can do a full physical run to see how would the whole system perform. 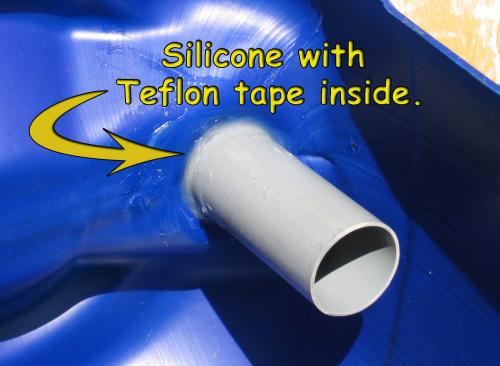
Sealing ( photo / image / picture from KK Ng's Garden ) All the other grow tanks did not have a perfect fit for the drain pipes as in the prototype. This time I have to use silicone together with teflon tape (thanks for this suggestion Sojerd). The teflon tape is great for increasing the perimeter of the piping for a snug fit while the silicone provided a great seal. While doing the assembly, a thought came into my mind that nasty algae will grow in the transparent soft pvc tubing that forms part of the siphon loop. I decided to make use of opaque flexible hose instead of the transparent pvc tubing 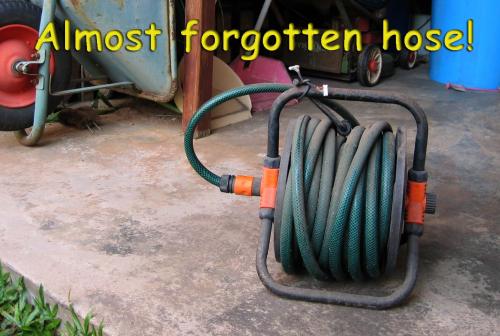
Opaque Hose ( photo / image / picture from KK Ng's Garden ) Once again up into the goodies store to look for an alternative and all I could find is this extra long garden hose that had been comfortably rolled up in its reel. It was all dusty for being up there for like ages and I guess cutting a couple of feet won't hurt. 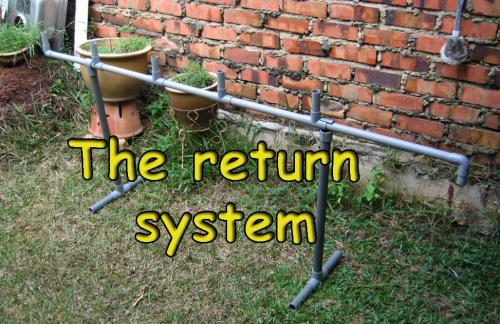
The Return System ( photo / image / picture from KK Ng's Garden ) The pebbles went into the grow tanks as they were sorted until all were filled before the plumbing work was started on. I had the return plumbing firmly embedded in my mind and was really excited to see it transformed into reality piece by piece. For the stand, I salvaged the materials from one my funny fishing gadget which was some kind mini sailing vessel. 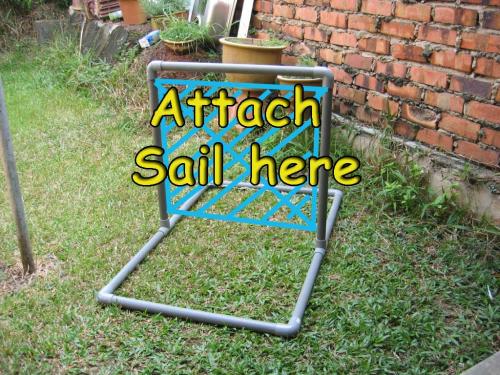
Fishing Contraption ( photo / image / picture from KK Ng's Garden ) I made this contraption after reading about it in the internet and did not catch any fish with it. The idea is for it to carry the hook and baits away from the beach as far as possible which I thought there were many fishes but ........ ah well!! that was history. Some of the parts were salvaged from the rod holder. The 20mm rigid pvc piping that I am using had a little story of its own. Never knew that the pressure could caused the pipe to crack, it was really messy and ugly. 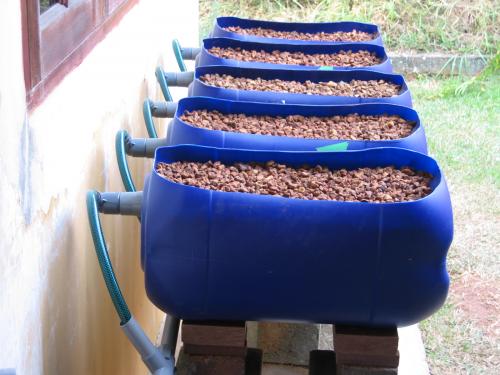
All in a row. ( photo / image / picture from KK Ng's Garden ) 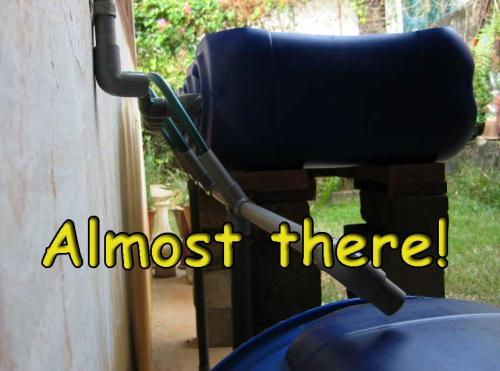
Almost there! ( photo / image / picture from KK Ng's Garden ) Now I am glad that I got a use for it and it should not cause any unexpected mess. Anyway the only expenses here were the T-junctions and teflon tape. And the cost so far: 1 pc 200 litres Drum = $45.00 5 pcs 25 litres cans = $20.00 1 pc Funny Hand saw = $3.90 1 tube 300gm silicone sealant = $6.00 8 pcs Reduction Adapter 32 to 25mm = $5.60 8 pcs Reduction Elbow 25 to 15mm = $4.80 1 meter 32mm pvc thin wall pipe = $2.50 1 meter 15mm pvc thin wall pipe = $1.50 1 pc best quality hacksaw blade = $3.80 4 pcs 20mm pvc T junction = $3.80 1 roll teflon tape = $0.50 This blog entry has been viewed 623 times
You're reading one of many blogs on GardenStew.com.
Register for free and start your own blog today. |
|
