|
Recent Entries to this Blog
Project Tomato - It's Yummy
Posted: 25 Oct 2014 Posted: 03 Oct 2014 Posted: 23 Sep 2014 Posted: 19 Sep 2014 Posted: 07 Sep 2014 All Entries |
KK Ng's BlogProjects - All things new to me!
Project Tomato - It's Yummy
Category: Tomatoes | Posted: Sat Oct 25, 2014 2:26 am Yesterday harvested a couple of the tomatoes for salad and it was sweet and yummy. 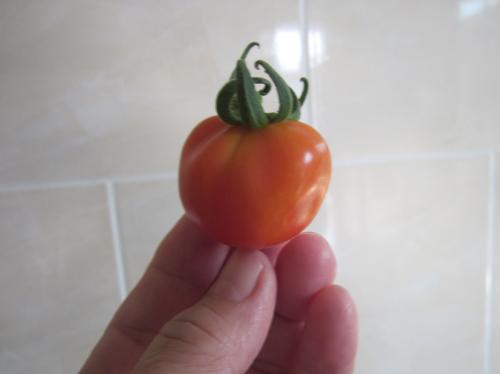
Sweet and Yum ( photo / image / picture from KK Ng's Garden ) 
My First Success ( photo / image / picture from KK Ng's Garden ) These fruits are from the heirloom plant no.2, they are larger then I expected about the size of the regular tomato that I planted last. The shape is a bit odd, looks like ... I don't know... 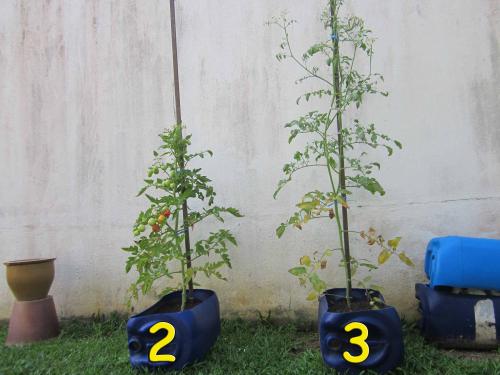
The stars ( photo / image / picture from KK Ng's Garden ) The heirloom plant no.2 is stunted maybe because of the heat but the hybrid plant no.3 is skinny and tall. No.2 have many fruits but no.3 have many flowers and only 2 fruits. 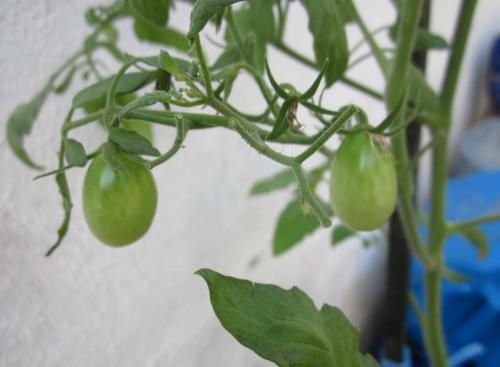
Grapes? ( photo / image / picture from KK Ng's Garden ) Fruits from the hybrid looks much more like cherry tomatoes but there is only two fruits even though there are lots of flowers. How about plant no.1? OK, ok guilty as charged, digging it out to inspect for beetle grub is a VERY bad idea ... I'll kick myself in the butt. OUCH!!! This blog entry has been viewed 1163 times
Project Tomato - Update
Category: Tomatoes | Posted: Fri Oct 03, 2014 3:43 am Since I had a problem with plant 1, I had just wanted to dig it up to check for beetle grubs. Just a couple of months ago most of my potted plants were plagued with those ewe disgusting grubs. A day after returning from my road trip, while I was making a small trench around my aubergine plant to add in some pelletised chicken dung, I caught 2 of those varmints. That prompted to dig out the tomato plant 1 to check for grubs. 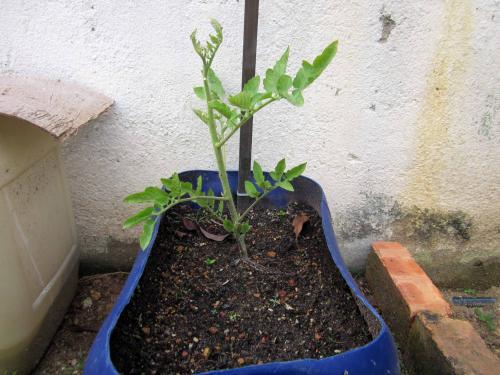
Plant before inspection ( photo / image / picture from KK Ng's Garden ) Looking at the picture now, it looks like the plant is recovering ... hmm maybe I should left it alone. 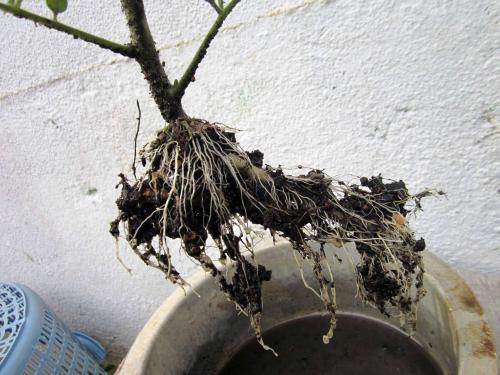
the roots ( photo / image / picture from KK Ng's Garden ) After cleaning the roots clean of all earth, there was no disgusting grubs in sight. I felt relived, I guess having to deal with so many of these grubs, I had developed a phobia. 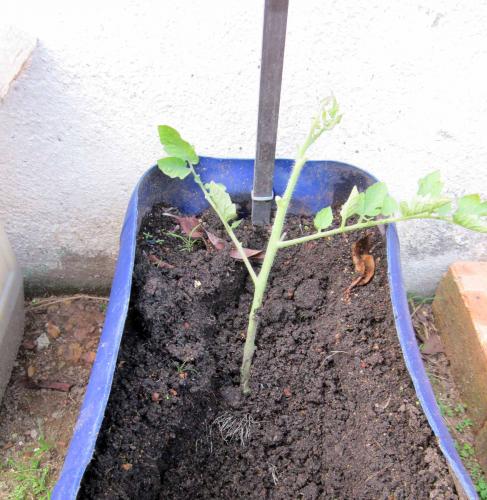
Epsom salt & compost added ( photo / image / picture from KK Ng's Garden ) Before burying the roots completely, I added Epsom salt and some compost as a recovery medication. 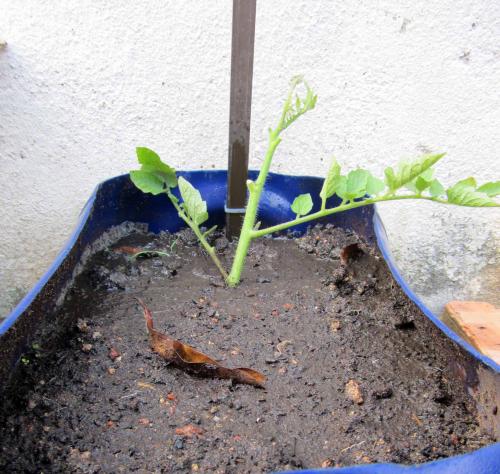
Done ( photo / image / picture from KK Ng's Garden ) I removed some of the lower leaves and planted it deeper. Now I guess it is waiting time. 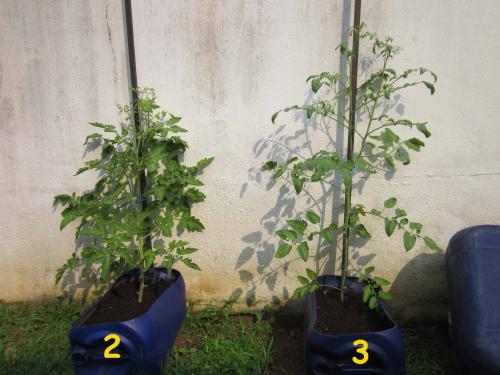
Happy plants ( photo / image / picture from KK Ng's Garden ) Plant 2 & 3 are doing well and they are happy. Plant 2 is the same species as plant 1. 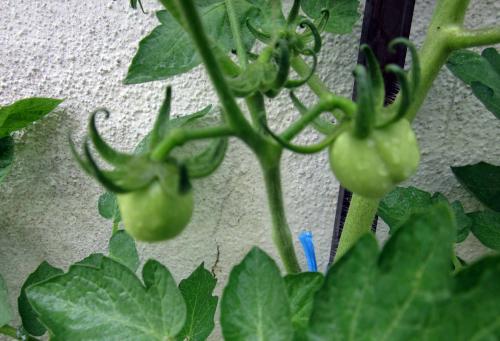
First toms plant 2 ( photo / image / picture from KK Ng's Garden ) Plant 2 have fruits already and plant 3 is flowering. 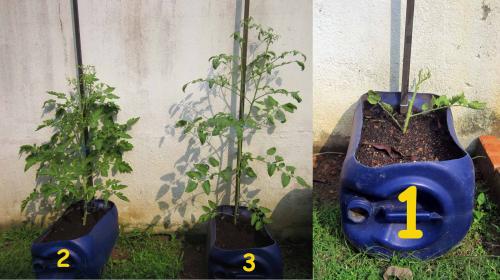
Plant 1, 2 & 3 ( photo / image / picture from KK Ng's Garden ) Plant 3 is over 3 feet, plant 2 about 3 feet and plant 1 is way under 3 feet. This blog entry has been viewed 1083 times
Project Tomato - It's Flowering
Category: Tomatoes | Posted: Tue Sep 23, 2014 2:23 am 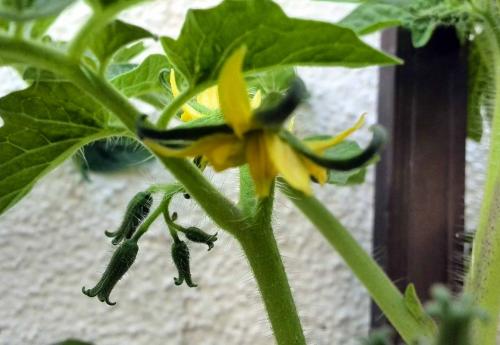
First Flower ( photo / image / picture from KK Ng's Garden ) Plant number 2 has started to flower and I'll give it a good feed of compost after I can see tiny fruits. Last edited: Tue Sep 23, 2014 2:24 am This blog entry has been viewed 1083 times
Project Tomato - YIKES!!! I have a problem!!!
Category: Tomatoes | Posted: Fri Sep 19, 2014 2:41 am A couple of days ago I noticed that one of my precious tomato plant was not well and I thought that it was some kind of bug attacking it like aphids. Did the soap water treatment and some part of the leaves turned yellow. I washed the plant with clean water 5 minutes after treating it with soap water so it couldn't be the soap water treatment. Out of the 3 plants only one is having the problem. 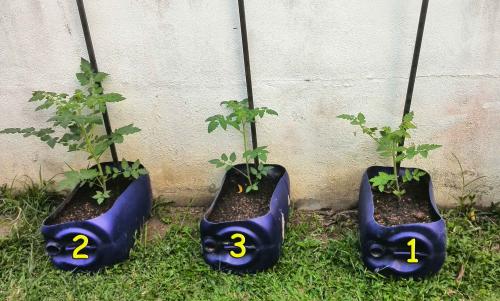
Precious Tomato ( photo / image / picture from KK Ng's Garden ) Plant number 1 was having the problem and the growth had slowed down considerably. It was the first plant that was transplanted and the largest among the three. 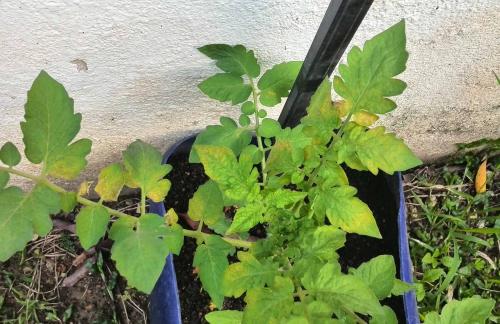
yellowing leaves ( photo / image / picture from KK Ng's Garden ) Yesterday morning some black spots start to show at the yellowing part of the leaves and bacteria infection comes to my mind immediately. 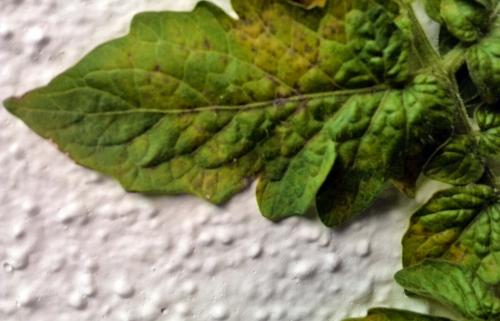
Black spots ( photo / image / picture from KK Ng's Garden ) Without thinking further, I grabbed a pair of shears and started cutting all the affected leaves away. After doing that I only realized was that the right thing to do and is there any other options or my diagnosis is wrong. To investigate this further I posted the problem in the forum. Well after reading the responses I think I did the right thing. If the plant does not recover then the possibility of beetle grub is very high. Anyway if the plant do not recover in two weeks I'll dig it up and look for those grubs. 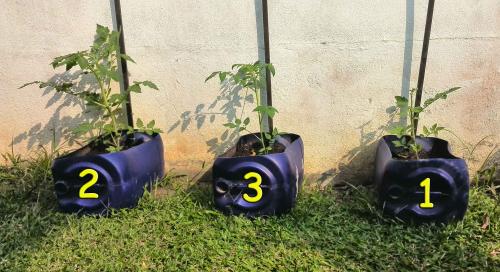
condition of plants ( photo / image / picture from KK Ng's Garden ) This is the condition of my 3 Heroes as of September 18th. Last edited: Fri Sep 19, 2014 2:42 am This blog entry has been viewed 1184 times
Project Tomato - All Planted
Category: Tomatoes | Posted: Sun Sep 07, 2014 2:20 am 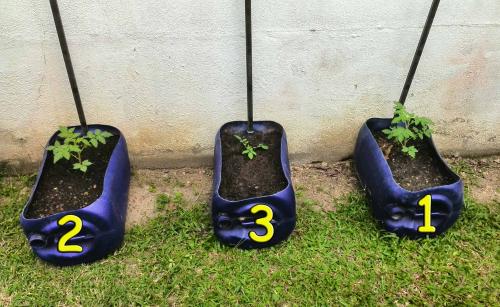
All ready ( photo / image / picture from KK Ng's Garden ) They are all in their new home and the difficult part is just starting. Number 1 and 3 are heirloom and 2 is the lone hybrid. They all look healthy. Last edited: Sun Sep 07, 2014 2:20 am This blog entry has been viewed 1101 times
Project Tomato - First Transplant Done
Category: Tomatoes | Posted: Wed Aug 27, 2014 5:31 am After the long wait I finally got one seedling that is tall enough, about six inches. 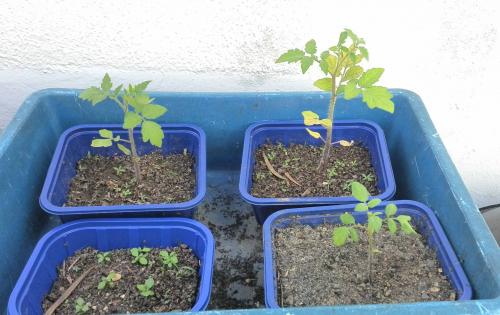
The Candidates ( photo / image / picture from KK Ng's Garden ) The first to sprout is the tallest and I do not know why some of the leaves are yellowing. Maybe because it had been raining and there was too much water. I was just wandering if I were to let the seedlings grow in a open top box, would I get taller seedlings? Maybe will try the next round. Next is to prepare the container, more holes were punched slightly above the bottom to allow for better drainage. Thanks to Carolyn suggestion, I was able to decide quickly where I wanted the extra drain holes. Those holes at the bottom were already there. 
Drain holes ( photo / image / picture from KK Ng's Garden ) Since the tomatoes are indeterminate, I had a 8feet aluminum pole attached to the container securely. 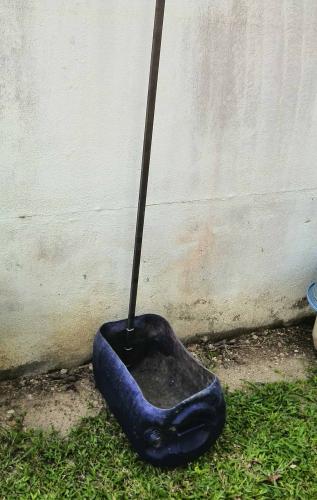
The container ( photo / image / picture from KK Ng's Garden ) Next the media which was the most difficult thing to obtain. 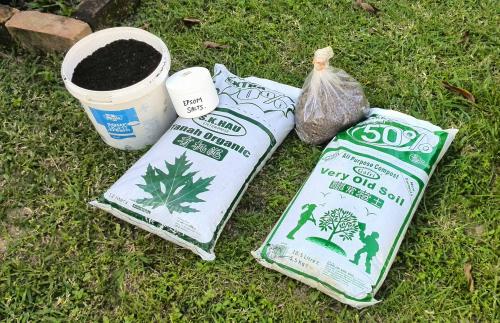
The media ( photo / image / picture from KK Ng's Garden ) From left to right, first is home made compost, Epsom salt, organic soil, pelletised chicken dung, and very old soil. The mix is about six liter of compost, six liter of organic soil, six liter of very old soil, six tablespoon of chicken dung and one tablespoon Epsom salt around the roots. 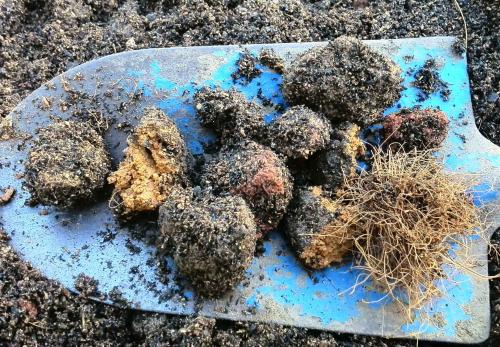
Organic soil ( photo / image / picture from KK Ng's Garden ) The organic soil smell like coconut husk, brownish in colour, had lots of clay balls, some unchopped coconut husk and some burnt things inside. 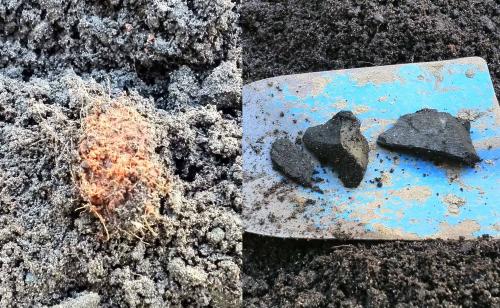
Very Old soil ( photo / image / picture from KK Ng's Garden ) The very old soil also had some clumps of coconut husk, large pieces of charcoal, looks like it is burned, very dark in colour and no distinct smell. 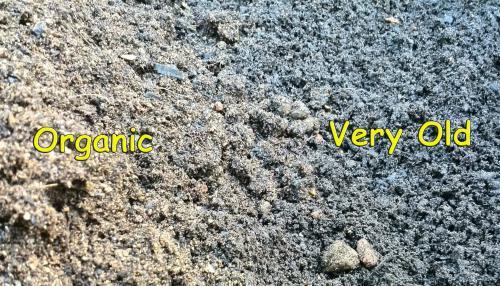
The potting soil ( photo / image / picture from KK Ng's Garden ) Anyway I broke as much of the clumps as I can, mix in the compost and chicken dung. Mix the mixture real well and put it in the container. 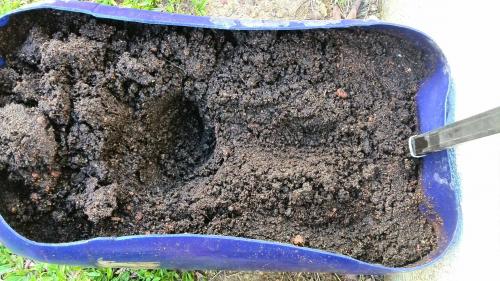
Lay down planting style. ( photo / image / picture from KK Ng's Garden ) I made a long hole like Sjoerd did in his "Tommie Time" post and planted the tomato seedling. Now to prepare the seedling. 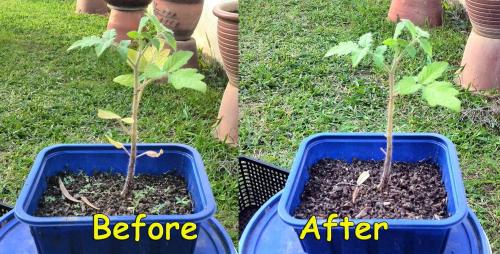
Ready to go. ( photo / image / picture from KK Ng's Garden ) All unauthorized growth were removed and the yellowing leaves on the tomato was removed too before planting it in its new home. 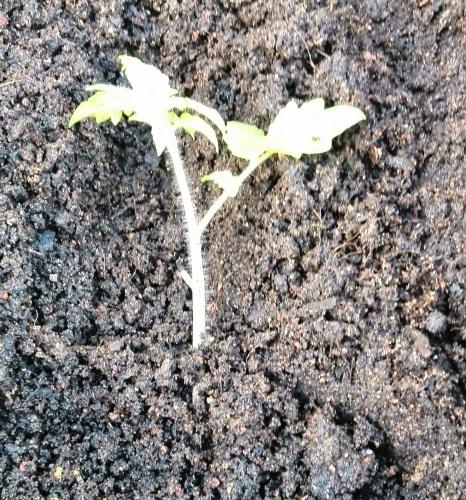
in the long hole ( photo / image / picture from KK Ng's Garden ) A tablespoon of Epsom salt was spread all over the root area before covering it with earth. I did not add a tube at the root area because it is not in a green house. 
Final ( photo / image / picture from KK Ng's Garden ) Finally I had to cut another leave away and prop the plant up slightly with a wire rest. Another two plants to do and the long wait will begin. Last edited: Wed Aug 27, 2014 5:36 am This blog entry has been viewed 863 times
Project Tomato - It worked!!!
Category: Tomatoes | Posted: Sat Aug 09, 2014 3:45 am Hey Jerry, I placed a alarm clock beside the hybrid tomato and out come a seedling :D 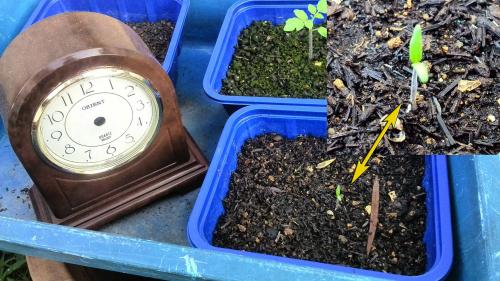
Alarm clock trick. ( photo / image / picture from KK Ng's Garden ) Hehe!!! This blog entry has been viewed 861 times
Project Tomato - Early Riser
Category: Tomatoes | Posted: Fri Aug 01, 2014 4:19 am Yesterday saw an early riser from the Large Red Cherry species and the hybrid are still in a state of hibernation. 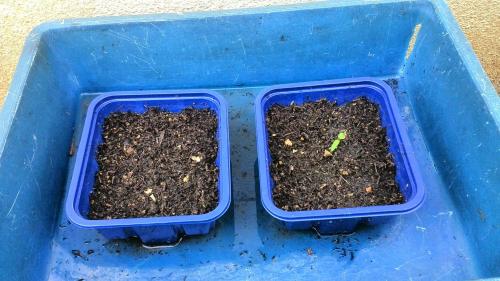
an early riser! ( photo / image / picture from KK Ng's Garden ) Hey hybrid WAKE UP!!! This blog entry has been viewed 830 times
Project Tomato - A New Start
Category: Tomatoes | Posted: Sun Jul 27, 2014 4:11 am Finally after 2 long years I managed to get my hands on Epsom Salt and it rekindled my interest in planting tomatoes. In my last "successful attempt" I managed to get some regular tomatoes but they were more like large cherry tomatoes. OK This time I am going to plant real cherry tomatoes because the aim now is to get garden fresh tomatoes for salad instead of making tomato paste or sauce. I have two different varieties and one is a hybrid. 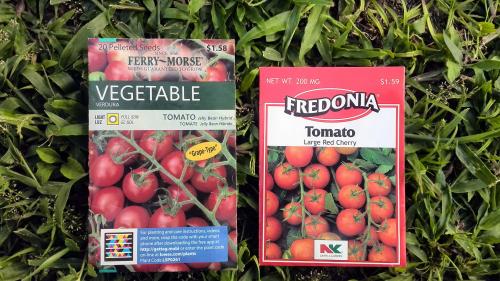
Cherry Tomatoe Seeds. ( photo / image / picture from KK Ng's Garden ) The one on the right is the hybrid and I got these seeds about a year ago. Prepared the bed with 75% compost and 25% black soil which I got from my neighbor. According to him black soil is burnt soil combined with other vegetation. I found quite a fair bit of coconut husk in it. 
Starter ( photo / image / picture from KK Ng's Garden ) I put in 3 seeds of each type separately into each starter. The starters were placed in a place where they get the morning sun. 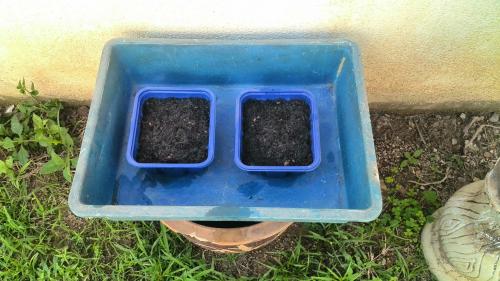
Germination Station ( photo / image / picture from KK Ng's Garden ) And now keeping my fingers crossed and counting the days... Last edited: Sun Jul 27, 2014 4:12 am This blog entry has been viewed 837 times
I'm Disappointed!!!
Category: Sweet Corn | Posted: Wed Dec 12, 2012 2:02 am Yesterday evening (actually it was day before yesterday, had some technical problem) we had beautiful weather, the sun was out and it wasn't hot. The breeze was cool and really pleasant making me feel as though I was in the highlands. Had not had this kind of pleasurable weather for such a real long time and was picture perfect for me to be in the mini farm. 
Super mini corn field!!! ( photo / image / picture from KK Ng's Garden ) The silk of the corn was already brown and from my previous experience I guess it is time for the picking. 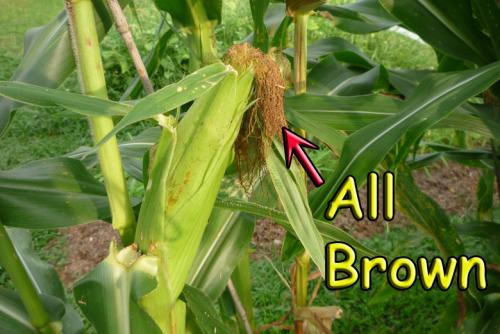
Maturity sign ( photo / image / picture from KK Ng's Garden ) Some of the corns had their kernels exposed at the top â¦.. hmmm??? 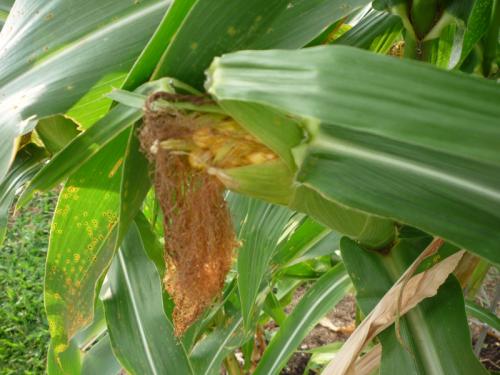
Exposed kernels ( photo / image / picture from KK Ng's Garden ) The ears were small â¦. I've small but meaty hands 10.5cm across 18cm from the tip of the middle finger to the base of the palm, short fingers too!!! 
Small ( photo / image / picture from KK Ng's Garden ) 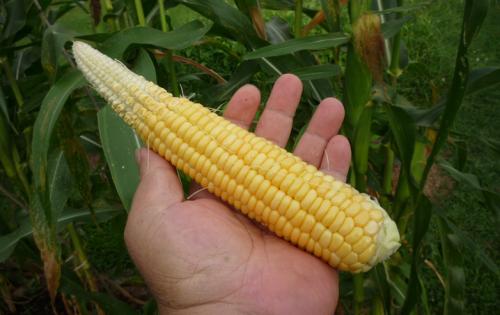
hand ( photo / image / picture from KK Ng's Garden ) Those ears that were completely close did not have kernels on top of its cobâ¦â¦ mmmm??? 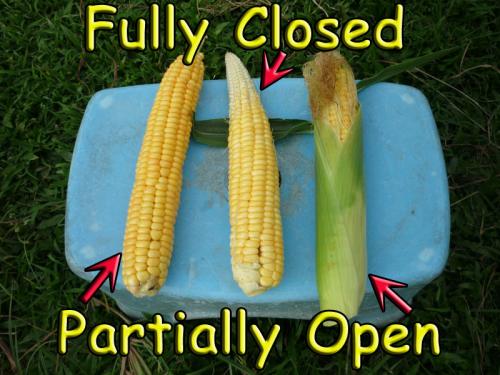
Open, close ( photo / image / picture from KK Ng's Garden ) Almost all the plants had two ears at least with some having four but only one is almost fully formed. 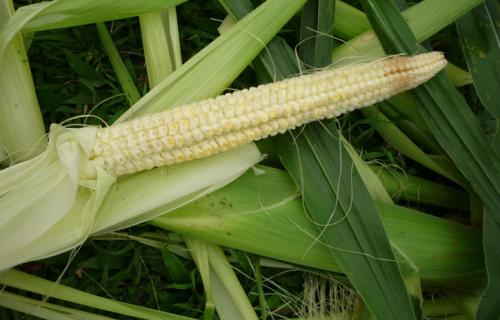
kerneless ( photo / image / picture from KK Ng's Garden ) On the whole out of 18plants I only got 15 edible pathetic ears. 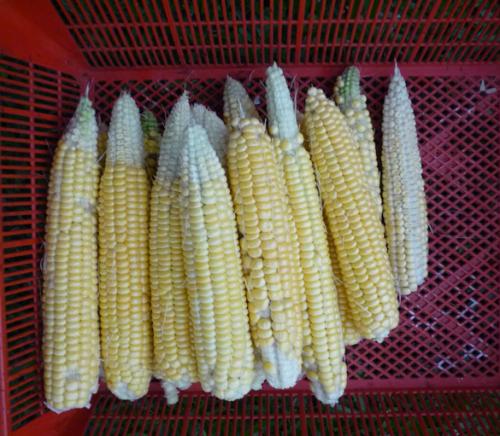
All the harvest ( photo / image / picture from KK Ng's Garden ) After having done shucking the corns, I was pleasantly rewarded with this beautiful sight which is a delight to see. A short while later it started to rain. 
rainbow of hope ( photo / image / picture from KK Ng's Garden ) Becky had the corns steamed almost immediately after I brought them into the house and we had them for dinner. The final verdict â¦.. YUCKS!!! It tasted like corn starch!!! Guess this is not my kind of corn. Last edited: Tue Apr 15, 2014 12:34 am This blog entry has been viewed 661 times
You're reading one of many blogs on GardenStew.com.
Register for free and start your own blog today. |
|
